DVI, HDMI, VGA Image Recorder User Guide - VideoGhost
Anuncio
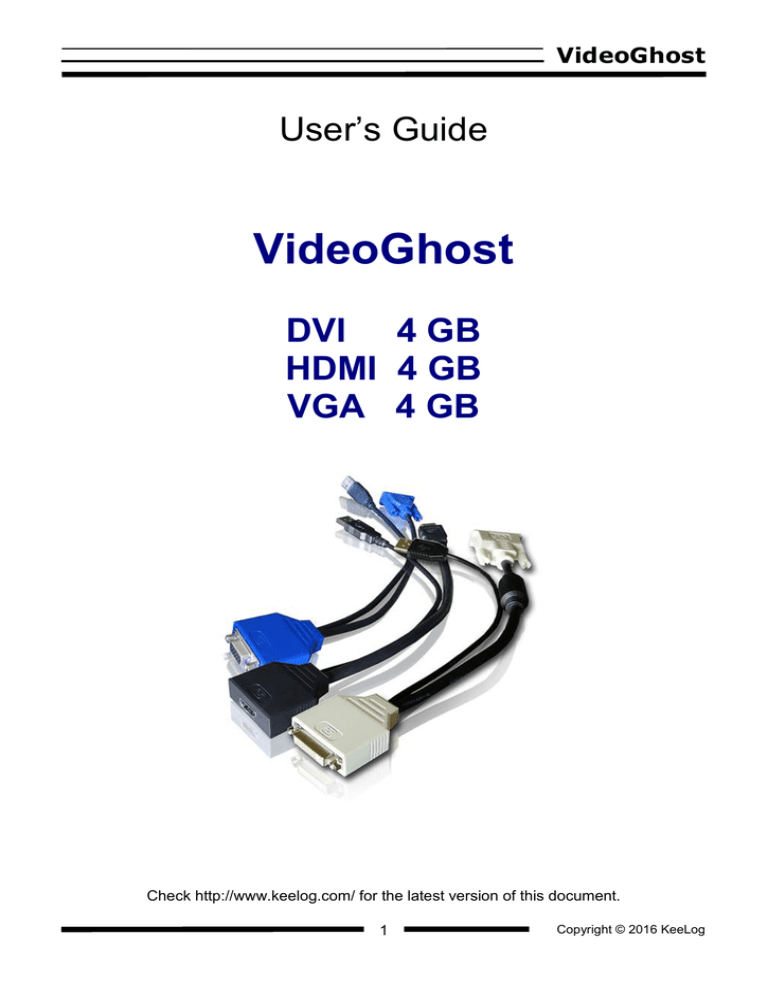
VideoGhost User’s Guide VideoGhost DVI 4 GB HDMI 4 GB VGA 4 GB Check http://www.keelog.com/ for the latest version of this document. 1 Copyright © 2016 KeeLog VideoGhost Table of contents Table of contents.............................................................................................................. 2 Getting started ................................................................................................................. 2 Introduction ...................................................................................................................... 3 About the product ......................................................................................................... 3 Features....................................................................................................................... 3 Requirements ............................................................................................................... 3 Applications .................................................................................................................. 4 Quick Start....................................................................................................................... 5 Recording screenshots ..................................................................................................... 7 Viewing recorded data ...................................................................................................... 9 Configuration options...................................................................................................... 11 Clock configuration ......................................................................................................... 14 Using KL Tools............................................................................................................... 16 Specifications................................................................................................................. 17 Troubleshooting ............................................................................................................. 19 Legal disclaimer ............................................................................................................. 21 Getting started Already familiar with the VideoGhost frame-grabber? Start video-logging in 2 simple steps: section Quick Start New to the VideoGhost? Learn about recording first: section Recording screenshots Then learn to retrieve the recorded data: section Viewing recorded data Questions or problems? Go through the Troubleshooting section. 2 Copyright © 2016 KeeLog VideoGhost Introduction About the product The VideoGhost is an intelligent hardware frame-grabber, compatible with DVI, HDMI, and VGA signal sources such as computers and laptops. It features a built-in JPEG compressor, and a huge 4 GB internal flash disk. Frames captured from the DVI, HDMI, or VGA bus will be compressed and stored to the built-in Flash Drive. The VideoGhost may be switched to Flash Drive mode at any time, and will pop-up as a removable disk, containing captured screenshots as JPEG files. The device is 100% stealthy and does not influence the operation of the computer, laptop, etc. No drivers or software are required, no configuration necessary, works out of the box! Features Compatible with all DVI, VGA, and HDMI devices Supports resolutions up to Full-HD (1920 x 1080) and WUXGA (1920 x 1200) Works with computers and external laptop monitors No power supply necessary (power is drawn from the USB port) Built-in JPEG encoder 4 Gigabytes of internal memory in all versions Built-in time-stamping module with battery (7 years lifetime guaranteed!) No software or drivers required, Windows, Linux, and Mac compatible Ultra compact and discrete, looks like a mini-extension cable Transparent to computer operation, undetectable for security scanners Several color options available: white, black, gray, blue Requirements Compatible DVI / HDMI / VGA video signal source (no HDCP encryption) Standard resolution up to 1920 x 1200 and bandwidth up to 160MHz Computer with standard USB 1.1 or 2.0 port Operating system with USB Mass-Storage device support Optionally MS Windows XP/Vista/7/8 (only for running KL Tools) 3 Copyright © 2016 KeeLog VideoGhost Applications Employers: Monitor acceptable internet usage Monitor employee productivity Detect unauthorized access attempts Save snapshots from slide shows, presentations, movies, surveillance cameras Collect computer usage statistics Parents: Monitor your family's computer activity Protect your child from on-line hazards and predators Observe WWW, E-mail, and chat usage Save snapshots of viewed documents, web-pages, movies Investigators: Monitor remote computers Automatically store snapshots from security cameras Retrieve snapshots of viewed documents, e-mails, web-pages Collect computer-related evidence Detect unauthorized use of computer equipment 4 Copyright © 2016 KeeLog VideoGhost Quick Start This section contains concise information on basic video-logger handling. If you need detailed instructions, please refer to sections Recording screenshots and Viewing recorded data. To record snapshots, connect the VideoGhost to graphics card output or the digital TV output. DVI version HDMI version VGA version Then, connect the output device (TV or monitor) to the other end of the VideoGhost. Finally, connect the USB connector to a free USB port. Do not use the supplied USB key. DVI version HDMI version VGA version Recording will start automatically on power-up. 5 Copyright © 2016 KeeLog VideoGhost To view recorded snapshots, connect the USB cable of the VideoGhost to a free USB port using the supplied USB Key. The video-logger will pop up as a removable disk, containing the captured screenshots as JPEG files (just like a digital camera). Browse the disk using standard image-viewing software. 6 Copyright © 2016 KeeLog VideoGhost Recording screenshots Recording mode is the default mode of operation for the VideoGhost. In record mode, the device will silently monitor the DVI, HDMI, or VGA video signal and record a screenshot every few seconds. The screenshots will be stored as JPEG files on the internal Flash Drive. Installation of the video-logger in record mode is quick and easy, no software or drivers are required. Connect the VideoGhost to the source of the video signal, such as the output of the graphics card, or the TV output. DVI version HDMI version VGA version Then, connect the output device (TV or monitor) to the other end of the VideoGhost. DVI version HDMI version 7 VGA version Copyright © 2016 KeeLog VideoGhost Finally, connect the USB connector to a free USB port. Do not use the supplied USB key. Recording will start automatically on power-up. DVI version HDMI version VGA version Note: The USB connection is used for powering the device only. If no USB port is available, a +5V DC USB power supply may be used instead. 8 Copyright © 2016 KeeLog VideoGhost Viewing recorded data Once screenshots have been recorded to the internal Flash Drive, they may be viewed on any computer, laptop, or TV with USB Mass Storage support. The procedure is very similar to restoring images from a digital camera. Use the supplied USB Key to connect the VideoGhost’s USB output to a free USB port. The device may stay connected to the video source and TV/monitor, however this is not necessary. After a few seconds, the hardware video-logger will automatically get detected as a Mass Storage Device. The operating system will use the standard built-in mass storage driver (MS Windows 7 in the following examples). Note: During the first switch to Flash Drive mode, the operating system can ask for drivers. In such case choose automatic driver installation (usually default option). 9 Copyright © 2016 KeeLog VideoGhost The Flash Drive will contain the captured screenshots as JPEG files, grouped in folders named 001, 002, etc. Depending on the device configuration, the images may have burned-in time- and date-stamps. Use any image-viewing software to browse the JPEG files, such as the default Windows Photo Viewer. Switching back to record mode can be achieved by a safe software removal of the flash disk. Use the systems standard disk removal procedure. For MS Windows, left-click on the Safe Removal icon in the system tray and select the appropriate drive. Then reconnect the VideoGhost to the USB port, however without the supplied USB Key. To get the most out of the VideoGhost, install the supplied application KL Tools. Go to section Using KL Tools to find out more. 10 Copyright © 2016 KeeLog VideoGhost Configuration options The VideoGhost may be configured through the file CONFIG.TXT, placed in the Flash Drive root folder. Use any text editor to prepare such a configuration file, containing the following text: Interval=300 Resize=50 Timestamping=Image Copy this file to the root folder in Flash Drive mode. The new configuration will be loaded on next power-up. The following list presents the most common configuration options. All variable and value strings are case insensitive. Interval sets number of seconds between successive screenshots. Please note that compressing and saving an image takes several seconds (depending on the image size and quality), so this may become the limiting factor for low values of Interval. Default value is 300. Resize sets the resizing factor for storing screenshots. Allowed values are No (no resizing), Auto (automatic resizing factor based on image size), 75 (75%), 67 (67%), 50 (50%), 33 (33%), and 25 (25%). Default value is No. Timestamping configures the built-in time- and date-stamping module. Allowed values are Yes (timestamping active, but limited to updating the modification time and date of JPEG files), Image (timestamps burned into JPEG image content), and No (timestamping disabled). Default is Image. Quality sets the quality factor for JPEG compression. Allowed values are from 1 (lowest quality, smallest file size) to 10 (highest quality, largest file size). Please note that setting a 11 Copyright © 2016 KeeLog VideoGhost high quality value will result in longer compression times and increased disk space usage. Default value is 7. DisableLogging allows to disable screenshot logging. Allowed values are Yes (logging disabled) and No (logging enabled). Default value is No. Encryption enables flash disk encrypting. Encryption will ensure full confidentiality of the stored data, even if the device is physically tampered with. Allowed values are Yes (encryption enabled) and No (encryption disabled). Default is No. Important: toggling the encryption setting will format the entire flash disk. All data will be lost, including the configuration file! An example configuration file contents is shown below: Interval=200 Resize=25 Timestamping=Yes Quality=5 A full list of available parameters with descriptions is available below. Basic parameter list Parameter Interval Resize Timestamping Quality DisableLogging Values Screenshot interval in seconds (default 300) No (default) Auto 75 67 50 33 25 Yes Image (default) No JPEG compression quality (default 7) Yes No (default) Example Description Interval=200 Number of seconds successive screenshots. Resize=50 Resizing factor for storing screenshots in percent. Auto will choose an optimal resizing factor based on the image size. Timestamping=Yes Time-stamping disable flag. Quality=5 Quality factor for JPEG compression from 1 to 10. DisableLogging=Yes Screenshot logging disable flag. 12 between Copyright © 2016 KeeLog VideoGhost Advanced parameter list (use only when you know what you’re doing!) Parameter Values Example Encryption Yes No (default) Encryption=No Brightness Brightness (default 0) ForceWidth Image width in pixels (defaults to resolution X) ForceWidth=1024 ForceHeight Image height in pixels (defaults to resolution Y) ForceWidth=768 TopMargin Top margin in pixels (default 0 or table value) TopMargin=10 LeftMargin Left margin in pixels (default 0 or table value) LeftMargin=5 RightFrame Right frame in pixels (default 0 or table value) RightFrame=20 BottomFrame Bottom frame in pixels (default 0 or table value) BottomFrame=15 ShiftX Horizontal shift value (default 0 or table value) ShiftX=-10 ShiftY Vertical shift value (default 0 or table value) ShiftY=-5 factor Brightness=50 13 Description Flash Drive encryption setting (caution: changing this value will reformat the Flash Drive). The factor to add to the standard image brightness from 0 to 150 If this parameter is present, it will force the width of the captured image regardless of the current resolution. If this parameter is present, it will force the height of the captured image regardless of the current resolution. If this parameter is present, it will cut out the top part of the captured image. It is used primarily in the VGA version, for filtering out the useful part of the signal. If this parameter is present, it will cut out the left part of the captured image. It is used primarily in the VGA version, for filtering out the useful part of the signal. If this parameter is present, it will add a frame on the right side of the captured image. It is used primarily in the VGA version, for filtering out the useful part of the signal. If this parameter is present, it will add a frame at the bottom of the captured image. It is used primarily in the VGA version, for filtering out the useful part of the signal. If this parameter is present, it will shift the image horizontally within the bounds given by LeftMargin and RightFrame. It is used primarily in the VGA version, for filtering out the useful part of the signal. If this parameter is present, it will shift the image vertically within the bounds given by TopMargin and BottomFrame. It is used primarily in the VGA version, for filtering out the useful part of the signal. Copyright © 2016 KeeLog VideoGhost Clock configuration It is necessary to configure the built-in clock module for getting correct date and time-stamps. To do this, a text file named TIME.TXT should be prepared with the following format: Year=2010 Month=4 Day=1 Hour=12 Minute=34 Second=56 Format=PM The fields should contain the current time and date. The field Format allows distinguishing between A.M., P.M., and 24-hour time (use the value AM, PM, or 24). After the file has been prepared, switch to Flash Drive mode and copy the file TIME.TXT to the root folder of the flash disk. The supplied USB Key has to be used to switch to Flash Drive mode. After copying the file, safely remove the Flash Drive and disconnect the USB Key. The new clock configuration will be loaded during the next power-up. 14 Copyright © 2016 KeeLog VideoGhost The clock configuration file must be named TIME.TXT and must be placed in the root folder. Variable and value strings are case insensitive, however they must match the options listed below. Year sets the clock year value. Valid range is from 2000 to 2099. Month sets the clock month value. Valid range is from 1 (January) to 12 (December). Day sets the clock day value. Valid range is from 1 to 31. If the specified day exceeds the maximum number of days in the specified month, the next valid day value will be chosen. Hour sets the clock hour value. Valid range is from 1 to 12 for 12-hour time (A.M./P.M.), and 0 to 23 for 24-hour time. Minute sets the clock minute value. Valid range is from 0 to 59. Second sets the clock second value. Valid range is from 0 to 59. Format sets the time format. Valid values are AM, PM, and 24. If AM is chosen, the 12hour format is selected and the specified hour is treated as before noon. If PM is chosen, the 12-hour format is selected and the specified hour is treated as after noon. If 24 is chosen, the 24-hour format is selected and the specified hour is treated as 24hour format. Sample TIME.TXT for 12-hour time: Sample TIME.TXT for 24-hour time: Year=2010 Month=10 Day=25 Hour=5 Minute=51 Second=43 Format=PM Year=2010 Month=10 Day=25 Hour=17 Minute=51 Second=43 Format=24 15 Copyright © 2016 KeeLog VideoGhost Using KL Tools KL Tools is a free application delivered with all VideoGhost series devices. KL Tools assists in configuring a VideoGhost frame-grabber and retrieving the recorded data it contains. It is not necessary to operate the device, but may speed up usage by its intuitive user interface. KL Tools is available on the CD-ROM attached with the device. Installing KL Tools is straightforward. Simply follow the installation wizard and answer standard questions. When initialized, KL Tools will ask for the device type, and assist in configuring the device and retrieving the recorded images. There is no special knowledge required to use KL Tools – simply follow the instructions displayed by the application. 16 Copyright © 2016 KeeLog VideoGhost Specifications VideoGhost DVI VideoGhost HDMI VideoGhost VGA Power supply 4.5 V – 5.5 V DC 4.5 V – 5.5 V DC 4.5 V – 5.5 V DC Max. power consumption 250 mA (1.3 W) 250 mA (1.3 W) 250 mA (1.3 W) Memory capacity 4 GB 4 GB 4 GB Data retention 100 years 100 years 100 years Interface support DVI-compatible video source, USB 1.1 or 2.0 with MSD support HDMI-compatible video source, USB 1.1 or 2.0 with MSD support VGA-compatible video source, USB 1.1 or 2.0 with MSD support Max. video bandwidth 160 MHz 160 MHz 160 MHz Max. video resolution 1920 x 1200 1920 x 1200 1920 x 12001 Typical JPEG encoding time in seconds2: Frame size Quality = 3 Quality = 5 Quality = 7 50% Auto No 50% Auto No 50% Auto No Resize Resize Resize Resize Resize Resize Resize Resize Resize 640x480 1 1 1 1 1 1 1 1 2 800x600 2 3 3 2 3 3 2 3 3 1024x768 2 5 5 2 5 5 2 5 5 1280x720 3 5 5 3 5 5 3 5 5 1440x900 4 5 7 4 6 8 4 6 8 1280x1024 4 5 7 4 5 7 4 5 7 1680x1050 5 6 9 5 6 9 5 6 9 1600x1200 5 7 10 5 7 10 5 7 10 1920x1080 5 7 11 5 7 11 5 7 12 1 Limited to standard resolution and refresh rate combinations. 2 Encoding times may vary depending on image contents. 17 Copyright © 2016 KeeLog VideoGhost The VGA version supports the most common resolution and refresh rate combinations: 50 Hz 56 Hz 640x480 800x600 X 60 Hz 70 Hz 72 Hz 75 Hz 85 Hz 100 Hz X X X X X X X X X X 1024x768 X X X X X 1152x864 X X X X X 1280x720 X X X 1280x768 X X 1280x800 X 1280x960 X X X X 1280x1024 X X X X 1360x768 X X X 1440x900 X X 1600x900 X X X 1600x1200 X X X X 1680x1050 X X X 1920x1080 X X 1920x1200 X X 120 Hz X All KeeLog products come with 1 year warranty against manufacturer defects. Defect products must be shipped by the customer. All warranty repairs and delivery to the customer will be paid by the manufacturer. 18 Copyright © 2016 KeeLog VideoGhost Troubleshooting The VideoGhost will not work in the following cases: 1. 2. 3. 4. Internal laptop screens Devices protected with HDCP, such as most Blu-ray players No USB port for powering the device Non-conformant DVI/HDMI/VGA interfaces No video signal at the monitor or TV Please check the following: 1. Is the VideoGhost connected firmly to the signal source, such as the graphics card? 2. Is the monitor/TV connected firmly to the VideoGhost? 3. Is the USB cable connected? The VideoGhost does not switch to Flash Drive mode Please check the following: 1. Are you using the delivered USB Key to connect the device to a USB port? 2. Does the operating system support removable USB flash disks? 3. Have you checked the drive list? 4. Have you tried on a different USB port? 5. Have you checked on a different computer? I can’t find any screenshots after switching to Flash Drive mode Please check the following: 1. Have you powered the device from the USB port while recording? 2. Have you checked in the subdirectories, such as 001, 002, etc.? 3. Did you properly configure the device through CONFIG.TXT? 4. Have you checked with a different screen resolution? The VideoGhost always shows up as a removable drive Connect the USB plug directly to a USB port, without the USB Key. The screenshots show no contents, just noise You are probably trying to acquire a HDCP-protected video signal, such as a Blu-ray or DVD player. The VideoGhost is not a device intended for breaking the HDCP copyright protection. 19 Copyright © 2016 KeeLog VideoGhost Problems with time-stamps Set the correct time by creating a clock configuration file TIME.TXT. Make sure you have not disabled time-stamping. Refer to the Clock configuration section for detailed instructions. Screenshots are not logged as fast as I would like Change the Interval parameter in CONFIG.TXT to a smaller number. If this doesn’t help, it means that the JPEG compression time is the limiting factor. Reduce the image size by reducing the Quality parameter in CONFIG.TXT. Finally, change the Resize parameter to 50, 33, or 25. I’ve checked everything, nothing helps! If you are still experiencing problems, please do the following: 1. 2. 3. 4. Check if the problem appears with a different screen resolution. Check if the problem appears on a different computer or video source. Check if the problem appears using a different USB port. Contact the dealer you have purchased the device from. Please supply all necessary information (hardware type, model and manufacturer, OS type and version, and a short description of the problem). 20 Copyright © 2016 KeeLog VideoGhost Legal disclaimer KeeLog does not take responsibility for any damage, harm or legal actions caused by misuse of its products. The user should follow the guidelines contained in this document, otherwise no liability will be assumed. It is the user's responsibility to obey all effective laws in his/her country, which may prohibit usage of KeeLog products. Please also consider, that not knowing the law does not allow to not obeying it. A good example is the U.S. Department of Justice Letter on Keystroke Monitoring and Login Banners, according to which a clear notice should be displayed, warning that user keystrokes may be logged. Please check with your legal representative for logging requirements in your country. For more information on KeeLog products, visit our website: http://www.keelog.com/ You should not use this device to intercept data you are not authorized to possess, especially passwords, banking data, confidential correspondence etc. Most countries recognize this as a crime. Please consult a legal representative for logging requirements in your country. 21 Copyright © 2016 KeeLog VideoGhost Notes: European Office U.S. Office KeeLog Lekcyjna 42 PL 51-169 Wroclaw Poland Aqua Electronics Inc. 1550 Louis Ave. Elk Grove Village, IL. 60007 U.S.A http://www.keelog.com/ keelog@keelog.com RoHS Copyright © 2004-2016. All rights reserved. 22 Copyright © 2016 KeeLog
