Wi-Fi HD Camera Quick Setup Guide
Anuncio

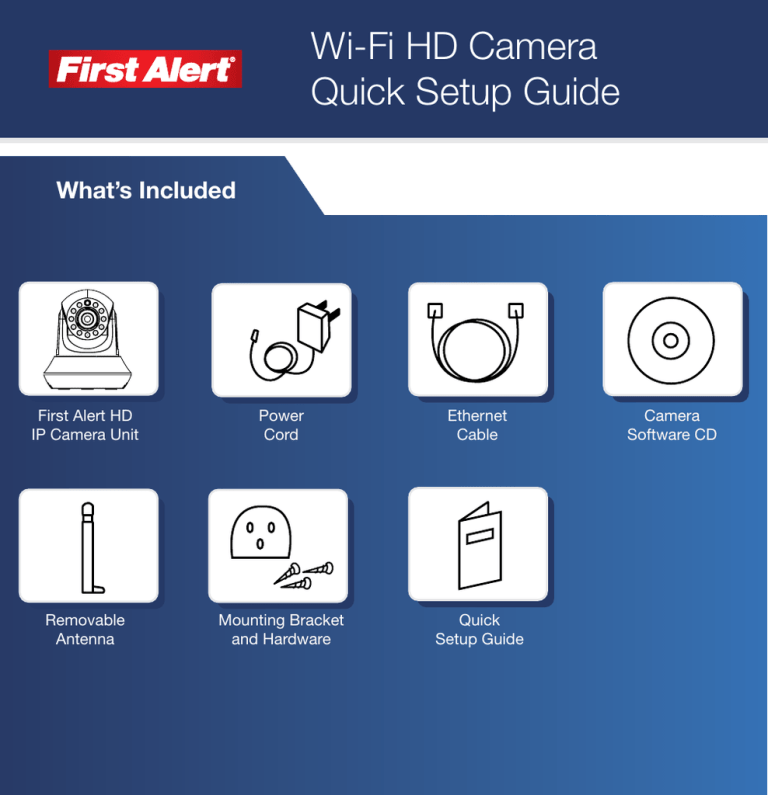
Wi-Fi HD Camera Quick Setup Guide What’s Included First Alert HD IP Camera Unit Power Cord Ethernet Cable Removable Antenna Mounting Bracket and Hardware Quick Setup Guide Camera Software CD Initial Camera Installation Instructions 1 Attach the antenna to the camera. 2 Plug the camera into an AC outlet. 3 Attach the camera to your router using the Ethernet cable. (Allow 2 minutes for the camera to cycle through a series of movements) OPTION OPTION A B Mobile Device Software Connectivity PC Software Connectivity There are multiple ways you can view and/or setup your camera. Regardless of which setup instruction you choose below, you will be able to view the camera on the mobile device and/or the PC locally and/or remotely. LAN (Local Area Network): viewing the camera with the PC and/or mobile device when everything is connected on the same WIFI or internet connection. WAN (Wide Area Network): viewing the camera with the PC and/or mobile device when everything is connected on a different WIFI or internet connection. OPTION A Mobile Device Software Connectivity (LAN) Local Viewing Setup (From iPhone/iPad/Android) (iPhone/iPad/Android must be connected to the same local network as the Camera) 1. 2. 3. 4. 5. 6. 7. Follow steps 1-3 in “Initial Camera Installation” instructions. Make sure your mobile device is connected to your Local Area Network (WIFI). Download the First Alert HD IP Camera Viewer from the appropriate App Store. Open First Alert HD IP Camera Viewer App on mobile device. Select the Local tab from the bottom of the App. Select the camera in the camera list to view. Select back Wireless Connectivity (From iPhone/iPad/Android) 8. 9. 10. 11. 12. 13. 14. 15. 16. 17. 18. Next to Exxxx ID number in App, select the (iPhone) or (Android) button Select wireless Setting (Iphone) or use WIFI (Android) Toggle WIFI to ON Select SSID (iPhone) or click search (Android) Select Password and enter your Wireless Network Password a. Toggle show password to confirm the password was entered correctly b. DHCP should be enabled Select Done (iPhone) or OK (Android) Unplug the Camera Ethernet Cable from the router and the camera Please allow 2 minutes for the camera to reboot Select Back Click the refresh button at the top right. The camera will show up in the task pane when it is finished rebooting Select camera to view (WAN) Remote Viewing Setup (From iPhone/iPad/Android) 1. 2. 3. 4. 5. 6. 7. 8. 9. 10. Follow steps 1-4 in Option A above Select Remote tab Create an account by selecting “Create Account” or if you already created an account move onto the next step Enter your username and Password and select login. Select “Options” from the top right of the App. Select “Add Camera”. Select “Scan QR code” (QR code is on the bottom of the camera) or Enter the device information for the camera. (Device information is on a label on the bottom of the camera. DO NOT LOSE THIS INFORMATION.) Click done on the top right corner Click “OK” on the add camera success Select the camera in the camera list to view. Tip: 1. Pinch the image screen to zoom. 2. Manually focus the camera by rotating the lens on the front of the camera OPTION B PC Software Connectivity (LAN) Local Viewing Setup (From PC) (PC must be connected to the same local network as the Camera) 1. 2. 3. 4. 5. Follow Steps 1-3 in “Initial Camera Installation” Instructions. On your PC, Insert the installation disk that came with your camera (or visit www.firstalert.com) and install the camera remote viewing software. Double click the software icon on your desktop. Your camera ID number should be listed in the LAN task pane in the upper right. Double click the Exxxxx camera and you should be connected to your camera on a local network. Wireless Connectivity (From PC) 6. Follow steps 1-4 in Option B. 7. Right click on the Camera ID in the task pane. 8. Select “Set WIFI Connection” 9. Check the “start WIFI setting” box 10. Click “Scan” 11. Select your Wireless network name from the Network Name (SSID) dropdown menu 12. Enter your Wireless Network Password in the Password field 13. Select OK 14. Unplug the Ethernet Cable from the router and the camera 15. Please allow 60 seconds for the camera to reboot (WAN) Remote Viewing Setup (From PC) 1. 2. 3. 4. 5. 6. 7. 8. Follow steps 1-4 in Option B. Select the WAN tab. In the software, click register to create a username and password . Once a username and Password is created, login into the software. (Tip: Select the WAN tab on the upper right) Right click anywhere in the software task pane on the right and select “add device”. Enter the device information for the camera. (Tip: Device information is on a label on the bottom of the camera.) DO NOT LOSE THIS INFORMATION. Once the camera is added to the task pane under WAN, you will now be able to log off the local internet on your PC and connect to another remote internet source. Once connected to a different internet source than the Open the PC software, select the WAN tab, and log into your account. You will see the added camera under WAN. © 2014 BRK Brands, Inc. All rights reserved. To download the full manual please visit www.firstalert.com. M08-0489-002 Cámara Wi-Fi HD Guía de Instalación Rápida Qué está incluido Unidad de Cámara IP HD de First Alert Antena Removible Cable de Poder Soporte de Montaje y Accesorios Cable de Ethernet Guía de Configuración Rápida CD de Software de la Cámara Instrucciones de Instalación Inicial de la Cámara 1 Coloque la antena en la cámara. 2 Enchufe la cámara en una toma de CA. OPTION OPTION A B Software de Conectividad para Dispositivos Móviles 3 Conecte su cámara a su router usando el cable de Ethernet. (Permita que pasen 2 minutos para que la cámara pase por una serie de movimientos) Software de Conectividad para PC Hay múltiples formas de ver y/o configurar su cámara. Sin importar cuáles instrucciones de configuración usted elija de abajo, usted podrá ver la cámara en el dispositivo móvil y/o en una PC localmente y/o remotamente. LAN (Red de Área Local, por sus siglas en inglés): ver la cámara con una PC y/o un dispositivo móvil cuando todo está conectado a la misma conexión WIFI o de Internet. WAN (Red de Área Amplia, por sus siglas en inglés): ver la cámara con una PC y/o un dispositivo móvil cuando todo está conectado a diferentes conexiones WIFI o de Internet. OPCIÓN A Software de Conectividad para Dispositivos Móviles (LAN) Configuración de Vista Local (Desde iPhone/iPad/Android) (El iPhone/iPad/Android debe de estar conectado a la misma red de área local que la Cámara) 1. Siga los pasos del 1 al 3 en las instrucciones de “Instalación Inicial de la Cámara”. 2. Asegúrese de que su dispositivo móvil esté conectado a su Red de Área Local (WIFI). 3. Descargue el Visualizador de Cámara IP HD de First Alert de la App Store correcta. 4. Abra el Visualizador de Cámara IP HD de First Alert en el dispositivo móvil. 5. Seleccione la pestaña Local en la parte inferior del App. 6. Seleccione la cámara de la lista de cámaras para ver. 7. Seleccione Atrás. Conectividad Inalámbrica (Desde iPhone/iPad/Android) 8. A la par del Número de ID Exxxx en el App, seleccione el botón (iPhone) o (Android). 9. Seleccione la Configuración inalámbrica (iPhone) o use WIFI (Android). 10.Cambie WIFI a ENCENDIDO. 11.Seleccione SSID (iPhone) o haga clic en buscar (Android). 12.Seleccione Contraseña e ingrese su Contraseña de Red Inalámbrica. a. Cambie a ver contraseña para confirmar que la contraseña se haya ingresado correctamente. b. DHCP debe de estar habilitado. 13.Seleccione Listo (iPhone) u OK (Android). 14.Desenchufe el Cable de Ethernet de la Cámara del router y la cámara. 15.Por favor permita que pasen 2 minutos para que la cámara se reinicie. 16. Seleccione Atrás. 17. Haga clic en el botón de recargar en la parte superior derecha. La cámara aparecerá en la ventana de tareas cuando termine de reiniciar. 18. Seleccione la cámara para ver. (WAN) Configuración para Vista Remota (Desde iPhone/iPad/Android) 1. Siga los pasos del 1 al 4 en la Opción A de arriba. 2. Seleccione la pestaña Remota. 3. Cree una cuenta seleccionando “Registrar Una Cuenta” o si usted ya creó una cuenta, pase al siguiente paso. 4. Ingrese su usuario y Contraseña y seleccione ingresar. 5. Seleccione “Opciones” en la parte superior derecha del App. 6. Seleccione “Agregar Cámara”. 7. Seleccione “Escanear código QR” (El código QR está en la parte inferior de la cámara) o Ingrese la información del dispositivo de la cámara. (La información del dispositivo está en una etiqueta en la parte inferior de la cámara. NO PIERDA ESTA INFORMACIÓN). 8. Haga clic en listo en la esquina superior derecha. 9. Haga clic en “OK” en éxito al agregar cámara. 10. Seleccione la cámara de la lista de cámaras para ver. Recomendación: 1. Pellizque la imagen en la pantalla para ampliar. 2. Enfoque manualmente la cámara girando el lente en la parte frontal de la cámara. OPCIÓN B Software de Conectividad para PC (LAN) Configuración de Vista Local (Desde una PC) (La PC debe de estar conectada a la misma red de área local que la Cámara) 1. 2. 3. 4. 5. Siga los pasos del 1 al 3 en las instrucciones de “Instalación Inicial de la Cámara”. En su PC Inserte el disco de instalación que se incluye con su cámara (o visite www.firstalert. com) e instale el software de vista remota de la cámara. Haga doble clic en el ícono del programa en su escritorio. El número de ID de su cámara debería de estar enlistada en la ventana de tareas LAN en la parte superior derecha. Haga doble clic en la cámara Exxxxx y debería de estar conectado a su cámara en una red local. Conectividad Inalámbrica (Desde una PC) 6. Siga los pasos del 1 al 4 en la Opción B. 7. Haga clic derecho en la ID de la Cámara en la ventana de tareas. 8. Seleccione “Configurar Conexión WIFI” 9. Marque la casilla de “iniciar configuración WIFI” 10.Haga clic en “Escanear” 11.Seleccione el nombre de su red Inalámbrica del menú desplegable Nombre de Red (SSID) 12.Ingrese su Contraseña de Red en el campo de Contraseña 13.Seleccione OK 14.Desenchufe el Cable de Ethernet de la Cámara del router y la cámara 15.Por favor permita que pasen 60 segundos para que la cámara se reinicie (WAN) Configuración para Vista Remota (Desde una PC) 1. 2. 3. 4. 5. 6. 7. Siga los pasos del 1 al 4 en la Opción B. Seleccione la pestaña WAN. En el programa, haga clic en registrar para crear un nombre de usuario y una contraseña. Una vez que se haya creado el nombre de usuario y la contraseña, ingrese al programa. Haga clic derecho en cualquier parte de la ventana de tarea derecha del programa y seleccione “agregar dispositivo”. Ingrese la información del dispositivo de la cámara. (Recomendación: La información del dispositivo está en una etiqueta en la parte inferior de la cámara.) (NO PIERDA ESTA INFORMACIÓN.) Una vez que la cámara se haya agregado a la ventana de tarea bajo WAN, usted podrá salir del Internet local en su PC y podrá conectarse a otra fuente de Internet remota. 8. Una vez que esté conectado a otra fuente de Internet, abra el programa en la PC, seleccione la pestaña WAN e ingrese a su cuenta. Usted verá su cámara agregada bajo WAN.


