Descargar - UniNet Argentina
Anuncio
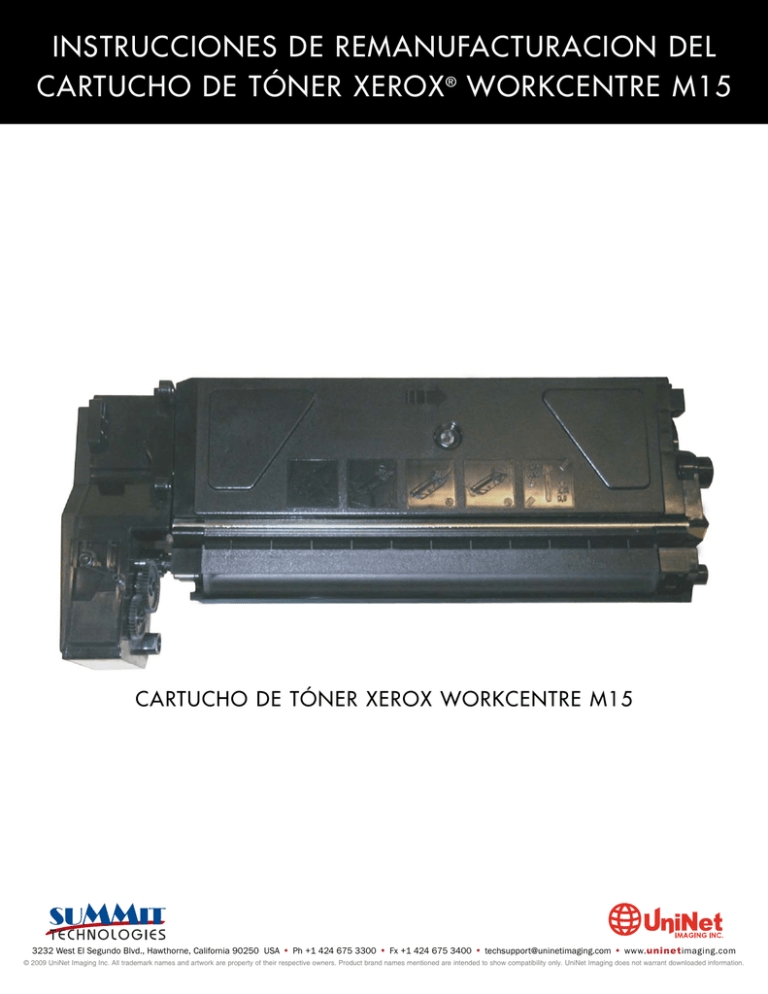
INSTRUCCIONES DE REMANUFACTURACION DEL CARTUCHO DE TÓNER XEROX ® WORKCENTRE M15 CARTUCHO DE TÓNER XEROX WORKCENTRE M15 3232 West El Segundo Blvd., Hawthorne, California 90250 USA • Ph +1 424 675 3300 • Fx +1 424 675 3400 • techsupport@uninetimaging.com • www.uninetimaging.com © 2009 UniNet Imaging Inc. All trademark names and artwork are property of their respective owners. Product brand names mentioned are intended to show compatibility only. UniNet Imaging does not warrant downloaded information. INSTRUCCIONES DE REMANUFACTURACION DEL CARTUCHO DE TÓNER XEROX WORKCENTRE M15 INSUMOS REQUERIDOS 1. 200g de tóner Xerox WorkCentre M15 2. Grasa de litio blanca HERRAMIENTAS REQUERIDAS 1. Desarmador de cabeza Phillips 2. Desarmador común pequeño 3. Gancho para resortes 4. Aspiradora aprobada para tóner 1. Remueva los dos tornillos localizados en la cavidad de desperdicio. Remueva la cavidad de desperdicio. Tenga cuidado de no perder los engranajes. 2. Remueva los engranajes de la cavidad de desperdicio, abra la cubierta del resorte, aspire y sople la cavidad de desperdicio hasta que esté limpia. 3232 West El Segundo Blvd., Hawthorne, California 90250 USA • Ph +1 424 675 3300 • Fx +1 424 675 3400 • techsupport@uninetimaging.com • www.uninetimaging.com © 2009 UniNet Imaging Inc. All trademark names and artwork are property of their respective owners. Product brand names mentioned are intended to show compatibility only. UniNet Imaging does not warrant downloaded information. INSTRUCCIONES DE REMANUFACTURACION DEL CARTUCHO DE TÓNER XEROX WORKCENTRE M15 3. En el mismo lado del cartucho donde está la cavidad de desperdicio, remueva el tapón de llenado de tóner. Elimine los residuos de tóner del cartucho. Aspire/sople la cavidad de suministro. No es necesario limpiar completamente el cartucho en éste momento, ya que el rodillo revelador necesita ser retirado al igual que la cuchilla dosificadora debe ser limpiada. Tendrá acceso más fácilmente para limpiar la cavidad en ese momento. 4. Remueva el engranaje guía de la cavidad de desperdicio. 5. Remueva el tornillo pequeño del rodillo revelador y la cubierta lateral. 6. Con un gancho para resortes, hale hacia arriba, por en medio, la cubierta del rodillo revelador, y retírela del cartucho. La cubierta tiene una pequeña lengüeta de plástico en cada lado que se ajustan en su sitio. 3232 West El Segundo Blvd., Hawthorne, California 90250 USA • Ph +1 424 675 3300 • Fx +1 424 675 3400 • techsupport@uninetimaging.com • www.uninetimaging.com © 2009 UniNet Imaging Inc. All trademark names and artwork are property of their respective owners. Product brand names mentioned are intended to show compatibility only. UniNet Imaging does not warrant downloaded information. INSTRUCCIONES DE REMANUFACTURACION DEL CARTUCHO DE TÓNER XEROX WORKCENTRE M15 7. Remueva los tres tornillos de la cubierta lateral opuesta. 8. Tenga en cuenta la ubicación y la colocación de los engranajes y remuévalos. 3232 West El Segundo Blvd., Hawthorne, California 90250 USA • Ph +1 424 675 3300 • Fx +1 424 675 3400 • techsupport@uninetimaging.com • www.uninetimaging.com © 2009 UniNet Imaging Inc. All trademark names and artwork are property of their respective owners. Product brand names mentioned are intended to show compatibility only. UniNet Imaging does not warrant downloaded information. INSTRUCCIONES DE REMANUFACTURACION DEL CARTUCHO DE TÓNER XEROX WORKCENTRE M15 9. Remueva la pequeña cubierta lateral interna del lado del engranaje, en el eje del rodillo revelador. Aun cuando no es necesario remover esta parte del rodillo para sacarlo, si no es retirado, se doblará, y causará escurrimientos. Para removerlo, presione la pequeña lengüeta y sáquelo. 10. Levante el rodillo revelador y retírelo del cartucho. Limpie los residuos de tóner de la cavidad. 11. Limpie la cuchilla dosificadora. A menos que existan cuchillas dosificadoras nuevas, no recomendamos que esta cuchilla sea removida, ya que está sostenida en su lugar por medio de un sello adhesivo de esponja que está debajo de la cuchilla. Si la cuchilla es levantada (no es algo sencillo de realizar) esta se doblará, y ya no servirá. Limpie la cuchilla en el lugar donde está localizada con una mota de algodón mojada con alcohol. Asegúrese de no tirar alcohol dentro del cartucho. 3232 West El Segundo Blvd., Hawthorne, California 90250 USA • Ph +1 424 675 3300 • Fx +1 424 675 3400 • techsupport@uninetimaging.com • www.uninetimaging.com © 2009 UniNet Imaging Inc. All trademark names and artwork are property of their respective owners. Product brand names mentioned are intended to show compatibility only. UniNet Imaging does not warrant downloaded information. INSTRUCCIONES DE REMANUFACTURACION DEL CARTUCHO DE TÓNER XEROX WORKCENTRE M15 12. Instale el rodillo revelador. 13. Instale la pequeña cubierta lateral interna. Asegúrese que esté colocada correctamente. 14. Instale la cubierta lateral del rodillo revelador, el tornillo, y el engranaje guía en el lado de la cavidad de desperdicio. Limpie la grasa de los engranajes y póngales grasa nueva. Recomendamos que utilice grasa de litio blanca. 15. Instale los engranajes, comience de izquierda a derecha, coloque los engranajes interiores primero. 3232 West El Segundo Blvd., Hawthorne, California 90250 USA • Ph +1 424 675 3300 • Fx +1 424 675 3400 • techsupport@uninetimaging.com • www.uninetimaging.com © 2009 UniNet Imaging Inc. All trademark names and artwork are property of their respective owners. Product brand names mentioned are intended to show compatibility only. UniNet Imaging does not warrant downloaded information. INSTRUCCIONES DE REMANUFACTURACION DEL CARTUCHO DE TÓNER XEROX WORKCENTRE M15 16. Instale el engranaje de la cubierta lateral y los tres tornillos. 17. Instale la cubierta del rodillo revelador de la misma manera que la quito. No la doble mucho, o se quedara doblada. 18. Llene con 200g de tóner Xerox WorkCentre 412, 312, M15. 19. Instale el tapón de llenado. Revise que no haya escurrimientos. 3232 West El Segundo Blvd., Hawthorne, California 90250 USA • Ph +1 424 675 3300 • Fx +1 424 675 3400 • techsupport@uninetimaging.com • www.uninetimaging.com © 2009 UniNet Imaging Inc. All trademark names and artwork are property of their respective owners. Product brand names mentioned are intended to show compatibility only. UniNet Imaging does not warrant downloaded information. INSTRUCCIONES DE REMANUFACTURACION DEL CARTUCHO DE TÓNER XEROX WORKCENTRE M15 20. Instale la cavidad de desperdicio y los dos tornillos. 21. Asegúrese que el engranaje guía de la cavidad de desperdicio este acoplado con los engranajes de la cavidad de desperdicio. 3232 West El Segundo Blvd., Hawthorne, California 90250 USA • Ph +1 424 675 3300 • Fx +1 424 675 3400 • techsupport@uninetimaging.com • www.uninetimaging.com © 2009 UniNet Imaging Inc. All trademark names and artwork are property of their respective owners. Product brand names mentioned are intended to show compatibility only. UniNet Imaging does not warrant downloaded information.
