Convert any HD video source, Component or RGB (VGA) into an
Anuncio
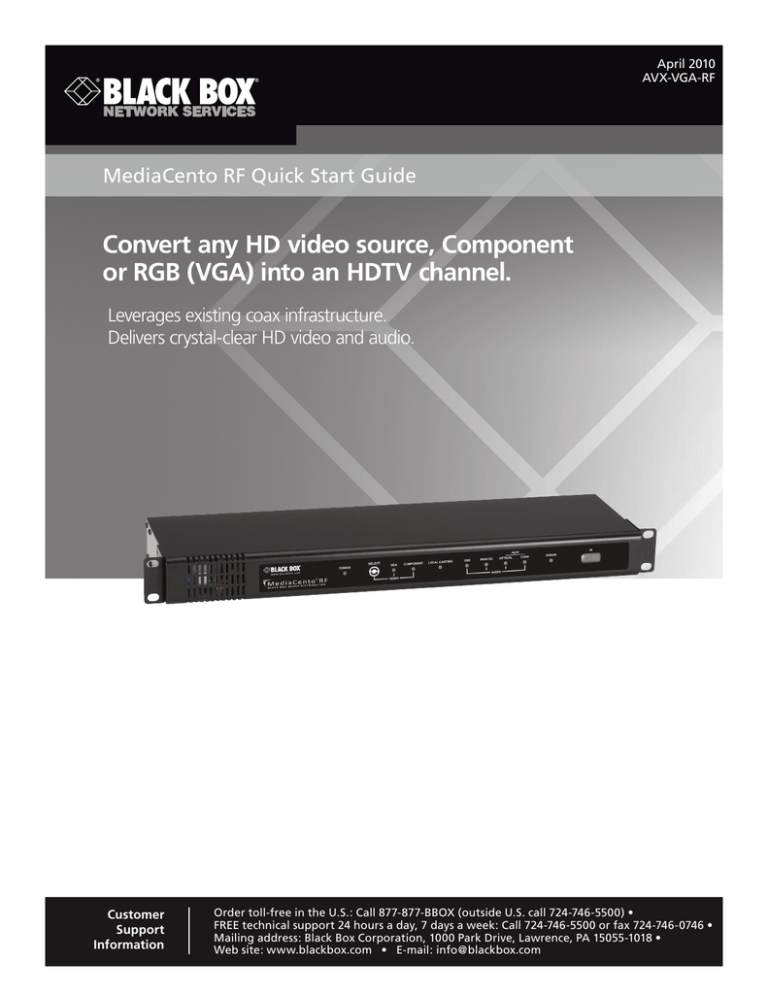
April 2010 AVX-VGA-RF MediaCento RF Quick Start Guide Convert any HD video source, Component BLACK BOX or RGB (VGA) into an HDTV channel. ® Leverages existing coax infrastructure. Delivers crystal-clear HD video and audio. Customer Support Information Order toll-free in the U.S.: Call 877-877-BBOX (outside U.S. call 724-746-5500) • FREE technical support 24 hours a day, 7 days a week: Call 724-746-5500 or fax 724-746-0746 • Mailing address: Black Box Corporation, 1000 Park Drive, Lawrence, PA 15055-1018 • Web site: www.blackbox.com • E-mail: info@blackbox.com MediaCento RF Quick Start Guide Trademarks Used in this Manual Black Box and the Double Diamond logo are registered trademarks, and MediaCento is a trademark, of BB Technologies, Inc. TOSLINK is a registered trademark of Toshiba Coproration. UL is a registered trademark of Underwriters’ Laboratories, Inc. Any other trademarks mentioned in this manual are acknowledged to be the property of the trademark owners. Important Safety Instructions Pertaining to a Risk of Fire, Electric Shock, or Injury to Persons 1. Keep these instructions. 2. Heed all warnings. 3. Follow all instructions. 4. Do not use this apparatus near water. 5. Clean only with dry cloth. 6. Do not block any ventilation openings. Install in accordance with the manufacturer’s instructions. 7. Do not install near any heat sources such as radiators, heat registers, stoves, or other apparatus (including amplifiers) that produce heat. 8. Do not defeat the safety purpose of the polarized or grounding-type plug. A polarized plug has two blades with one wider than the other. A grounding type plug has two blades and a third grounding prong. The wide blade or the third prong is provided for your safety. If the provided plug does not fit into your outlet, consult an electrician for replacement of the obsolete outlet. 9. Power cord must be accessible to allow for the removal of power from the unit. 10. Protect the power cord from being walked on or pinched, particularly at plugs, convenience receptacles, and the point where they exit from the apparatus. 11. Unplug the apparatus during lightning storms or when unused for long periods of time. 12. Only use attachments/accessories specified by the manufacturer. 13. Refer all servicing to qualified service personnel. Servicing is required when the apparatus has been damaged in any way, such as the power-supply cord or plug is damaged; liquid has been spilled, or objects have fallen into the apparatus; the apparatus has been exposed to rain or moisture, does not operate normally, or has been dropped. 14. WARNING: To reduce the risk of fire or electric shock, do not place this apparatus in a position where it is exposed to dripping or splashing liquids, rain, moisture, or excessively high humidity. Do not place objects containing liquid close to the unit where they might cause spillage onto the apparatus. We‘re here to help! If you have any questions about your application or our products, contact Black Box Tech Support at 724-746-5500 or go to blackbox.com and click on “Talk to Black Box.” You’ll be live with one of our technical experts in less than 20 seconds. Page 2 724-746-5500 | blackbox.com FCC and IC RFI Statements Federal Communications Commission and Industry Canada Radio Frequency Interference Statements This equipment generates, uses, and can radiate radio-frequency energy, and if not installed and used properly, that is, in strict accordance with the manufacturer’s instructions, may cause inter­ference to radio communication. It has been tested and found to comply with the limits for a Class A computing device in accordance with the specifications in Subpart B of Part 15 of FCC rules, which are designed to provide reasonable protection against such interference when the equipment is operated in a commercial environment. Operation of this equipment in a residential area is likely to cause interference, in which case the user at his own expense will be required to take whatever measures may be necessary to correct the interference. Changes or modifications not expressly approved by the party responsible for compliance could void the user’s authority to operate the equipment. This digital apparatus does not exceed the Class A limits for radio noise emis­sion from digital apparatus set out in the Radio Interference Regulation of Industry Canada. Le présent appareil numérique n’émet pas de bruits radioélectriques dépassant les limites applicables aux appareils numériques de la classe A prescrites dans le Règlement sur le brouillage radioélectrique publié par Industrie Canada. Page 3 MediaCento RF Quick Start Guide Instrucciones de Seguridad (Normas Oficiales Mexicanas Electrical Safety Statement) 1. Todas las instrucciones de seguridad y operación deberán ser leídas antes de que el aparato eléctrico sea operado. 2. Las instrucciones de seguridad y operación deberán ser guardadas para referencia futura. 3. Todas las advertencias en el aparato eléctrico y en sus instrucciones de operación deben ser respetadas. 4. Todas las instrucciones de operación y uso deben ser seguidas. 5. El aparato eléctrico no deberá ser usado cerca del agua—por ejemplo, cerca de la tina de baño, lavabo, sótano mojado o cerca de una alberca, etc. 6. El aparato eléctrico debe ser usado únicamente con carritos o pedestales que sean recomendados por el fabricante. 7. El aparato eléctrico debe ser montado a la pared o al techo sólo como sea recomendado por el fabricante. 8. Servicio—El usuario no debe intentar dar servicio al equipo eléctrico más allá a lo descrito en las instrucciones de operación. Todo otro servicio deberá ser referido a personal de servicio calificado. 9. El aparato eléctrico debe ser situado de tal manera que su posición no interfiera su uso. La colocación del aparato eléctrico sobre una cama, sofá, alfombra o superficie similar puede bloquea la ventilación, no se debe colocar en libreros o gabinetes que impidan el flujo de aire por los orificios de ventilación. 10. El equipo eléctrico deber ser situado fuera del alcance de fuentes de calor como radiadores, registros de calor, estufas u otros aparatos (incluyendo amplificadores) que producen calor. 11. El aparato eléctrico deberá ser connectado a una fuente de poder sólo del tipo descrito en el instructivo de operación, o como se indique en el aparato. 12. Precaución debe ser tomada de tal manera que la tierra fisica y la polarización del equipo no sea eliminada. 13. Los cables de la fuente de poder deben ser guiados de tal manera que no sean pisados ni pellizcados por objetos colocados sobre o contra ellos, poniendo particular atención a los contactos y receptáculos donde salen del aparato. 14. El equipo eléctrico debe ser limpiado únicamente de acuerdo a las recomendaciones del fabricante. 15. En caso de existir, una antena externa deberá ser localizada lejos de las lineas de energia. 16. El cable de corriente deberá ser desconectado del cuando el equipo no sea usado por un largo periodo de tiempo. 17. Cuidado debe ser tomado de tal manera que objectos liquidos no sean derramados sobre la cubierta u orificios de ventilación. 18. Servicio por personal calificado deberá ser provisto cuando: A: El cable de poder o el contacto ha sido dañado; u B: Objectos han caído o líquido ha sido derramado dentro del aparato; o C: El aparato ha sido expuesto a la lluvia; o D: El aparato parece no operar normalmente o muestra un cambio en su desempeño; o E: El aparato ha sido tirado o su cubierta ha sido dañada. Page 4 724-746-5500 | blackbox.com Table of Contents 1. Specifications....................................................................................................................................................................................... 6 1.1 General........................................................................................................................................................................................ 6 1.2 Video Encoder.............................................................................................................................................................................. 6 1.3 Audio Encoder............................................................................................................................................................................. 7 1.4 RF Spectrum Analysis................................................................................................................................................................... 7 1.5 Modulator/Upconverter................................................................................................................................................................ 7 1.6 Control/Setup.............................................................................................................................................................................. 7 2. Getting Started.................................................................................................................................................................................... 8 2.1 Overview..................................................................................................................................................................................... 8 2.2 Front Panel.................................................................................................................................................................................. 8 2.3 Back Panel................................................................................................................................................................................... 9 2.4 What’s Included.........................................................................................................................................................................10 3. Basic Installation..................................................................................................................................................................................11 4. Configuration and Support for MediaCento RF...................................................................................................................................12 Page 5 MediaCento RF Quick Start Guide 1. Specifications 1.1 General Compliance: UL® 60065, FCC Class B Component Video (Y, Pr, Pb) Resolutions Supported: 1080i, 720p, 480p, 480i, 59.94 frames/fields per second Computer VGA (Analog) Resolutions Supported: 640 x 480, 720 x 480, 800 x 600, 1024 x 768, 1152 x 864, 1176 x 664, 1280 x 720, 1280 x 768, 1280 x 800, 1280 x 960, 1280 x 1024, 1360 x 768, 1440 x 900 at 60, 70, 72, 75, 85 Hz; 1680 x 1050, 1920 x 1080 at 60 Hz NOTE: VGA resolutions are broadcast centered in the best vertical fit into 1920 x 1080 or 1280 x 720 at 59.94 frames per second. Cooling: Internal fan, front/back flow Enclosure Type: Metal Mounting: Detachable rackmounting ears; rubber feet for counter or shelf MTBF: 30,000 hours Use: North America only Connectors: Video Input: Component Video: RCA connectors, 75 ohm, 0 to 0.7 V; buffered and looped; Computer VGA (Analog): HD15 connector, 75 ohm RGB, 0 to 0.7 V; separate H and V sync; buffered and looped; Audio Input: SPDIF digital audio; TOSLINK® optical, buffered and looped; RCA 75 ohm, buffered and looped; USB as PCM audio device; Formats: 48 k bit PCM, AC-3 pass-through; Analog: R/L via RCA, buffered and looped; 16-bit 48 k bit sampling; Assignment: Audio inputs can be assigned to either video input Temperature Tolerance: Operating: 32 to 113° F (0 to 45° C) Humidity Tolerance: 10 to 80%, noncondensing Power: 100 to 240 VAC, 50/60 Hz, 25 watts Size: 1.72"H x 17"W x 5.75"D (4.37 x 43.18 x 14.61 cm) Weight (Shipping): 5.5 lb. (12.1 kg) 1.2 Video Encoder Encoder Video Profile: MPEG2 HD Profile 2: ISO13818-2 MP @ HL (1920 x 1080 or 1280 x 720) Traffic Shaping: Variable bit rate Video Transport Bit Rate: 38.78 Mbps Video Encoding Data Rates: Variable, 7 to 30 Mbps Average Encoding Data Rate: 25 Mbps Encoding Latency: Programmable 70 to 400 msec Color Profile: 4:2:0 GOP Size: 16 Intra DC Precision: 8 to 11 bit, programmable Video, Audio PID: Programmable Program Information: Programmable Content Watermarking: Digital and visual Page 6 724-746-5500 | blackbox.com Chapter 1: Specifications 1.3 Audio Encoder Encoder Audio Profile: ATSC A/52 Digital Passthrough: Dolby Digital® (AC-3) 1-5.1 channel, linear PCM 1.4 RF Spectrum Analysis Automated spectrum scanning and reporting across all channels: Analog, digital, or empty channel; relative channel power; STD, HRC, IRC detection 1.5 Modulator/Upconverter Modulation Types: QAM 256 (ITU-T J83 Annex B); Interleaving modes: (64, 2 only) Cable Standard: HRC, IRC, or STD Frequency Range: 50–900 MHz (channels 2–141); 2 kHz resolution, ±30 ppm accuracy, ±35 ppm stability Output Power: +25 dBmV typical Output Level Adjust: 0–20 dB of attenuation in 5-dB steps MER: 34 dB typical I/O Amplitude Flatness: ±1 dB over 6 MHz typical I/Q Amplitude Imbalance: <1% typical 1.6 Control/Setup Command Line Interface: RS-232 or USB Input Switching: IR, RS-232, USB or front panel Origin: Designed and manufactured in the U.S.A. RS-232 Port: 9600 baud, 8 bits, 1 stop bit, no parity, hardware/software flow control supported Page 7 MediaCento RF Quick Start Guide 2. Getting Started 2.1 Overview The MediaCento™ RF is a 1U combination HD MPEG 2 encoder and frequency-agile QAM modulator. It enables you to convert any HD video source, or Component or RGB (VGA) signal in real time and in very high quality into an HDTV cable channel. This channel works with standard coax wiring, where it can be combined with up to 134 other HDTV channels and distributed over an entire premise. This guide will take you through a typical installation procedure and will have you broadcasting your own HDTV channel in less than ten minutes. For additional assistance or more complex installations, contact Black Box Technical Support at 724-746-5500 or info@blackbox.com. 2.2 Front Panel Figure 2-1 shows the front panel of the MediaCento RF. Table 2-1 describes its components. 1 2 3 4 5 6 7 Figure 2-1. MediaCento RF front panel. Table 2-1. Front-panel components. Number Component Description 1 Power indicator Indicates whether unit is powered 2 Input switch Switches between Component video and VGA inputs 3 Active video source indicator Indicates which video input is currently selected 4 Broadcast status indicator Indicates if video source is being sent to coax output 5 Active audio source indicator Indicates which audio input is currently selected 6 Error indicator Indicates that system is booting or system error 7 IR input window Receives IR commands Page 8 724-746-5500 | blackbox.com Chapter 2: Getting Started 2.3 Back Panel Figure 2-2 shows the back panel of the MediaCento RF. Table 2-2 describes its components. 10 8 9 11 12 15 13 14 16 17 18 19 20 21 22 Figure 2-2. Media Cento RF back panel. Table 2-2. Back panel components. Number Component Description 8 RCA connector SPDIF digital audio output 9 RCA connector SPDIF digital audio input 10 Coax output Outputs encoded video as QAM 256 channel 11 SPDIF digital audio output, TOSLINK connector Looped output from SPDIF digital audio input, TOSLINK connector 12 SPDIF digital audio input, TOSLINK connector Accepts digital audio input audio input (48 kHZ PCM or AC3) 13 Component Video output, RCA connectors, 75 ohm Looped output for video received at Component Video input, RCA connectors, 75 ohm 14 Component Video input, RCA connectors, 75 ohm Accepts Component Video input 15 VGA (RGB) input; HD15 connector Accepts standard VGA input 16 VGA (RGB) output; HD15 connector Looped output from VGA (RGB) input 17 Analog audio output, R/L RCA connectors Looped output for analog L/R audio input, RCA connectors USB Type B USB audio device or GUI configuration port 19 Analog audio input, R/L RCA connectors Input for analog L/R audio 20 IR port IR repeater output port 21 DB9 connector RS-232 serial control 22 3-prong AC power connector Plug in the power cord here 18 Page 9 MediaCento RF Quick Start Guide 2.4 What’s Included Your box should contain the following items. If anything is missing or damaged, contact Black Box Technical Support at 724-746-5500 or info@blackbox.com. • MediaCento RF unit • Power cord • (4) adhesive rubber non-slip feet • This printed Quick Start Guide • Rackmount kit (attached to unit) • USB cable Page 10 724-746-5500 | blackbox.com Chapter 3: Basic Installation 3. Basic Installation Follow these steps to install the MediaCento RF: NOTE: Factory default settings allow the MediaCento RF to broadcast a Component HD source with analog audio on Channel 2.1, over coax cabling, for reception at connected HDTVs. HDTV Coax cable Back panel of AVX-VGA-RF Component video cables L/R audio cables HD source Figure 3-1. Typical installation. 1. Plug the power cord into an AC outlet. 2. Connect the Component video output of the HD source to the Component video input of the MediaCento RF. 3. Connect the L/R analog audio output of the HD source to the L/R analog audio input of the MediaCento RF. 4. Connect the coaxial output of the MediaCento RF to the HDTV RF input. 5. Tune the HDTV to channel 2.1 to view the MediaCento RF channel. NOTE: The default audio input is L/R analog. Page 11 MediaCento RF Quick Start Guide 4. Configuration and Support for MediaCento RF IMPORTANT: To configure the MediaCento RF for everyday use and to check for updated firmware, you need to download the Black Box Modular Configuration Tool, a powerful graphical user interface, onto your laptop or PC and connect to the MediaCento RF via an open USB port. An Internet connection on your PC is required to download the Black Box Modular Configuration Tool from our server and to update the firmware on the MediaCento RF. To get the Black Box Modular Configuration Tool: 1. Visit ftp://ftp.blackbox.com/anonymous/communications 2. Download the Black Box Modular Configuration Tool (setup.exe). Always check for updated firmware first: 1. Launch setup.exe. 2. Connect your PC to the MediaCento RF via USB Type B to USB Type B cable. 3. Power up the MediaCento RF. 4. Install new firmware if prompted. If there is new firmware available, follow the directions for downloading firmware. Configuration Factory default settings allow MediaCento RF to broadcast a Component video HD source with SPDIF-coax analog on HD channel 2.1, over coax cabling, for reception at connected HDTVs. To use the factory default settings for a connected component video HD source: 1. Plug the MediaCento RF power cord into an AC outlet. 2. Connect the “component video output” of the HD source to the “component video input” of the MediaCento RF. 3. Connect the “analog audio output” of the HD source to the “analog audio input” of the MediaCento RF. 4. Connect the “coaxial output” of the MediaCento RF to the on-premise coax network that feeds HDTVs. 5. Tune HDTV to Channel 2.1 to view the MediaCento RF and the connected HD source. Y ou might need to perform a digital cable channel scan on the HDTV first to receive the new MediaCento RF channel. To make ANY changes to the default settings (including setting alternative audio inputs, changing the RF output channel, re-naming the HDTV channel etc.), use the Black Box Modular Configuration Tool for configuration. Bit Rate Adjustment NOTE: There is a way to adjust for bit rate. The default setting is “high.” The higher the bit rate generally means the higher the video quality but there are some HDTVs that will not accept a high bit rate on certain scenes. We chose a setting (high) that is compatible with most TVs. If you encounter any issues with our default setting, you can adjust the bit rate by going to the Configuration tab and MPEG encoding section. Frame Rate Adjustment You can change the default setting for 720p resolution from the default of 60 fps down to 30 fps. To adjust frame rate, go to the Configuration tab and MPEG encoding section, then check the “Show Advanced Options” checkbox. If you have any questions or problems, contact Black Box Technical Support at 724-746-5500 or info@blackbox.com. Page 12 724-746-5500 | blackbox.com NOTES Page 13 NOTES Page 14 724-746-5500 | blackbox.com NOTES Page 15 Black Box Tech Support: FREE! Live. 24/7. Tech support the way it should be. Great tech support is just 20 seconds away at 724-746-5500 or blackbox.com. About Black Box Black Box Network Services is your source for more than 118,000 networking and infrastructure products. You’ll find everything from cabinets and racks and power and surge protection products to media converters and Ethernet switches all supported by free, live 24/7 Tech Support available in 20 seconds or less. © Copyright 2010. All rights reserved. 724-746-5500 | blackbox.com
