ROOFTOP TIPS
Anuncio
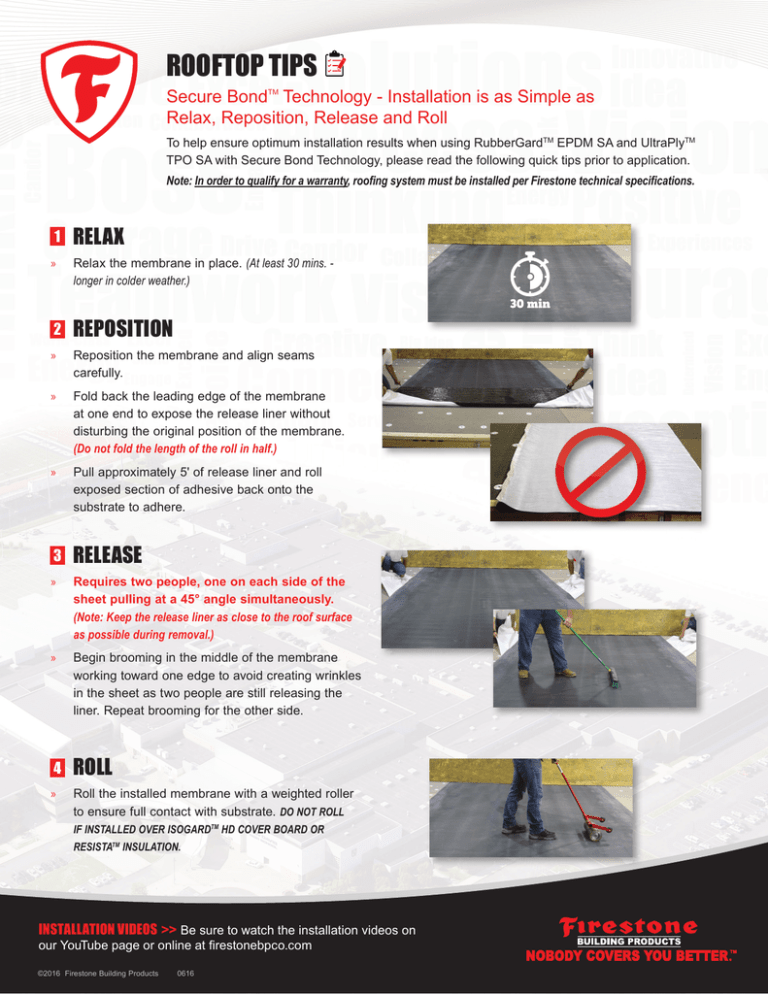
ROOFTOP TIPS Secure BondTM Technology - Installation is as Simple as Relax, Reposition, Release and Roll To help ensure optimum installation results when using RubberGardTM EPDM SA and UltraPlyTM TPO SA with Secure Bond Technology, please read the following quick tips prior to application. Note: In order to qualify for a warranty, roofing system must be installed per Firestone technical specifications. 1 RELAX »» Relax the membrane in place. (At least 30 mins. longer in colder weather.) 2 REPOSITION »» Reposition the membrane and align seams carefully. »» Fold back the leading edge of the membrane at one end to expose the release liner without disturbing the original position of the membrane. (Do not fold the length of the roll in half.) »» Pull approximately 5' of release liner and roll exposed section of adhesive back onto the substrate to adhere. 3 RELEASE »» Requires two people, one on each side of the sheet pulling at a 45° angle simultaneously. (Note: Keep the release liner as close to the roof surface as possible during removal.) »» Begin brooming in the middle of the membrane working toward one edge to avoid creating wrinkles in the sheet as two people are still releasing the liner. Repeat brooming for the other side. 4 ROLL »» Roll the installed membrane with a weighted roller to ensure full contact with substrate. DO NOT ROLL IF INSTALLED OVER ISOGARDTM HD COVER BOARD OR RESISTATM INSULATION. INSTALLATION VIDEOS >> Be sure to watch the installation videos on our YouTube page or online at firestonebpco.com ©2016 Firestone Building Products 0616 ROOFTOP TIPS Secure BondTM Technology - La istalacion es tan sensilla como Relaje, Reposicione y Presione. Para ayudar a asegurar resultados óptimos durante la instalación del RubberGardTM EPDM SA y UltraPlyTM TPO SA con tecnología unión segura , por favor lea los siguientes consejos rápidos antes de la aplicación. Nota: Para poder calificar para una garantia, se debe instalar el sistema de cubiertas segun las especificaciones tecnicas de Firestone. »1 RELAJE LA MEMBRANA » Por lo menos 30 minutos. Puede requerir mas tiempo en climas fríos. 2 REPOSICIONE » Vuelva a colocar la membrana y alinear las costuras cuidadosamente. » Doble hacia atrás el borde principal de la membrana en un extremo para exponer el revestimiento de liberación sin perturbar la posición original de la membrana. (No doble la longitud del rollo. » Tire de aproximadamente 5' del rollo de papel antiadherente y presione la membrana expuesta con el adhesivo de nuevo al sustrato para completar la adherencia. 3 LIBERE » Este proceso requiere dos personas, una a cada lado halando en un ángulo de 45° al mismo tiempo. (Nota: Mantenga el revestimiento de liberación tan cerca de la superficie del techo como sea posible durante la separación.) » Comience barriendo en el medio de la membrana trabajando hacia los costados para evitar la creación de arrugas mientras que las dos personas todavía siguen con el proceso de liberación de revestimiento protector. Repita el proceso en el otro lado de la membrana. 4 PRESIONE » Presione la membrana instalada con un rodillo pesado para asegurar el pleno contacto con el sustrato. NO PRESIONE SI SE ESTA INSTALANDO SOBRE AISLAMIENTOS ISOGARD HD O TABLEROS DE COBERTURA RESISTA. VIDEOS DE INSTALACION >> Asegúrese de ver los videos de instalación en nuestra página de YouTube o en firestonebpco.com ©2016 Firestone Building Products 0616
