Capacidad: 660W-250V • Base Estándar Rated
Anuncio
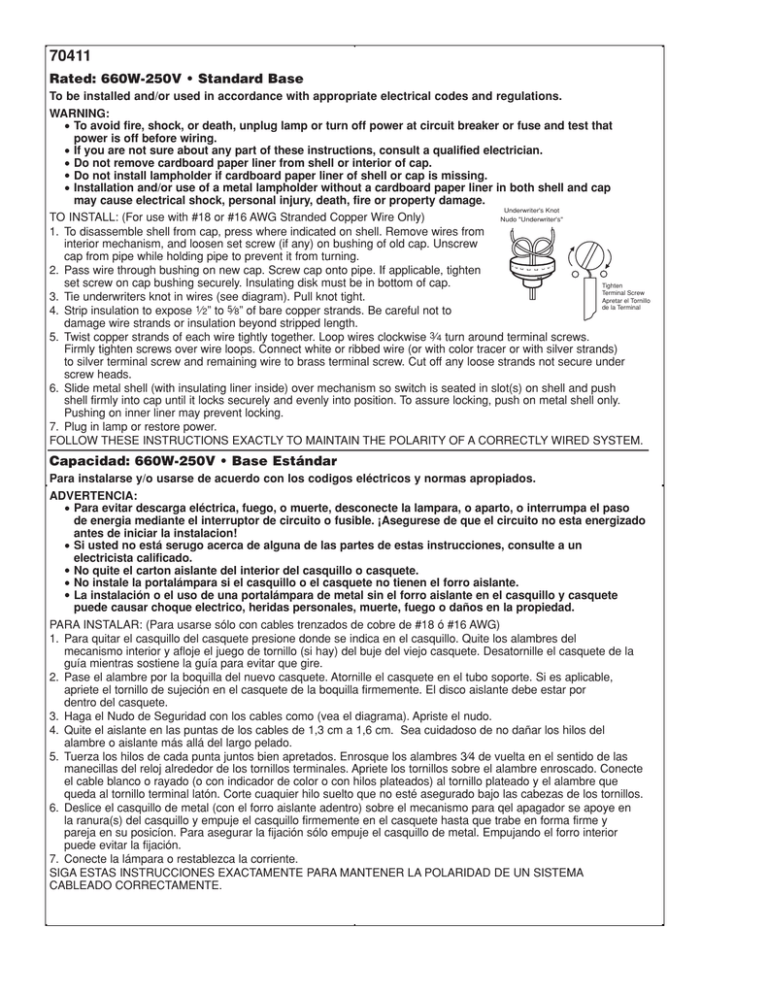
70411 Rated: 660W-250V • Standard Base To be installed and/or used in accordance with appropriate electrical codes and regulations. WARNING: • To avoid fire, shock, or death, unplug lamp or turn off power at circuit breaker or fuse and test that power is off before wiring. • If you are not sure about any part of these instructions, consult a qualified electrician. • Do not remove cardboard paper liner from shell or interior of cap. • Do not install lampholder if cardboard paper liner of shell or cap is missing. • Installation and/or use of a metal lampholder without a cardboard paper liner in both shell and cap may cause electrical shock, personal injury, death, fire or property damage. Underwriter's Knot TO INSTALL: (For use with #18 or #16 AWG Stranded Copper Wire Only) Nudo "Underwriter's" 1. To disassemble shell from cap, press where indicated on shell. Remove wires from interior mechanism, and loosen set screw (if any) on bushing of old cap. Unscrew cap from pipe while holding pipe to prevent it from turning. 2. Pass wire through bushing on new cap. Screw cap onto pipe. If applicable, tighten set screw on cap bushing securely. Insulating disk must be in bottom of cap. Tighten Terminal Screw 3. Tie underwriters knot in wires (see diagram). Pull knot tight. Apretar el Tornillo de la Terminal 4. Strip insulation to expose 1⁄ 2” to 5⁄ 8” of bare copper strands. Be careful not to damage wire strands or insulation beyond stripped length. 5. Twist copper strands of each wire tightly together. Loop wires clockwise 3⁄ 4 turn around terminal screws. Firmly tighten screws over wire loops. Connect white or ribbed wire (or with color tracer or with silver strands) to silver terminal screw and remaining wire to brass terminal screw. Cut off any loose strands not secure under screw heads. 6. Slide metal shell (with insulating liner inside) over mechanism so switch is seated in slot(s) on shell and push shell firmly into cap until it locks securely and evenly into position. To assure locking, push on metal shell only. Pushing on inner liner may prevent locking. 7. Plug in lamp or restore power. FOLLOW THESE INSTRUCTIONS EXACTLY TO MAINTAIN THE POLARITY OF A CORRECTLY WIRED SYSTEM. Capacidad: 660W-250V • Base Estándar Para instalarse y/o usarse de acuerdo con los codigos eléctricos y normas apropiados. ADVERTENCIA: • Para evitar descarga eléctrica, fuego, o muerte, desconecte la lampara, o aparto, o interrumpa el paso de energia mediante el interruptor de circuito o fusible. ¡Asegurese de que el circuito no esta energizado antes de iniciar la instalacion! • Si usted no está serugo acerca de alguna de las partes de estas instrucciones, consulte a un electricista calificado. • No quite el carton aislante del interior del casquillo o casquete. • No instale la portalámpara si el casquillo o el casquete no tienen el forro aislante. • La instalación o el uso de una portalámpara de metal sin el forro aislante en el casquillo y casquete puede causar choque electrico, heridas personales, muerte, fuego o daños en la propiedad. PARA INSTALAR: (Para usarse sólo con cables trenzados de cobre de #18 ó #16 AWG) 1. Para quitar el casquillo del casquete presione donde se indica en el casquillo. Quite los alambres del mecanismo interior y afloje el juego de tornillo (si hay) del buje del viejo casquete. Desatornille el casquete de la guía mientras sostiene la guía para evitar que gire. 2. Pase el alambre por la boquilla del nuevo casquete. Atornille el casquete en el tubo soporte. Si es aplicable, apriete el tornillo de sujeción en el casquete de la boquilla firmemente. El disco aislante debe estar por dentro del casquete. 3. Haga el Nudo de Seguridad con los cables como (vea el diagrama). Apriste el nudo. 4. Quite el aislante en las puntas de los cables de 1,3 cm a 1,6 cm. Sea cuidadoso de no dañar los hilos del alambre o aislante más allá del largo pelado. 5. Tuerza los hilos de cada punta juntos bien apretados. Enrosque los alambres 3⁄4 de vuelta en el sentido de las manecillas del reloj alrededor de los tornillos terminales. Apriete los tornillos sobre el alambre enroscado. Conecte el cable blanco o rayado (o con indicador de color o con hilos plateados) al tornillo plateado y el alambre que queda al tornillo terminal latón. Corte cuaquier hilo suelto que no esté asegurado bajo las cabezas de los tornillos. 6. Deslice el casquillo de metal (con el forro aislante adentro) sobre el mecanismo para qel apagador se apoye en la ranura(s) del casquillo y empuje el casquillo firmemente en el casquete hasta que trabe en forma firme y pareja en su posicíon. Para asegurar la fijación sólo empuje el casquillo de metal. Empujando el forro interior puede evitar la fijación. 7. Conecte la lámpara o restablezca la corriente. SIGA ESTAS INSTRUCCIONES EXACTAMENTE PARA MANTENER LA POLARIDAD DE UN SISTEMA CABLEADO CORRECTAMENTE.

![Hoja de datos [página del catálogo]](http://s2.studylib.es/store/data/004946794_1-26ed64d93229a58faebbab14a4d19a44-300x300.png)
