Triton Blue - Alteisa.com
Anuncio
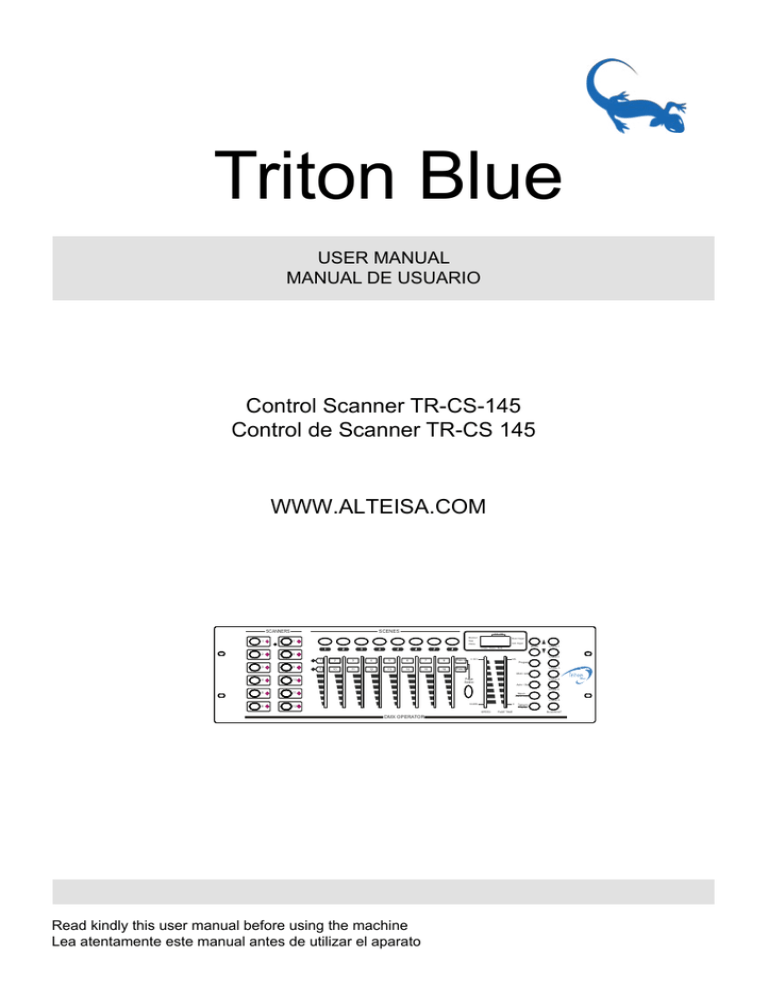
Triton Blue USER MANUAL MANUAL DE USUARIO Control Scanner TR-CS-145 Control de Scanner TR-CS 145 WWW.ALTEISA.COM SCENES SCANNERS 1 7 2 8 STEP / TIME Blackout Step Music trigger Auto trigger PROG Chase Scene Bank 3 9 1 2 3 4 5 6 7 8 Page A � 10 11 12 13 14 15 16 Page B BANK Chase 1 Chase 2 ��� ���� � � Program Chase 3 Midi / Add 4 Page Select 10 5 11 6 12 Chase 4 Auto / Del Chase 5 Music Bank-copy Chase 6 ������ DMX OPERATOR Read kindly this user manual before using the machine Lea atentamente este manual antes de utilizar el aparato �� SPEED FADE TIME Tapsync Display BLACKOUT Triton Blue USER MANUAL Control Scanner TR-CS-145 SCENES SCANNERS 1 7 2 8 STEP / TIME Blackout Step Music trigger Auto trigger PROG Chase Scene Bank 3 9 1 2 3 4 5 6 7 8 Page A � 10 11 12 13 14 15 16 Page B BANK Chase 1 Chase 2 ��� ���� � � Program Chase 3 Midi / Add 4 Page Select 10 5 11 6 12 Chase 4 Auto / Del Chase 5 Music Bank-copy Chase 6 ������ DMX OPERATOR �� SPEED FADE TIME Tapsync Display BLACKOUT English MAIN FEATURES 1. 192 DMX Channels. 2. 30 Banks each composed of 8 programmable scenes. 3. 8 Fades adjusting output level. 4. Built-in Microphone. 5. AUTO mode is controlled by TAP SYNC and SPEED controlled. 6. MIDI control through MIDI interface. 7. 4 digits LED display. 8. Blackout master controlled by Manual or Remote. 9. CHASE programming and CHASE running, manual control and remote control. 10. Fade Time control. 11. DMX polarity selects. TECHNICAL SPECIFICATION 1� POWER INPUT: DC+9-12V,300mA min 2� Output: AC 230V~50Hz (AC 120V~60Hz) 300Ma, DC 9V 300mA 3� Dimensions: 482x132x73mm 4� Weight: 2.5Kg OPERATING INSTRUCTIONS 1�GENERAL DESCRIPTIONS: I. There is 192 DMX channel adjusting output level in every scene. II. 8 scenes are available to be programmed for each bank. When scene running, all scenes of one bank will be executed continuously in a cycle. III. Select desired bank using UP and DOWN button, Also you can select desired bank using MIDI signals through MIDI interface, there are totally 30 banks, once only one can be chose. IV. Scenes can be executed automatically, and the duration is dependent on TAP SYNC, scenes are executed under music triggering or NOTE triggering, also press a scene buttons by hand to run scenes. V. There are total 6 chases, each contains 240 scenes. 2. CONTROLS & FUNCTIONS 1 2 SCENES SCANNERS 1 7 STEP / TIME Blackout Step 7 Music trigger Auto trigger PROG Chase Scene Bank 2 8 3 9 4 10 5 11 6 12 1 2 3 4 5 6 7 8 Page A � 10 11 12 13 14 15 16 Page B BANK Chase 2 ��� ���� � � Chase 1 Program Chase 3 Midi / Add Page Select Chase 4 Auto / Del Chase 5 Music Bank-copy Chase 6 ������ DMX OPERATOR 3 TR-MQ 1000 4 Pag. 3 �� SPEED 5 Tapsync Display BLACKOUT FADE TIME 6 14 15 English 1. scanners(1-12) Scanners 1 2 3 4 5 6 7 8 9 10 11 12 Scanners 1 2 3 4 5 6 7 8 9 10 11 12 Channel 1-16 17-32 33-48 49-64 65-80 81-96 97-112 113-128 129-144 145-160 10-176 177-192 Fade control OFF OFF OFF OFF OFF OFF OFF OFF OFF OFF OFF OFF LED OFF OFF OFF OFF OFF OFF OFF OFF OFF OFF OFF OFF Channel 1-16 17-32 33-48 49-64 65-80 81-96 97-112 113-128 129-144 145-160 10-176 177-192 Fade control ON ON ON ON ON ON ON ON ON ON ON ON LED ON ON ON ON ON ON ON ON ON ON ON ON Press desired scanner, corresponding LED is lit, and appropriate channels is enabled to be adjusted, when scenes are running, if fades control is OFF, channel output level is not controlled by the fades, if fades control is ON, channel 8-output level is controlled by the fades. 3. Scene button Press one scene button to run scene or to store scene, and the second digit of LCD DISPLAY shows scenes 1-8. 4. Fade (1-8) Slide the fades to adjust the output level of DMX channel from 0 to FF. (255). 5. PAGE SELECT Press to select page A to page B 6. SPEED SLIDER Move the slider to adjust chasing speed. 7. FADE TIME SLIDER Move the slider to adjust FADE TIME. 8. LED DISPLAY 9. BANK button (↑or↓) English Pag. 4 TR-MQ 1000 Press UP or DOWN to increases or decrease Bank, the third and fourth digit of LED DISPLAY shows BANK NO. (01-30) 10. CHASE 1-CHASE 6 Select desired CHASE to be programmed or run CHASE. 11. PROGRAM Turn the power on, it is in MANUAL RUN mode, press PROGRAM for 2 seconds, corresponding LED blinks, SCENE and CHASE are ready to be programmed, press PROGRAM once more to return to RUN mode, corresponding LED goes out. 12. MIDI/ADD a� Press MIDI key when running, the third and fourth digit of LED flash, select MIDI channel using UP or DOWN, press MIDI key once more or any other key excluding UP or DOWN to end the MIDI channel setting. b� Press this key to make programs when in PROGRAM mode. 13. AUTO/DEL a� In RUN mode, press Auto/Del, corresponding LED is ON, which indicates it is AUTO RUN mode, press once more to withdraw MUSIC mode, corresponding LED goes out. b� Press this key to make Scene and chase program when in PROGRAM mode. 14. MUSIC/BANK COPY a� In RUN mode, press this key, corresponding LED is ON, which indicates it is in MUSIC mode, press once more to withdraw MUSIC mode, corresponding LED goes out. b� Press this key to make Scene and chase program when in PROGRAM mode. 15. TAP SYNC/DISPLAY a� In AUTO RUN mode, running speed of scene is dependent on the interval of last two pressing of TAP SYNC/DISPLAY, Max.10 minutes. b� In PROGRAM mode, select display between STEP and BANK, in other mode; select display between 00-225 and 0%-100%. 16. BLACKOUT Press this key to disable all channel output, but not any other functions. Press once withdraw Blackout mode. MIDI IN Use to receive MIDI data. 17. DMX POLARITY SELECT TR-MQ 1000 Pag. 5 English Select the polarity of DMX output. 18. DMX OUT Use to output DMX data. 19. DC INPUT DC 9V~12V, 300mA MIN. PROGRAMMING FOR SCENES Press PROGRAM for 3 second, appropriate LED blink, which indicates it is in PROGRAM mode. 1. SECNE PROGRAMMING I. Press SCANNER key to select DMX channel composed of 8 channels. II. Select different channel to control several devices at the same time. III.Adjust appropriate fades to select desired output level, than turn off fade. IV. Select and adjust output level continuously until all devices are set. V. Press MIDI/ADD. VI. Select desired bank using UP or DOWN. VII. Press SCENE to store this SCENE. 2. 3. SCENE EDITING I. Select desired scene of bank. II. Make program of scene to meet the requirement of device. III. Press MIDI/ADD IV. Press scene to store this scanner. 4. SCANNER COPY I. If a scanner is set, press and hold the SCANNER first. II. Press the SCANNER to copy to , then the SCANNER is copied to anther SCANNER. 5. SCENE COPY I. Select desired SCENE. II. Press MIDE/ADD once. III. Select one bank, then press the scene to copy to. 6. DELETE SCENE (DMX channel incorporated with this SCENE are set to 0) I. Select desired scene. II. While pressing and holding AUTO/DEL. Press scene required to be deleted. CLEAN ALL SCENE (ALL DMX channel are set 0.) I. Press PROGRAM + DOWN while turning power off. II. Turn the power on. 7. COPY BANK English Pag. 6 TR-MQ 1000 8. I. Select desired bank II. Press MIDE/ADD. III. Select the bank to copy to. IV. Press MUSIC /BANKCOPY DELETE A BANK Select the bank to be deleted, press Auto/DEL+Music/Bank copy. PROGRAMMING FOR CHASES Press PROGRAM, corresponding LED flashes, which indicates it is in PROGRAM mode. 1. MAKE PROGRAM OF SCENE IN CHASE. I. There are up to 240 scene in a CHASE. II. Scene are run in the programmed order. first programming, first runing. III.Select a CHASE which contains programmed scene. IV. Select a scene of bank. V. Press MIDI/ADD. 2. COPY A BANK TO CHASE Select a bank, press MUSIC/BANK COPY, and press MIDI/ADD. Then the scenes of the bank are copied to the CHASE. 3. CHASE EDITING Add a STEP IN CHASE. a� Select desired LCD display. b� Press TAP SYNC/DISPLAY, the LCD shows the CHASE and its STEP, Press TAP SYNC/ DISPLAY once, the LCD shows the SCENE and BANK. c� Add a STEP in CHASE. d� Presses TAP SYNC/DISPLAY, the LCD shows the CHASE and its STEP. If it has made program till the 15th step, select the 9th using UP or DOWN, press MIDI/ADD, the CHASE is maintained and the STEP turns to 10th STEP. Select desired SCENE using UP or DOWN, Press MIDI/REC, then the new 10th STEP is added to SCENE, the previous 10th STEP turns to the new 11th STEP, the previous 11th STEP turns to the new 12th STEP , and so on. e� Delete a STEP in CHASE Select desired STEP and then press AUTO/DEL. For example, select the 10th STEP using UP or DOWN, press AUTO/DEL, then the 10th STEP is deleted, the previous 11th STEP turns to the 10th STEP, the previous 12th STEP and so on. 4. DELETE A CHASE I. Select desired CHASE. TR-MQ 1000 Pag. 7 English II. Press desired CHASE while holding Auto/DEL. 5. CLEAN ALL CHASE (ALL SCENES are still available) I . Press DOWN+Auto/DEL while turning power off. II. Turn the power on. RUNNING SCENES • Turn the power on; it is in MANUAL RUN mode. When in PROGRAM mode, press PROGRAM for 2 seconds, PROGRAM LED goes out, it enters MANUAL mode. • If there is not any scene having been programmed in a bank, the scene can’t be run; only the SCENES having been programmed are executed. • If the fades is set to OFF, Scene will execute channel program setting. 1. MANUAL RUN I. Extinguish AUTO triggered LED and MUSIC triggered LED. II. Select a bank (using ↑or↓,MIDI signals through MIDI interface) III. Press scene to run scene. IV. Run scene-using MIDI. 2. AUTO RUN I. Press AUTO/DEL, corresponding LED is ON. II. Press TAP SYNC/DISPLAY, Press it once more after some time, the interval between two pressing is assigned to the speed of AUTO RUN, the maximum limit is 10 minutes. If there are many pressings more than twice, the last two pressing are designated. III. Select desired bank, using UP or DOWN via MIDI signals. IV. Press Auto/DEL once more to withdraw AUTO RUN mode. 3. MUSIC RUN I. Press music/Bank copy, corresponding indicator lights, scene run is engaged into MUSIC RUN. II. Select desired bank, using UP or DOWN or via MIDI signals. III. Press music/bank copy once more to withdraw MUSIC RUN. 4. MIDI RUN Select bank to run scenes using MIDI whenever it is in MANUAL RUN, AUTO RUN or MUSIC RUN. 5. CHASE RUN I. CHASE RUN requires making programs, when running CHASE, scene will be step auto matching. II. CHASE RUN includes MANUAL RUN, AUTO RUN, ATDIO RUNS, and MIDI RUN. III. Either one CHASE more can be run in the order of selection. IV. Press CHASE, Corresponding indicator lights, which indicates it, is in CHASE RUN. 6. FADE TIME CONTROL Move the slider to adjust FADE TIME, Output varies accordingly. English Pag. 8 TR-MQ 1000 MIDI CHANNEL SETTING 1. MIDI channel setting I. Press MIDI, the third and fourth digits of LED blink, selects MIDI channel setting. II. Press MIDI one more to end MIDI channel setting. Also you can press any other UP and DOWN or move the fades to end MIDI channel setting. 2. key except MIDI RUNNING NOTE ON: Receive NOTE ON signals to execute corresponding function. BANK BANK1 BANK2 BANK15 CHASE TR-MQ 1000 NOTE NUMBER 00 01 02 03 04 05 06 07 08 09 10 ” 112 113 114 115 116 117 118 119 120 121 122 123 124 125 126 FUNCTION TURN ON TURN OFF SCENE1 TURN ON TURN OFF SCENE2 TURN ON TURN OFF SCENE3 TURN ON TURN OFF SCENE4 TURN ON TURN OFF SCENE5 TURN ON TURN OFF SCENE6 TURN ON TURN OFF SCENE7 TURN ON TURN OFF SCENE8 TURN ON TURN OFF SCENE1 TURN ON TURN OFF SCENE2 TURN ON TURN OFF SCENE3 ” TURN ON TURN OFF SCENE1 TURN ON TURN OFF SCENE2 TURN ON TURN OFF SCENE3 TURN ON TURN OFF SCENE4 TURN ON TURN OFF SCENE5 TURN ON TURN OFF SCENE6 TURN ON TURN OFF SCENE7 TURN ON TURN OFF SCENE8 TURN ON TURN OFFCHASE1 TURN ON TURN OFFCHASE1 TURN ON TURN OFFCHASE2 TURN ON TURN OFFCHASE3 TURN ON TURN OFFCHASE5 TURN ON TURN OFFCHASE6 BACKOUT Pag. 9 English Triton Blue MANUAL DE USUARIO Control de Scanner TR-CS 145 SCENES SCANNERS 1 7 2 8 STEP / TIME Blackout Step Music trigger Auto trigger PROG Chase Scene Bank 3 9 1 2 3 4 5 6 7 8 Page A � 10 11 12 13 14 15 16 Page B BANK Chase 1 Chase 2 ��� ���� � � Program Chase 3 Midi / Add 4 Page Select 10 5 11 6 12 Chase 4 Auto / Del Chase 5 Music Bank-copy Chase 6 ������ DMX OPERATOR �� SPEED FADE TIME Tapsync Display BLACKOUT Español Características: 192 canales DMX. 8 faders para el ajuste de la salida. Micrófono incorporado. El modo AUTO es controlado mediante los controles de TAP SYMC y SPEED. Pantalla de función de 4 dígitos LED Control de Black-Out controlable manual o remotamente. Programación de CHASE, ejecución manual o remota. Control de “Fade time” Selector de polaridad de señal de DMX Características técnicas: Alimentación de entrada: Transformador: Dimensiones: Peso: DC +9 ~ 12V, 300 mA min. AC 230V~50 Hz (AC 120V~60Hz) 300mA, DC 9V 300mA 482 x 132 x 73 mm. 2.5 Kgs. Instrucciones de manejo Descripción general: I. II. Ajustes del valor de salida de los 192 canales de DMX en cada una de las escenas. 8 escenas están disponibles para ser programadas en cada uno de los bancos, Cuando una escena esta ejecutándose, todas las escenas de ese banco están ejecutando continuamente. Selecciona el banco deseado usando los botones de “UP” y “DOWN”, también pueden ser seleccionado a través de un interfaces MIDI, están disponibles 30 banco, solo puede estar seleccionado uno al mismo tiempo. Las escenas pueden ser ejecutadas automáticamente, la duración dependerá del control de “TAP SYNC”, pueden ser también activabas mediante el “triggering” de la música o “NOTE triggering”, también pueden ser ejecutadas manualmente pulsado el botón de escena. Están disponibles 6 CHASE, con 260 escenas cada uno. III. IV. V. 2. Controles y funciones. 1 2 SCENES SCANNERS 1 7 STEP / TIME Blackout Step 7 Music trigger Auto trigger PROG Chase Scene Bank 2 8 3 9 4 10 5 11 6 12 1 2 3 4 5 6 7 8 Page A � 10 11 12 13 14 15 16 Page B BANK Chase 2 ��� ���� � � Chase 1 Program Chase 3 Midi / Add Page Select Chase 4 Auto / Del Chase 5 Music Bank-copy Chase 6 ������ DMX OPERATOR 3 TR-MQ 1000 4 Pag. 11 �� SPEED 5 Tapsync Display BLACKOUT FADE TIME 6 14 15 Español 1. scannners (1-12) Scanners 1 2 3 4 5 6 7 8 9 10 11 12 Channel 1-16 17-32 33-48 49-64 65-80 81-96 97-112 113-128 129-144 145-160 10-176 177-192 Fade control OFF OFF OFF OFF OFF OFF OFF OFF OFF OFF OFF OFF LED OFF OFF OFF OFF OFF OFF OFF OFF OFF OFF OFF OFF Scanners 1 2 3 4 5 6 7 8 9 10 11 12 Channel 1-16 17-32 33-48 49-64 65-80 81-96 97-112 113-128 129-144 145-160 10-176 177-192 Fade control ON ON ON ON ON ON ON ON ON ON ON ON LED ON ON ON ON ON ON ON ON ON ON ON ON Pulse el scanner deseado, el LED correspondiente se encenderá, y el canal apropiado se activara para se ajustado, cuando la escena se esta ejecutando, si el control de fader esta en “OFF”, el nivel de salida del canal no estará controlado por este faders, si en control del fader esta en “ON”, la salida del canal 8 será controlado por este fader. 3. Botón de escena Pulse el botón de escena para lanzar la escena o para almacenar la escena, y el segundo digito de la pantalla de LCD mostrara el número de la escena (del 1 al 8). 4. Fade (1-8) Deslice el potenciómetro para ajustar el nivel de salida de DMX desde o a FF (255). 5. Selección de pagina. Pulse para seleccionar la pagina A o la pagina B. 6. Control de velocidad. Mueve este controlador para ajustar la velocidad de de los CHASE. 7.- Control de “FADE TIME” Mueva este control para ajustar el control de “FADE TIME” 8. Pantalla de control (LED) 9. Botón de bancos (Arriba abajo) Pulse “UP” o “DOWN” para incrementar o decrementar el numero del banco, el tercer y cuarto dígitos de la pantalla de LED mostrara el numero de banco que se ha seleccionado. 10 CHASE 1 – CHASE 6 Selecciona el CHASE para programar o para ejecutar. 11 Programas (PROGRAM) Al encender el controlador, este se pone en modo “MANUAL RUN”, pulse el botón de “PROGRAM” durante 2 segundos, el led correspondiente empezara a parpadear, en este momento el controlador esta lista para programar una escena o un CHASE, pulse el botón de “PROGRAM” una vez más para volver al modo de “RUN”, el led correspondiente se apagara. 12 MIDI/ADD a.- Pulse la tecla de “MIDI” para ejecutar, tercer y cuarto digito de la pantalla de control empezara a parpadear, seleccione el canal de MIDI usando los botón de “UP” o “DOWN”, pulse una vez más el botón de “MIDI” o cualquier otra tecla a excepción de las de “UP” y “DOWN” para salir de la configuración de canal MIDI. b.- Pulse esta tecla para crear un programa estando en modo “PROGRAM” 13. AUTO / DEL Español Pag. 12 TR-MQ 1000 a.- En modo “RUN”, pulse el botón de AUTO/DEL, el led correspondiente se encenderá, esto indica que nos encontramos en modo “AUTO RUN”, pulse el botón una vez más para salir del modo “AUTO RUN”, el led correspondiente se apagara. b.- Pulse esta tecla para crear una escena y un CHASE estando en modo “PROGRAM” 14. MUSCI/BANK COPY a.- En modo “RUN”, pulse el botón de “MUSIC”, el led correspondiente se encenderá, esto indica que nos encontramos en modo “MUSIC”, pulse el botón una vez más para salir del modo “AUTO RUN”, el led correspondiente se apagara. b.- Pulse esta tecla para crear una escena y un CHASE estando en modo “PROGRAM” 15. TAP SYNC/DISPLAY a.- En modo AUTO RUN, la velocidad de ejecución de una escena dependerá del intervalo del los dos pulsaciones del TAP SYNC/DISPLAY, hasta una máximo de 10 minutos. b.- En modo “PROGRAM”, muestra la selección entre STEP y BANK, en otros modos muestra en la pantalla los valores entre 00-255 y 0%-100% 16. BLACK-OUT Pulse este botón para desactivar la salida de todos los canales, pero no todas las demás funciones, pulse otra vez para desactivar esta opción. 17. Selección de la polaridad de la señal de DMX Selecciona la polaridad de la señal de DMX. 18. Salida de DMX Conector de salida de señal de DMX 19. Entrada de corriente. DC 9V~12V, 300mA. Mínimo. Programación de escenas Pulse el botón de “PROGRAM” durante 3 segundos, el LED correspondiente empezara a parpadear, esto indica que nos encontramos en modo “PROGRAM” 1.- Programación de escenas. I. Pulse el botón de SCANNER para seleccionar el canal de DMX, compuesto por 8 canales. II. Seleccionar diferentes canales para seleccionar varios aparatos a la vez. III.Ajuste los fader que correspondan para seleccionar el nivel de salida deseado. IV. Seleccione y ajuste el nivel de salida para todos los aparatos a configurar. V. Pulse el botón de “MIDI/ADD” VI. Seleccione el banco deseado usando las teclas de “UP” o “DOWN” VII. Pulse el botón de “SCENE” para almacenar la escena actual. 2.- Edición de escenas I. Seleccione la escena del banco deseado. II. Realice la escena con los dispositivos deseados. III.Pulse el botón de “MIDI/ADD” IV. Pulse “SCENE” para almacenar la escena 3.- Copia de SCANNER I. Si se desea configurar un SCANNER, pulse y mantenga el primer SCANNER. II. Pulse el botón de SCANNER donde quiere que sea copiado el otro SCANNER. 4.- Copiar una escena. I. Seleccione la escena que desea copiar. II. Pulse MIDI/ADD una vez. III.Seleccione el banco y la escena donde desea copiar la escena. 5.- Borrar una escena. I. Seleccione la escena deseada. II. Pulse y mantenga la tecla de AUTO/DEL. Pulse la escena deseada para confirmar la TR-MQ 1000 Pag. 13 Español eliminación. 6.- Limpiar todas las escenas (Todos los canales de DMX se pondrán a 0). I. Pulse PROGRAM + DOWN, mientras el controlador se apaga. II. Vuelva ha encender el controlador. 7. Copiar un banco. I. Seleccionar el banco deseado. II. Pulse el botón de MIDI/ADD. III.Seleccione el banco donde desea copiar. IV. Pulse el botón de MUSIC/BANKCOPY 8. Borrar un banco I. Seleccione el banco a borrar II. Pulse las teclas AUTO/DEL + MUSIC/BANKCOPY Programación de un CHASE. Pulse el botón de PROGRAM, el LED correspondiente empezara a parpadear, esto indica que estamos en modo PROGRAM 1.- Crear un programa CHASE con escenas. I. Un CHASE puede contener hasta 240 escenas. II. El orden de las escenas en el momento de ejecutar el programa es, el primer en programa es el primero en ejecutarse. III.Seleccione el CHASE donde quiere que se guarden las escenas. IV. Seleccione un banco de escenas. V. Pulse MIDI/ADD 2.- Copiar una banco a un CHASE I. Seleccione el banco que desea copiar en el CHASE. II. Pulse MUSIC/BANKCOPY. III.Pulse MIDI/ADD IV. Las escenas del banco serán copiadas al CHASE. 3.- Edición de un CHASE Añadir una escena al CHASE. I. Seleccione el CHASE que quiere editar. II. Pulse la tecla de DISPLAY para conmutar la pantalla a STEP. III.Pulse la tecla MIDI/ADD IV. Seleccione el banco donde esta la escena que quiere añadir al CHASE. V. Pulse otra vez la tecla MIDI/ADD. 4.- Borrar una escena de un CHASE I. Seleccione la escena deseada. II. Pulse la tecla del CHASE deseado mientras mantiene pulsada la tecla de AUTO/DEL. 5.- Limpiar todos los CHASE (Se eliminara todas las escenas) I. Pulse las teclas de DOWN+AUTO/DEL, mientras el controlador se apaga. II. Vuelva a encender el controlador. Ejecutar las escenas. Encienda el controlador, este se pondrá en modo MANUAL RUN. Cuando se esta en modo PROGRAM, pulse el botón de PROGRAM durante unos 2 segundos, hasta que el LED de PROGRAM se apaga, entonces pasaremos a modo MANUAL. Español Pag. 14 TR-MQ 1000 Si no hay ninguna escena programa, todas están en blanco, las escenas no podrán ser ejecutados solo las escenas que estén programadas pueden ser ejecutadas. Si el fader es fijado en “OFF” , la escena se ejecuta con los niveles programados. 1.- Ejecución manual. I. Desactive el modo de funcionamiento “AUTO” y el modo “MUSIC” II. Seleccione el banco deseado, (usando “Up” o “DOWN”, o mediante el interface de MIDI) III.Pulse “SCENE” para ejecutar la escena. IV. O ejecute la escena mediante el interface MIDI. 2.- Auto ejecución. I. Pulse AUTO/DEL, el LED correspondiente se encenderá. II. Pulse TAP SYNC/DISPLAY, pulse lo otra vez después de un tiempo, el tiempo pasado entre las dos pulsaciones, será la velocidad usada en el modo “AUTO RUN”, el tiempo máximo será de 10 minutos. Si se pulsa mas de dos veces, el tiempo de las dos ultimas pulsaciones serán las se tomen como referencia. III.Seleccione el banco deseado, usando “UP” o “DOWN” o a través del interface MIDI. IV. Pulse AUTO/DEL una vez más para desactivar el modo AUTO RUN 3.- Ejecución mediante la música I. Pulse MUSCI/BANKCOPY, la luz correspondiente se encenderá, el modo se establecerá en MUSIC RUN. II. Seleccione el banco deseado, usando “UP” o “DOWN” o el interface MIDI III.Pulse MUSIC/BANKCOPY para desactivar este modo de funcionamiento. 4.- Ejecución median un interface MIDI. Seleccione el banco deseado mediante el interface MIDI, siempre que este en modo MANUAL RUN, AUTO RUN o MUSIC RUN. 5.- Ejecutar un CHASE I. Para ejecutar un CHASE, es necesario haber programado con anterioridad un CHASE, cuando se ejecuta un CHASE, las escenas contenidas se pasaran automáticamente, en el mismo orden en que se han programado. II. CHASE RUN esta incluido en los modos MANUAL RUN, AUTO RUN, AUDIO RUN y MIDI RUN. III.Cada uno de los CHASE se ejecutara en el orden en que se halla seleccionado. IV. Pulse el botón de CHASE, el LED correspondiente se iluminara, esto nos indicara que estamos en CHASE RUN. 6.- Control de FADE TIME. Mueve el potenciómetro para ajustar el FADE TIME, la salida se ajustara automáticamente,. Configuración de canal MIDI 1.- Configuración del canal MIDI. I. Pulse MIDI, el tercer y cuarto digito de la pantalla de control parpadearan, seleccione el canal MIDI a configurar. II. Pulse el botón de MIDI una vez más para salir de la configuración, o también puede pulsar cualquier otra tecla a excepción de “UP” y “DOWN”, o mueva cualquier fader del interface MIDI. 2.- Ejecución mediante el control MIDI. Dependiendo de la nota enviada el controlador ejecutara una función u otra. TR-MQ 1000 Pag. 15 Español BANK BANK1 BANK2 BANK15 CHASE Español Numero de NOTA Función 00 Activa o Desactiva la escena 1 01 Activa o Desactiva la escena 2 02 Activa o Desactiva la escena 3 03 Activa o Desactiva la escena 4 04 Activa o Desactiva la escena 5 05 Activa o Desactiva la escena 6 06 Activa o Desactiva la escena 7 07 Activa o Desactiva la escena 8 08 Activa o Desactiva la escena 1 09 Activa o Desactiva la escena 2 10 Activa o Desactiva la escena 3 ” ” 112 Activa o Desactiva la escena 1 113 Activa o Desactiva la escena 2 114 Activa o Desactiva la escena 3 115 Activa o Desactiva la escena 4 116 Activa o Desactiva la escena 5 117 Activa o Desactiva la escena 6 118 Activa o Desactiva la escena 7 119 Activa o Desactiva la escena 8 120 Activa o Desactiva el CHASE 1 121 Activa o Desactiva el CHASE 2 122 Activa o Desactiva el CHASE 3 123 Activa o Desactiva el CHASE 4 124 Activa o Desactiva el CHASE 5 125 Activa o Desactiva el CHASE 6 126 BACKOUT Pag. 16 TR-MQ 1000
