SWT - ISTR - Ingeniería Software y Tiempo Real
Anuncio
Ingeniería
IngenieríaSoftware
software
de Físicas
4º4º Físicas
Desarrollo de interfaces gráficas de usuario
usando SWT
(Standard Widget Toolkit)
José M. Drake y Patricia López
Computadores y Tiempo Real
Santander, 2008
1
Interfaces gráficas: Programación dirigida por eventos
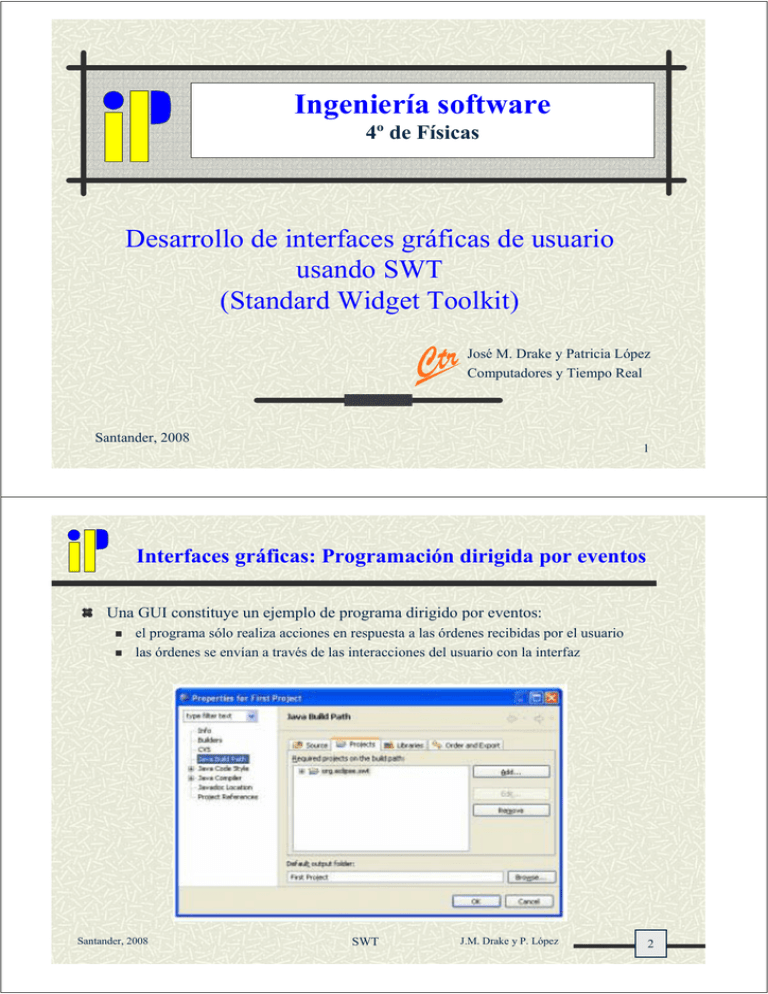
Una GUI constituye un ejemplo de programa dirigido por eventos:
!
!
el programa sólo realiza acciones en respuesta a las órdenes recibidas por el usuario
las órdenes se envían a través de las interacciones del usuario con la interfaz
Santander, 2008
SWT
J.M. Drake y P. López
2
Recursos para desarrollo de GUIs en Java
AWT – Abstract Windows Toolkit
!
Tiene una arquitectura muy simple y consiste en una capa que permite el
acceso desde Java de los recursos gráficos disponibles en el sistema
(Windows, Macintosh, Linux, etc.)
Swing – Introducidas con las Java FoundationClasses
!
Son componente puramente Java y crean un aspecto que es
independiente del sistema que queda por debajo.
SWT - Standard Widget Toolkit
!
Ha sido introducido con la plataforma Eclipse y es una capa muy fina
que proporciona acceso a los elementos nativos. Se basa en la definición
de una interfaz muy sencilla y común para todos los sistemas
JFACE
!
Santander, 2008
Ha sido introducido con la plataforma Eclipse y proporciona recursos
para llevar a cabo las tareas comunes del desarrollo de GUIs. Es útil
cuando se desarrollan GUIs complejas
SWT
J.M. Drake y P. López
3
Incorporar la librería SWT a un proyecto Java en Eclipse
Pulse el botón derecho sobre el proyecto y seleccione Build Path >
Configure Build Path
Seleccione la pestaña Libraries y pulse el botón Add Library.
Seleccione la librería SWT pulse Next y OK para finalizar añadiendo
las librerías SWT a su proyecto.
Santander, 2008
SWT
J.M. Drake y P. López
4
Ejemplo HelloWorld
import org.eclipse.swt.SWT;
import org.eclipse.swt.layout.FillLayout;
import org.eclipse.swt.widgets.Display;
import org.eclipse.swt.widgets.Label;
import org.eclipse.swt.widgets.Shell;
01 public class Helloword {
02
public static void main(String[] args) {
03
Display display = new Display();
04
Shell shell = new Shell(display);
05
shell.setText("Hello World");
06
shell.setBounds(100, 100, 200, 200);
07
shell.setLayout(new FillLayout());
08
Label label = new Label(shell, SWT.CENTER);
09
label.setText("Hola Mundo");
10
shell.open();
11
while (!shell.isDisposed()) {
12
if (!display.readAndDispatch()) display.sleep();
13
}
14
display.dispose();
15
}
16 }
Santander, 2008
SWT
J.M. Drake y P. López
5
Estructura de una GUI desarrollada con SWT
Los objetos de la clase Display representan el enlace entre la aplicación SWT y el gestor
de ventanas del sistema operativo
!
!
No son visibles
Existe un único elemento Display por cada aplicación
Los objetos de la clase Shell representan ventanas visibles dentro de la GUI a través de
las que se interacciona con el usuario
!
!
!
!
Actúa como parent o contenedor de los elementos (Widgets) que forman la GUI.
Gestiona los desplazamientos y cambios de tamaño.
Existe siempre una ventana principal, que se asocia en su creación al Display que la gestiona
Pueden existir ventanas secundarias o diálogos, que se asocian a otras ventanas
Widget es la clase raíz de todos los elementos gráficos que se pueden utilizar en una GUI
SWT
!
Todos los widgets se crean asociados al elemento que pertenecen
La creación de cualquier GUI en SWT se inicia siempre:
Display display = new Display();
Shell shellPrincipal = new Shell(display);
Santander, 2008
SWT
J.M. Drake y P. López
6
Clase Display
Constructor:
!
Display()
Cuando se requiera invocar el objeto Display se puede obtener por los métodos:
!
getCurrent() Retorna el display asociado al thread (línea de flujo) actual, o null si no
!
getdefault() Retorna el display por defecto, que es el primero que se creo en el
hay ninguno asociado a dicho thread.
sistema. Si no existe ninguno, se crea uno.
Otros métodos de interes ofrecidos por la clase Display son:
!
!
!
!
!
!
close() Cierra la conexión entre la GUI y el sistema operativo.
dispose() : Libera los recursos del sistema asociados al display
getActiveShell() Retorna la ventana activa.
getShells() Retorna un array con todas las ventanas disponibles asociadas al display.
getCursorControl() Retorna el elemento de la GUI sobre el que está situado el cursor.
getCursorLocation() Retorna la posición del cursor respecto a la esquina superior
izquierda de
!
!
!
la pantalla
getFocusControl() Retorna el elemento que se encuentra enfocado.
getSystemColor(int) Retorna un color estándar por su índice.
getSystemFont() Retorna el tipo de letra establecido por defecto.
SWT
Santander, 2008
J.M. Drake y P. López
7
Clase Shell
Constructor:
!
!
Shell (Display display) : Crea una ventana asociada al correspondiente display (ventana de
primer nivel).
Shell (Shell shell) : Crea una ventana asociada a otra (ventana secundaria).
Métodos contenidos en su API son:
!
!
!
!
!
!
!
!
Santander, 2008
close() Cierra la ventana y libera los recursos del sistema.
getdisplay() Retorna el display que soporta a la ventana.
getShells() Retorna el array con todas las ventanas definidas en ella.
isEnabled() Retorna True si la ventana está habilitada.
open() Construye la ventana para que se haga visible y admita interacciones.
setActive() Pasa la ventana a primer plano
setEnabled(boolean enabled) Habilita/deshabilita la ventana para que reciba
eventos.
setVisible(boolean visible) Haz visible/novisible la ventana.
SWT
J.M. Drake y P. López
8
Gestión de eventos en una GUI
La interacción entre la GUI y el sistema operativo está dirigida por eventos (los
generados por interacción con los elementos de la GUI).
El thread de la GUI (el que crea el Display) es el único que puede crear o modificar
elementos de control. Si lo hace otro thread, se lanza la excepción SWTException.
El thread de la GUI permanece a la espera de la llegada de eventos, los atiende y
vuelve de nuevo a situación de espera
The GUI Thread
while (!shell.isDisposed()) {
if
(!display.readAndDispatch())
display.sleep();
}
no
Has the shell been disposed?
yes
Reads and dispatches events
Are there events
for dispatching?
yes
Disposes the display
and exits.
no
sleeps
Santander, 2008
SWT
J.M. Drake y P. López
9
Jerarquía de los elementos de control
En el árbol de la derecha se muestra
la jerarquía de los elementos que se
proporcionan en la librería SWT
Todos los elementos descienden de
alguna de estas tres clases
abstractas:
!
Widget: Es el antecesor de todos los
objetos que se pueden añadir a una GUI
SWT.
!
Control: Es el antecesor de todos los
elementos visibles que se pueden incluir
en una GUI SWT.
!
Scrollable: Es el antecesor de todos los
elementos que pueden ser muy grandes,
y por tanto pueden incorporar bandas
laterales de desplazamiento
Santander, 2008
SWT
J.M. Drake y P. López
10
Clase Control
La clase Control, de la que heredan todos los elementos, es la que tiene los
métodos generales más importantes. Algunos métodos interesantes son:
getdisplay() Retorna el display con el que interacciona con el sistema.
getParent() Retorna el elemento dentro del que se ha declarado.
getShell() Retorna el shell dentro de que se encuentra declarado.
isEnabled() Retorna True si el elemento está habilitado para la interacción.
isVisible() Retorna True si es visible en la ventana.
setBackground(Color) Establece el color de fondo.
setBounds(Rectangle) Establece el tamaño y la posición del elemento de control.
setEnabled(boolean) Habilita el elemento para que admita interacción.
setVisible(boolean) Haz que aparezca visible o no el elemento de control.
boolean setFocus() Enfoca el elemento de control para que reciba los eventos del
teclado.
setFont(Font) Establece el tipo de letra.
setLayoutData(Object) Establece los datos que definen la política de distribución de
elementos dentro de él.
setSize(Point) Establece el tamaño del elemento de control.
!
!
!
!
!
!
!
!
!
!
!
!
!
SWT
Santander, 2008
J.M. Drake y P. López
11
Clase Label
Control estático que muestra texto o imágenes no modificables
Constructor:
!
Label (Composite parent, int style)
Estilos que son útiles cuando se crea son:
"
"
"
"
"
"
"
"
"
"
SWT.SHADOW_IN Creates an inset shadow around the widget.
SWT.SHADOW_OUT Creates an outset shadow around the widget.
SWT.SHADOW_NONE Creates a widget with no shadow.
SWT.WRAP Causes the text of the widget to wrap onto multiple lines, if necessary.
SWT.SEPARATOR Creates a single vertical or horizontal line.
SWT.HORIZONTAL Creates a horizontal line.
SWT.VERTICAL Creates a vertical line.
SWT.LEFT Left-justifies the widget within its bounding box.
SWT.RIGHT Right-justifies the widget within its bounding box.
SWT.CENTER Centers the widget within its bounding box.
Métodos que ofrece su API son:
!
setAlignment(int) Controls how text and images will be displaye. Valid arguments
!
setImage(Image) Sets the receiver's image to the argument, which may be null,
!
indicating that no image should be displayed.
setText(String) Sets the receiver's text.
include SWT.LEFT, SWT.RIGHT, and SWT.CENTER.
Santander, 2008
SWT
J.M. Drake y P. López
12
Clase Button
Control que representa un botón, que puede iniciar una acción cuando se pulsa con el ratón.
Constructor:
!
Button (Composite parent, int style)
Estilos útiles para la creación de botones son:
!
SWT.ARROW Creates an arrow button widget.
!
SWT.CHECK Creates a checkbox widget.
!
SWT.PUSH Creates a pushbutton widget.
!
SWT.RADIO Creates a radio button widget.
!
SWT.TOGGLE Creates a toggle button widget.
!
SWT.UP / SWT.DOWN Creates an upward/downward-pointing arrow button.
!
SWT.LEFT/ SWT.RIGHT Creates a leftward/rightwared-pointing arrow button or left/right-justifies the
widget within its bounding box.
!
SWT.CENTER Centers the widget within its bounding box.
Métodos que ofrece su API son:
!
setText(String) Sets the receiver's text.
!
setImage(Image) Sets the receiver's image to the argument,
!
setSelection(boolean) Sets the selection state if it is of type CHECK, RADIO, or TOGGLE
!
getSelection() Gets the selection state
Métodos para manejar los eventos que se produzcan:
!
addSelectionListener(SelectionListener) Adds the listener to the collection of listeners that will be
notified when the control is selected by sending it one of the messages defined in the SelectionListener
interface.
Santander, 2008
SWT
J.M. Drake y P. López
13
Ejemplo de uso de botones
import org.eclipse.swt.*; import org.eclipse.swt.events.*; import org.eclipse.swt.layout.*; import org.eclipse.swt.widgets.*;
public class ButtonExample {
public static void main(String[] args) {
Display display = new Display();
Shell shell = new Shell(display);
shell.setText("Button Example");
shell.setBounds(100, 100, 200, 100);
shell.setLayout(new FillLayout());
final Button button = new Button(shell, SWT.PUSH);
button.setText("Click Me Now");
button.addSelectionListener(
new SelectionAdapter() {
public void widgetSelected(SelectionEvent event) {
button.setText("I Was Clicked");
}
}
);
shell.open();
while (!shell.isDisposed()) {
if (!display.readAndDispatch()) display.sleep(); }
display.dispose();
}}
Santander, 2008
SWT
J.M. Drake y P. López
14
Clase Text
Control que muestra un texto, ofreciendo al operador la posibilidad de modificarlo.
Constructor:
! Text(Composite, int)
Estilos de creación útiles de los elementos tipo Text:
!
!
!
!
!
!
!
SWT.SINGLE Creates a single-line text widget.
SWT.MULTI Creates a multi-line text widget.
SWT.WRAP Causes widget's text to wrap onto multiple lines if necessary.
SWT.READ_ONLY Creates a read-only text widget that cannot be edited.
SWT.LEFT Creates a left-justified text widget.
SWT.RIGHT Creates a right-justified text widget.
SWT.CENTER Creates a center-justified text widget.
Métodos para manejar los eventos que se produzcan:
!
!
!
Santander, 2008
addModifyListener(ModifyListener) Adds the listener to the collection of listeners that will be notified
when the receiver's text is modified by sending it one of the messages defined in the ModifyListener
interface.
addSelectionListener(SelectionListener) Adds the listener to the collection of listeners that will be
notified when the control is selected by sending it one of the messages defined in the SelectionListener
interface.
addVerifyListener(VerifyListener) Adds the listener to the collection of listeners that will be notified
when the receiver's text is verified by sending it one of the messages defined in the VerifyListener
interface.
SWT
J.M. Drake y P. López
15
Clase Text (API continuación)
Métodos que ofrece su API son:
!
!
!
!
!
!
!
!
!
!
Santander, 2008
setText(String) Sets the contents of the receiver to the given string.
getText() Gets the widget text.
clearSelection() Clears the selection.
copy() Copies the selected text to the clipboard.
cut() Cuts the selected text to the clipboard.
paste() Pastes text from the clipboard.
selectAll() Selects all the text in the receiver.
setEchoChar(char echo) Sets the echo character.
setEditable(boolean editable) Sets the editable state.
setTextLimit(int) Sets the maximum number of characters that the
receiver is capable of holding to be the argument.
SWT
J.M. Drake y P. López
16
Elementos contenedores
Composite: Elemento contenedor de otros elementos de
control. Sirve de referencia para el redimensionado de los
elementos contenidos en él.
Group: Tipo especializado de Composite que enmarca una
zona con un borde y posee un título opcional.
Tab folder: Permite organizar la información de una
ventana en múltiples zonas superpuestas que se pueden
seleccionar mediante una pestaña.
SWT
Santander, 2008
J.M. Drake y P. López
17
Clase Composite
El Composite es un elemento contenedor de otros elementos de control.
!
!
Sirve de referencia para el redimensionado de los elementos contenidos en
él.
Se añaden widgets sobre él del mismo modo que se añaden a una Shell
Constructor:
!
Composite (Composite parent, int style)
Estilos útiles de un composite son:
!
!
!
SWT.BORDER Creates a composite widget with a border.
SWT.H_SCROLL Creates a composite widget with a horizontal scrollbar.
SWT.V_SCROLL Creates a composite widget with a vertical scrollbar.
Los métodos que ofrece su API son:
!
getChildren() Returns an array containing the receiver's children.
setLayout(Layout) Sets the layout that is associated with the receiver to be
!
the argument
getLayout() Gets the layout that is associated with the receiver
!
Santander, 2008
SWT
J.M. Drake y P. López
18
Clase Group
Es un tipo específico de Composite que enmarca una zona con un borde
y un título opcional
Constructor:
!
Group (Composite parent, int style)
Estilos útiles para un Group son:
! SWT.BORDER Creates a composite widget with a border.
! SWT.NO_RADIO_GROUP Prevents child radio button behavior.
Métodos que ofrece el API son (hereda los definidos para Composite):
!
setText(String) Sets the receiver's text, which is the string that will be
!
getText() Returns the receiver's text, which is the string that the is used as
the title.
displayed as the receiver's title, to the argument, which may not be null.
Santander, 2008
SWT
J.M. Drake y P. López
19
Clases TabFolder y TabItem
Permite organizar la información de una ventana en múltiples zonas superpuestas que
se pueden seleccionar mediante una pestaña.
Constructor:
! TabFolder (Composite parent, int style)
Estilos útiles de un composite son:
" SWT.TOP
" SWT.BOTTOM
Las pestañas se introducen añadiendo objetos hijos del tipo TabItem
! Constructores de TabItem:
" TabItem( TabFolder parent, int style)
" TabItem( TabFolder parent, int style, int index)
Métodos para manejar los eventos que se produzcan:
! addSelectionListener(SelectionListener) Adds the listener to the collection of
listeners that will be notified when the receiver's selection changes by sending it
one of the messages defined in the SelectionListener interface.
Santander, 2008
SWT
J.M. Drake y P. López
20
Clases TabFolder y TabItem (2)
Métodos útiles que ofrece la clase TabFolder son:
! TabItem getItem(int) Returns the item at the given, zero-relative index in the
receiver.
! getItemCount() Returns the number of items contained in the receiver.
! getItems() Returns an array of TabItems that are items in the receiver.
! getSelection() Returns an array of TabItems that are currently selected in the
receiver.
! getSelectionIndex() Returns the zero-relative index of the item that is currently
selected in the receiver, or -1 if no item is selected.
! indexOf(TabItem item) Searches the receiver's list starting at the first item
(index 0) until an item is found that is equal to the argument, and returns the
index of that item.
! setSelection(int) Selects the item at the given zero-relative index in the receiver.
Los elementos TabItem ofrecen en su API los siguientes métodos:
! setImage(Image image) Set the image label for the the tab item.
! setText(String string) Set the text label for the the tab item.
Santander, 2008
SWT
J.M. Drake y P. López
21
Ejemplo de un TabFolder
Button button =
new
Button(composite,
SWT.PUSH);
button.setBounds(25, 25, 100, 25);
button.setText("Click Me Now");
button.addSelectionListener(
new SelectionAdapter(){
public void widgetSelected(
SelectionEvent event) {
((Button)event.widget)
.setText("I
Was
Clicked");
}
});
}
shell.open();
while (!shell.isDisposed()) {
if (!display.readAndDispatch()) display.sleep();
}
display.dispose();
}
import org.eclipse.swt.*;
import org.eclipse.swt.events.*;
import org.eclipse.swt.layout.*;
import org.eclipse.swt.widgets.*;
public class TabFolderExample {
public static void main(String[] args) {
Display display = new Display();
Shell shell = new Shell(display);
shell.setText("TabFolder Example");
shell.setBounds(100, 100, 175, 125);
shell.setLayout(new FillLayout());
final TabFolder tabFolder =
new TabFolder(shell, SWT.BORDER);
for (int i = 1; i < 4; i++) {
TabItem tabItem =
new TabItem(tabFolder, SWT.NULL);
tabItem.setText("Tab " + i);
Composite composite =
new Composite(tabFolder, SWT.NULL);
tabItem.setControl(composite);
}
Santander, 2008
SWT
J.M. Drake y P. López
22
Otros elementos de control
Existen otros elementos de control muy útiles que no se
incluyen en esta presentación:
!
!
!
!
!
!
List Muestra una lista de elementos permitiendo seleccionar uno de
ellos.
Combo Similar a una Lista, pero muestra de forma singularizada el
elemento elegido. Y si es configurado a tal fin puede introducir un
nuevo valor en el campo de texto elegido.
Tabla Muestra una lista vertical y multicolumna de elementos. Cada
línea de la tabla es un elemento de la lista.
Tree Sirve para mostrar una información jerarquizada. Un árbol
consiste en una lista de elementos que a su vez contiene de forma
recursiva otros elementos.
Menus Proporciona un modo sencillo de ofrecer un amplio conjunto
de comandos y acciones. Los menús son jerarquizados
......
SWT
Santander, 2008
J.M. Drake y P. López
23
Gestión de recursos
Los recursos del sistema operativo deben ser gestionados por el programador y
deben seguirse las dos reglas:
!
!
Si se crea explícitamente un recurso, el recurso debe ser explícitamente liberado
(con dispose)
Cuando se libera un “parent” se liberan todos los hijos.
Los recursos de la plataforma para los que SWT ofrece clases manejadoras son:
!
Color: son utilizados por diferentes elementos para establecer su color
“foreground color” y el color del fondo “background color”.
"
!
Color (Display parent, int red, int green, int blue)
Font los font pueden ser creados con su nombre, tamaño y estilo:
"
Font (Display parent, string name, int heigh, int style)
Ejemplo myFont = new Font(Display.getCurrent(),”Arial”, 10, SWT.Bold)
!
Image Permite decorar muchos de los elementos con un icono. Admite muchos
formatos GIF, JPEG, PNG, BMP e ICO. Se crea haciendo referencia al fichero
que la contiene:
Image (Display parent, String filename)
Ejemplo: Image img = new Image(null, "c:\my_button.gif")
"
Santander, 2008
SWT
J.M. Drake y P. López
24
Layouts
Permite establecer la política de visualización de los elementos
dentro de un contenedor.
!
Se asignan a través de la operación setLayout que poseen todos los elementos
contenedores
Términos que se utilizan:
!
!
!
!
Área cliente: Área del objeto con capacidad de mostrar elementos
Márgenes: Número de pixels entre los elementos y los bordes del contenedor.
Espacio: Número de pixels entre los elementos de un mismo contenedor
Tamaño preferido: Usualmente hace referencia al mínimo tamaño que es requerido para
visualizar el elemento de control.
Trim
Top marging
Botón 2
Botón 1
Bot 3
Spacing
Bottom marging
Left marging
SWT
Santander, 2008
Right marging
J.M. Drake y P. López
25
FillLayout
Permite que los elementos hijos ocupen completamente una fila o una columna de un contenedor
!
!
Los elementos añadidos se expanden para ocupar todo el espacio
Al redimensionar, todos los elementos se redimensionan
Constructor
!
!
FillLayout()
FillLayout(int type)
Atributos:
!
Type: Determines the orientation of the layout
"
"
!
SWT.HORIZONTAL (default)
SWT.VERTICAL
marginHeight, marginWidth, spacing
shell.setLayout(new FillLayout());
for (int i = 1; i <= 8; i++) {
button = new Button(shell, SWT.PUSH);
button.setText("B" + i);
);
Santander, 2008
SWT
J.M. Drake y P. López
26
RowLayout
Sitúa elementos en filas y columnas, conforme se añaden elementos se sitúan en
fila o columna (según el tipo de RowLayout elegido), cuando llega al final del
contenedor pasa a la siguiente.
Constructor
!
!
RowLayout()
RowLayout(int type)
Atributos:
!
type Determina la orientación del layout (SWT.HORIZONTAL (default) and
!
justify Especifica si los elementos de una fila se encuentran completamente
!
pack Especifica si los elementos de una fila ocupan solo su tamaño por defecto
marginBottom Especifica el número de pixels entre los elementos y el lado inferior.
marginLeft Especifica el número de pixels entre los elementos y el lado izquierdo.
marginRight Especifica el número de pixels entre los elementos y el lado derecho.
marginTop Especifica el número de pixels entre los elementos y el lado superior.
Spacing: Especifica el número de pixels entre los elementos de la fila.
wrap Especifica si cuando no hay tamaño pasan los objetos a la fila siguiente
SWT.VERTICAL).
justificados, sin espacio sobrante entre ellos
!
!
!
!
!
!
SWT
Santander, 2008
J.M. Drake y P. López
27
Clase RowLayout
La anchura y la altura de los elementos en el layout se pueden controlar
utilizando objetos RowData, los cuales son asignados a los elementos
utilizando el método setLayoutData().
RowData tiene los atributos:
!
!
Santander, 2008
width Specifies the width of the cell in pixels.
height Specifies the height of the cell in pixels.
SWT
J.M. Drake y P. López
28
Clase GridLayout
Los elementos hijos se organizan por filas y columnas y ofrece una amplia gama de
opciones para controlar sus tamaños.
!
Se define de entrada el número de columnas (o filas) que se desean
Es el tipo de layout mas útil y por tanto el más usado
Atributos de GridLayout:
!
horizontalSpacing Especifica el número de pixels entre el lado derecho de
!
makeColumnsEqualWidth Establece que todas las columnas son de igual
!
marginWidth Especifica el número de pixels usados para los márgenes
una celda y el izquierdo de la siguiente.
anchura.
!
!
!
derecho e izquierdo de la malla.
marginHeight Especifica el número de pixels para los márgenes superior e
inferior de la malla.
numColumns Especifica el número de columnas que deben usarse en la
malla.
verticalSpacing Especifica el número de píxeles entre el fondo de una celda y
la parte superior de la vecina.
Santander, 2008
SWT
J.M. Drake y P. López
29
Clase GridData
Las características de layout de cada elemento puede controlarse usando un
objeto GridData, el cual se asigna con el método setLayoutData().
Atributos de GridData:
!
!
!
!
!
!
!
!
!
grabExcessHorizontalSpace: Especifica si una celda debe crecer para consumir el espacio horizontal
extra.
grabExcessVerticalSpace: Especifica si una celda debe crecer para consumir el espacio vertical
extra.
heightHint: Especifica la altura mínima del elemento (y por tanto de la fila que lo contiene).
horizontalAlignment: Especifica el tipo de alineación horizontal (SWT.BEGINNING,
SWT.CENTER, SWT.END, and SWT.FILL. SWT.FILL).
horizontalIndent: Especifica el número de pixels entre el elemento y el lado izquierdo de la malla.
horizontalSpan: Especifica el número de columnas en la malla a los que puede extenderse los
elementos.
verticalAlignment: Especifica el tipo de alineación horizontal (SWT.BEGINNING, SWT.CENTER,
SWT.END, and SWT.FILL).
verticalSpan: Especifica el número de filas en la malla a los que puede extenderse los elementos.
widthHint: Especifica la anchura mínima del elemento (y por tanto de la columna que lo contiene).
Santander, 2008
SWT
J.M. Drake y P. López
30
Ejemplo de uso de GridLayout
import org.eclipse.swt.*;
import org.eclipse.swt.layout.*;
import org.eclipse.swt.widgets.*;
public class GridLayoutExample {
public static void main(String[] args) {
Label label;
Text text;
GridData gridData;
Display display = new Display();
Shell shell = new Shell(display);
shell.setText("GridLayout Example");
shell.setBounds(100, 100, 200, 100);
GridLayout layout = new GridLayout();
layout.numColumns = 2;
shell.setLayout(layout);
label = new Label(shell, SWT.LEFT);
label.setText("Enter your first and last name");
gridData = new GridData();
gridData.horizontalSpan = 2;
SWT
Santander, 2008
label.setLayoutData(gridData);
label = new Label(shell, SWT.LEFT);
label.setText("First:");
text = new Text(shell,
SWT.SINGLE
|
SWT.BORDER);
gridData = new GridData();
gridData.horizontalAlignment = GridData.FILL;
gridData.grabExcessHorizontalSpace = true;
text.setLayoutData(gridData);
shell.open();
while (!shell.isDisposed()) {
if (!display.readAndDispatch())
display.sleep();
}
display.dispose();
}
}
J.M. Drake y P. López
31
Clase FormLayout
Con FormLayout se tiene control independiente sobre el tamaño de
cada uno de los cuatro lados de un elemento.
Los cuatro lados top, bottom, left y right pueden ser asociados
independientemente a los lados del contenedor parent, o a los lados
de cualquier elemento hermano dentro del mismo contenedor,
usando offset fijos o relativos.
FormLayout tiene dos atributos:
!
!
marginWidth Specifies the number of pixels of horizontal margin that will be
placed along the left and right edges of the layout.
marginHeight Specifies the number of pixels of vertical margin that will be
placed along the top and bottom edges of the layout.
El FormLayout sólo especifica los márgenes del contenedor.
Los objetos FormData contiene por cada uno de los lados cuatro
diferentes objetos FormAttachment:
Santander, 2008
SWT
J.M. Drake y P. López
32
Clase FormData
Los atributos de los FormData son:
!
!
!
!
!
!
Santander, 2008
top Specifies the attachment for the top side of the control.
bottom Specifies the attachment for the bottom side of the control.
left Specifies the attachment for the left side of the control.
right Specifies the attachment for the right side of the control.
width Specifies the preferred width in pixels of the control in the form.
height Specifies the preferred height in pixels of the control in the form.
SWT
J.M. Drake y P. López
33
Clase FormAttachment
Los atributos de los FormAttachment son:
!
!
!
!
!
Santander, 2008
alignment: Especifica el alineamiento del lado del elemento a otro
elemento. Puede tomar los valores SWT.DEFAULT, SWT.TOP,
SWT.BOTTOM, SWT.CENTER, SWT.LEFT and SWT.RIGHT.
control: Especifica el elemento objetivo al que hace referencia el
enlace.
denominator: Especifica el denominador de un término "a" en la
ecuación y = ax + b, que define la ligadura.
numerator Especifica el numerador que define el término "a" en la
ecuación y = ax + b, que define la ligadura.
offset Especifica el offset en pixels del lado del elemento que se
liga; puede ser positivo o negativo. Este es el termino "b" en la
ecuación y= ax + b, que define la ligadura.
SWT
J.M. Drake y P. López
34
Ejemplo de uso de FormLayout
En el ejemplo se crea un layout que tiene dos botones en la esquina lateral
derecha de un campo de texto que llena el espacio disponible.
!
!
!
El botón Cancel se asocia a la esquina inferior derecha.
El botón OK es asociado al lado inferior de la ventana y a el lado izquierdo del
botón Cancel.
El campo de texto es asociados a los lados superior, izquierdo y derecho de la
ventana y al lado superior del botón Cancel.
Santander, 2008
SWT
J.M. Drake y P. López
35
Código del ejemplo
public class FormLayoutExample {
public static void main(String[] args) {
FormData formData;
Display display = new Display();
final Shell shell = new Shell(display);
shell.setText("FormLayout Example");
shell.setBounds(100, 100, 220, 180);
shell.setLayout(new FormLayout());
formData.right =
new FormAttachment(cancelButton,-5);
formData.bottom = new FormAttachment(100,-5);
okButton.setLayoutData(formData);
Text text = new Text(shell,
SWT.MULTI | SWT.BORDER);
formData = new FormData();
formData.top = new FormAttachment(0,5);
formData.bottom =
new FormAttachment( cancelButton,-5);
formData.left = new FormAttachment(0,5);
formData.right = new FormAttachment(100,-5);
text.setLayoutData(formData);
Button cancelButton = new Button(
shell, SWT.PUSH);
cancelButton.setText("Cancel");
formData = new FormData();
formData.right = new FormAttachment(100,-5);
formData.bottom =
new FormAttachment(100,-5);
cancelButton.setLayoutData(formData);
Button okButton = new Button(shell, SWT.PUSH);
okButton.setText("OK");
formData = new FormData();
Santander, 2008
SWT
shell.open();
while (!shell.isDisposed()) {
if (!display.readAndDispatch()) display.sleep();}
display.dispose();
}
}
J.M. Drake y P. López
36
Eventos en SWT
Un evento es el mecanismo que se utiliza para notificar a una aplicación
cuando el operador ha realizado una acción sobre el sistema (ratón,
teclado, etc.)
En consecuencia, se ejecuta alguna actividad en la aplicación
La aplicación puede ser notificada sobre:
!
!
!
!
!
!
Santander, 2008
Entrada de un texto
Haber movido el ratón
Haber pulsado el botón del ratón
Cambios de selección de elementos
Haber eliminado (dispose) un elemento
....
SWT
J.M. Drake y P. López
37
Ciclo de procesamiento de un evento en SWT
El sistema operativo controla los dispositivos que pueden generar eventos, y los
organiza como una cola de mensajes.
El objeto Display usando el método readAndDispatch() gestiona los eventos de la
cola y aquellos que son relevantes los transforma en eventos que remite a la Shell.
La Shell determina a que elemento (widget) afecta el evento, y se lo transfiere.
El elemento se lo notifica a todos los objetos declarados como Listener
En cada objeto notificado se ejecuta el método handleEvent que gestiona sus efectos
en el contexto del objeto.
Santander, 2008
SWT
J.M. Drake y P. López
38
Patrón Observador
Event Sources: Son los widgets y el Display en los que se genera el evento.
Event Listener: Son objetos que implementan la interface Listener o instancias
de la interfaz EventListener, que están interesados en un determinado tipo de
evento.
Proceso de registro de los Event Listener: Proceso en el que un objeto (Event
Listener) ejecuta en un Event Source un método del tipo widget.addListener
para registrarse como interesado de un tipo de evento que se puede generar en
él.
Event data: Información que transfiere el EventSource al Event Listener con la
notificación del evento.
Proceso de distribución de eventos: Mecanismo que utiliza SWT para
transferir los eventos a los objetos interesados.
Santander, 2008
SWT
J.M. Drake y P. López
39
Ejemplo de atención de un evento.
Button elBotón = new Button(shell, SWT.PUSH);
elBotón.addSelectionListener(elInteresado);
elInteresado=new Interesado();
private class Interesado implements SelectionListener {
public void widgetDefaultSelected(SelectionEvent e){
}
public void widgetSelected(SelectionEvent e){
System.out.println(“Botón pulsado”);
}
}
....
Santander, 2008
SWT
J.M. Drake y P. López
40
Ejemplo equivalente
Button elBotón = new Button(shell, SWT.PUSH);
elBotón.addSelectionListener( new SelectionListener(){;
public void widgetDefaultSelected(SelectionEvent e){
}
public void widgetSelected(SelectionEvent e){
System.out.println(“Botón pulsado”);
}
});
....
Santander, 2008
SWT
J.M. Drake y P. López
41
Ejemplo de manejo de eventos a través de botones
import org.eclipse.swt.*; import org.eclipse.swt.events.*; import org.eclipse.swt.layout.*; import org.eclipse.swt.widgets.*;
public class ButtonExample {
public static void main(String[] args) {
Display display = new Display();
Shell shell = new Shell(display);
shell.setText("Button Example");
shell.setBounds(100, 100, 200, 100);
shell.setLayout(new FillLayout());
final Button button = new Button(shell, SWT.PUSH);
button.setText("Click Me Now");
button.addSelectionListener(
new SelectionAdapter() {
public void widgetSelected(SelectionEvent event) {
button.setText("I Was Clicked");
}
}
);
shell.open();
while (!shell.isDisposed()) {
if (!display.readAndDispatch()) display.sleep(); }
display.dispose();
}}
Santander, 2008
SWT
J.M. Drake y P. López
42
Tipos de eventos (Typed Event)
Son eventos específicos <EventName>, como “KeyEvent” o “SelectionEvent”
definidos para una determinada interacción
En la siguientes tablas se muestran estos tipos de eventos:
Santander, 2008
SWT
J.M. Drake y P. López
43
SWT
J.M. Drake y P. López
44
Tipos de eventos (2)
Santander, 2008
Typed Event Data
Los TypedEvent son subclases del tipo java.util.EventObject que
proporciona una cierta información asociada, y métodos para acceder a
ella.
Santander, 2008
SWT
J.M. Drake y P. López
45
TypedEvent específicos
Cada TypedEvent específico puede tener asociada una
información complementaria.
Por ejemplo KeyEvent contiene la información adicional:
!
!
!
Santander, 2008
character—Proporciona un valor char que corresponde a la tecla
pulsada.
stateMask—Retorna un entero que representa el estado del teclado.
keyCode—Proporciona las constantes públicas SWT que
corresponden con la teclas y que se llaman key code, y que se
pueden consultar en la documentación.La aplicación puede
determinar si se han pulsado teclas de control como Alt, Ctrl, Shift,
and Command keys
SWT
J.M. Drake y P. López
46
Ejemplo de gestión de los eventos de teclado
Button button = new Button(shell, SWT.CENTER);
button.addKeyListener(new KeyAdapter(){
public void keyPressed(KeyEvent e){
String string = "";
if ((e.stateMask & SWT.ALT) != 0) string += "ALT-";
if ((e.stateMask & SWT.CTRL) != 0) string += "CTRL-";
if ((e.stateMask & SWT.COMMAND) != 0) string += "COMMAND-";
if ((e.stateMask & SWT.SHIFT) != 0) string += "SHIFT-";
switch (e.keyCode){
case SWT.BS: string += "BACKSPACE"; break;
case SWT.CR: string += "CARRIAGE RETURN"; break;
case SWT.DEL: string += "DELETE"; break;
case SWT.ESC: string += "ESCAPE"; break;
case SWT.LF: string += "LINE FEED"; break;
case SWT.TAB: string += "TAB"; break;
default: string += e.character; break;
} System.out.println (string);
}
});
Santander, 2008
SWT
J.M. Drake y P. López
47
J.M. Drake y P. López
48
Adaptadores
Los
adaptadores
son
clases
abstractas que implementan las
interfaces Listener y proporcionan
implementaciones por defecto (no
hacen nada) de los metodos
requeridos por la interfaz.
Con su uso el programador sólo
tiene que sobreescribir los métodos
de interés.
Santander, 2008
SWT
Uso de adaptadores
Button elBotón = new Button(shell, SWT.PUSH);
elBotón.addSelectionListener( new SelectionAdapter(){;
public void widgetSelected(SelectionEvent e){
System.out.println(“Botón pulsado”);
}
});
....
SWT
Santander, 2008
J.M. Drake y P. López
49
Eventos sin tipo
Son eventos que pueden ser utilizados para quedarse a la
escucha de cualquier tipo de evento.
Los objetos que quedan a la escucha deben implementar la
interfaz Listener. Esta interfaz requiere implementar el
único procedimiento:
public void handleEvent(Event event)
La clase de evento Event contiene una información muy
completa sobre el estado del sistema.
El registro se puede realizar sobre el Display y sobre
cualquier Elemento (Widget):
public void addListener(int eventType, Listener listener);
public void removeListener(int eventType, Listener listener);
Santander, 2008
SWT
J.M. Drake y P. López
50
Tipos de eventos
Santander, 2008
SWT
J.M. Drake y P. López
51
Ejemplo de UntypedEvent
Listener listener = new Listener (){
public void handleEvent (Event event){
switch (event.type){
case SWT.KeyDown:
if (event.character == 'b')
System.out.println("Key"+event.character);
break;
case SWT.MouseDown:
if (event.button == 3)
System.out.println("Right click");
break;
case SWT.MouseDoubleClick:
System.out.println("Double click");
break;
}
}};
Button button = new Button(shell, SWT.CENTER);
button.addListener(SWT.KeyDown, listener);
button.addListener(SWT.MouseDown, listener);
button.addListener(SWT.MouseDoubleClick, listener);
Santander, 2008
SWT
J.M. Drake y P. López
52
Gráficos
Para dibujar sobre un elemento de una interfaz SWT, es necesario
generar un contexto gráfico sobre él.
El contexto gráfico está representado por la clase GC, que ofrece
varios métodos para realizar operaciones gráficas.
La creación de GC sobre un elemento se realiza con los constructores:
Ejemplo: para obtener el contexto gráfico de una Shell:
Shell myShell = new Shell(Display);
GC contextoGrafico = new GC(myShell);
Santander, 2008
SWT
J.M. Drake y P. López
53
Objetos Drawable
En la siguiente tabla se muestran los objetos que implementan la
interfaz Drawable, y sobre los que se pueden dibujar:
Santander, 2008
SWT
J.M. Drake y P. López
54
Métodos de dibujo sobre un GC
Para dibujar se considera el origen de coordenadas en la esquina
superior izquierda de la superficie de dibujo
Algunos métodos que se ofrecen para dibujar son:
!
!
!
!
!
!
Santander, 2008
drawRectangle(int x, int y, int width, int height): Draws the outline of the
rectangle specified by the arguments, using the receiver's foreground color.
fillRectangle(int x, int y, int width, int height): Fills the interior of the rectangle
specified by the arguments, using the receiver's background color.
drawLine(int x1, int y1, int x2, int y2): Draws a line, using the foreground color,
between the points (x1, y1) and (x2, y2).
drawOval(int x, int y, int width, int height): Draws the outline of an oval, using
the foreground color, within the specified rectangular area.
drawOval(int x, int y, int width, int height): Fills the interior of an oval, within
the specified rectangular area, with the receiver's background color.
drawPolygon(int[] pointArray) Draws the closed polygon which is defined by
the specified array of integer coordinates, using the receiver's foreground color.
SWT
J.M. Drake y P. López
55
J.M. Drake y P. López
56
Ejemplo de dibujo de figuras
import org.eclipse.swt.SWT;
import org.eclipse.swt.graphics.*;
import org.eclipse.swt.widgets.*;
public class DrawExample{
public static void main (String [] args){
Display display = new Display();
Shell shell = new Shell(display);
shell.setText("Drawing Example");
Canvas canvas = new Canvas(shell, SWT.NONE);
canvas.setSize(150, 150);
canvas.setLocation(20, 20);
shell.open ();
shell.setSize(200,220);
GC gc = new GC(canvas);
gc.drawRectangle(10, 10, 40, 45);
gc.drawOval(65, 10, 30, 35);
gc.drawLine(130, 10, 90, 80);
gc.drawPolygon(new int[] {20, 70, 45, 90, 70, 70});
gc.drawPolyline(new int[] {10,120,70,100,100,130,130,75});
gc.dispose();
while (!shell.isDisposed()){
if (!display.readAndDispatch()) display.sleep();
}display.dispose();
}
}
Santander, 2008
SWT
Dibujos y PaintEvent
Si un objeto sobre el que se ha dibujado un gráfico, se
redimensiona, el gráfico es borrado. Es importante volver a
dibujarlo en el nuevo tamaño, para mantener su apariencia.
Un control que cambia su apariencia, lanza el evento
PaintEvent. Apoyandose en la respuesta a estos eventos se
pueden mantener los dibujos.
Un aspecto importante de los PaintListener es que cada
PaintEvent contiene su propio GC.
Santander, 2008
SWT
J.M. Drake y P. López
57
Ejemplo de redimensionado de un dibujo
Canvas canvas = new Canvas(shell, SWT.NONE);
canvas.setSize(150, 150);
canvas.setLocation(20, 20);
canvas.addPaintListener(new PaintListener(){
public void paintControl(PaintEvent pe){
GC gc = pe.gc;
gc.drawPolyline(new int[] {10,120,70,100,100,130,130,75});
}
});
shell.open();
Santander, 2008
SWT
J.M. Drake y P. López
58
