Sterilizer Instructions
Anuncio
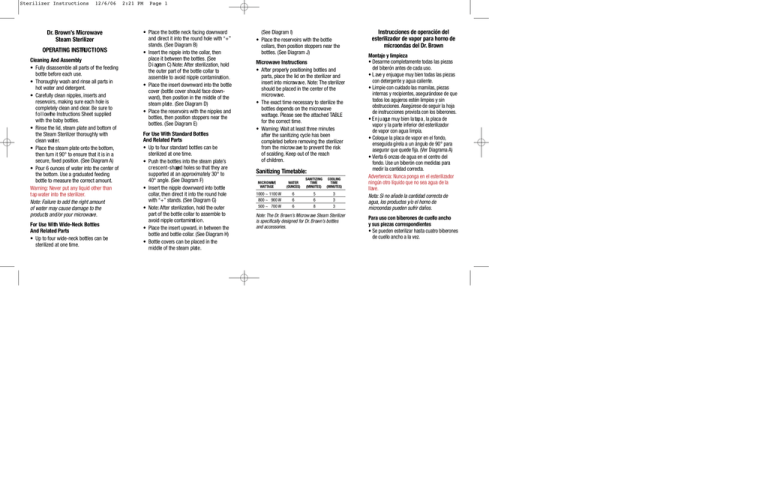
Sterilizer Instructions 12/6/06 Dr. Brown’s Microwave Steam Sterilizer OPERATING INSTRU C T I O N S Cleaning And Assembly • Fully disassemble all parts of the feeding bottle before each use. • Thoroughly wash and rinse all parts in hot water and detergent. • Carefully clean nipples, inserts and reservoirs, making sure each hole is completely clean and clear. Be sure to f o l l owthe Instructions Sheet supplied with the baby bottles. • Rinse the lid, steam plate and bottom of the Steam Sterilizer thoroughly with clean wat e r. • Place the steam plate onto the bottom, then turn it 90° to ensure that it is in a secure, fixed position. (See Diagram A) • Pour 6 ounces of water into the center of the bottom. Use a graduated feeding bottle to measure the correct amount. Warning: Never put any liquid other than t ap water into the sterilizer. Note: Failure to add the right amount of water may cause damage to the products and/or your microwave. For Use With Wide-Neck Bottles And Related Parts • Up to four wide-neck bottles can be sterilized at one time. 2:21 PM Page 1 • Place the bottle neck facing downward and direct it into the round hole with “+” stands. (See Diagram B) • Insert the nipple into the collar, then place it between the bottles. (See D i agram C) Note: After sterilization, hold the outer part of the bottle collar to assemble to avoid nipple contamination. • Place the insert downward into the bottle cover (bottle cover should face downward), then position in the middle of the steam plat e . (See Diagram D) • Place the reservoirs with the nipples and bottles, then position stoppers near the bottles. (See Diagram E) For Use With Standard Bottles And Related Parts • Up to four standard bottles can be sterilized at one time. • Push the bottles into the steam plate’s crescent-shaped holes so that they are supported at an approximately 30° to 40° angle. (See Diagram F) • Insert the nipple downward into bottle collar, then direct it into the round hole with “+” stands. (See Diagram G) • Note: After sterilization, hold the outer part of the bottle collar to assemble to avoid nipple contaminat i o n . • Place the insert upward, in between the bottle and bottle collar. (See Diagram H) • Bottle covers can be placed in the middle of the steam plat e . (See Diagram I) • Place the reservoirs with the bottle collars, then position stoppers near the bottles. (See Diagram J) Microwave Instructions • After properly positioning bottles and parts, place the lid on the sterilizer and insert into microw av e . Note: The sterilizer should be placed in the center of the microwave. • The exact time necessary to sterilize the bottles depends on the microwave wattage. Please see the attached TABLE for the correct time. • Warning: Wait at least three minutes after the sanitizing cycle has been completed before removing the sterilizer from the microw ave to prevent the risk of scalding. Keep out of the reach of children. Sanitizing Timetable: M I C R O WAVE WATTAGE 1000 ~ 1100 W 800 ~ 900 W 500 ~ 700 W WATER (OUNCES) SANITIZING TIME (MINUTES) COOLING TIME (MINUTES) 6 6 6 5 6 8 3 3 3 Note: The Dr. Brown’s Microw ave Steam Sterilizer is specifically designed for Dr. Brown’s bottles and accessories. Instrucciones de operación del esterilizador de vapor para horno de microondas del Dr. Brown Montaje y limpieza • Desarme completamente todas las piezas del biberón antes de cada uso. • L ave y enjuague muy bien todas las piezas con detergente y agua caliente. • Limpie con cuidado las mamilas, piezas internas y recipientes, asegurándose de que todos los agujeros estén limpios y sin obstrucciones. Asegúrese de seguir la hoja de instrucciones provista con los biberones. • E n j u ague muy bien la tap a , la placa de vapor y la parte inferior del esterilizador de vapor con agua limpia. • Coloque la placa de vapor en el fondo, enseguida gírela a un ángulo de 90° para asegurar que quede fija. (Ver Diagrama A) • Vierta 6 onzas de agua en el centro del fondo. Use un biberón con medidas para medir la cantidad correcta. Advertencia: Nunca ponga en el esterilizador ningún otro líquido que no sea agua de la llave. Nota: Si no añade la cantidad correcta de agua, los productos y/o el horno de microondas pueden sufrir daños. Para uso con biberones de cuello ancho y sus piezas correspondientes • Se pueden esterilizar hasta cuatro biberones de cuello ancho a la vez. Sterilizer Instructions 12/6/06 • Coloque el cuello del biberón hacia abajo directamente en el agujero redondo con soportes "+". (Ver Diagrama B) • Inserte la mamila en el cuello y colóquela entre un biberón y otro. (Ver Diagrama C) Nota: Después de la esterilización, sujete la parte externa del cuello del biberón que ha de armar para evitar la contaminación de la mamila. • Coloque la pieza interna hacia abajo en la cubierta del biberón (la cubierta del biberón debe estar hacia abajo) y enseguida acomode la parte media de la placa de vapor. (Ver Diagrama D) • Coloque los recipientes con las mamilas y los biberones y luego acomode los tap o n e s cerca de los biberones. (Ver Diagrama E) Para uso con biberones estándar y sus piezas correspondientes • Se pueden esterilizar hasta cuatro biberones estándar a la vez. • Empuje los biberones en los agujeros de media luna de la placa de vapor de manera que queden ap oyados a un ángulo aproximado de 30 a 40°. (Ver Diagrama F) • Inserte la mamila hacia abajo en el cuello del biberón y luego apúntelo hacia el agujero redondo con soportes "+". (Ver Diagrama G) • Nota: Después de la esterilización, sujete la parte externa del cuello del biberón que ha de armar para evitar la contaminación de la mamila. • Coloque las piezas internas hacia arriba, entre el biberón y el cuello del biberón. (Ver D i agrama H) 2:21 PM Page 5 • Las cubiertas de los biberones se pueden acomodar en medio de la placa de vapor. (Ver Diagrama I) • Coloque los recipientes con los cuellos de los biberones y luego acomode los tap o n e s cerca de los biberones. (Ver Diagrama J) A G Instrucciones para uso en horno de microondas B H C I D J E K • Después de acomodar correctamente los biberones y sus piezas, coloque la tapa en el esterilizador y métalo al horno de microondas. Nota: El esterilizador debe colocarse en el centro del horno de microondas. • El tiempo exacto necesario para esterilizar los biberones depende de los vatios del horno de microondas. Por favor consulte el tiempo correcto en la TABLA incluida. • Advertencia: Espere por lo menos tres minutos después del ciclo de saneado antes de sacar el esterilizador del horno de microondas para evitar quemaduras. Mantenga el esterilizador fuera del alcance de los niños. Tabla de tiempo de saneado: VATIOS DEL HORNO DE MICROONDAS 1000 ~ 1100 W 800 ~ 900 W 500 ~ 700 W AGUA (ONZAS) TIEMPO DE SANEADO (MINUTOS) TIEMPO DE ENFRIAMIENTO (MINUTOS) 6 6 6 5 6 8 3 3 3 Nota: El esterilizador de vapor del Dr. B r own para uso en horno de microondas está diseñado específicamente para biberones y accesorios del Dr. Brown. F HANDI-CRAFT® COMPANY www.handi-craft.com 1-800-778-9001 Made in China. Hecho en Chine. U.S. Patent Nos. 5,570,796 5,779,071 ©2006 Handi-Craft Company
