1013 série TC-C - TC-R - TC-S.qxp
Anuncio
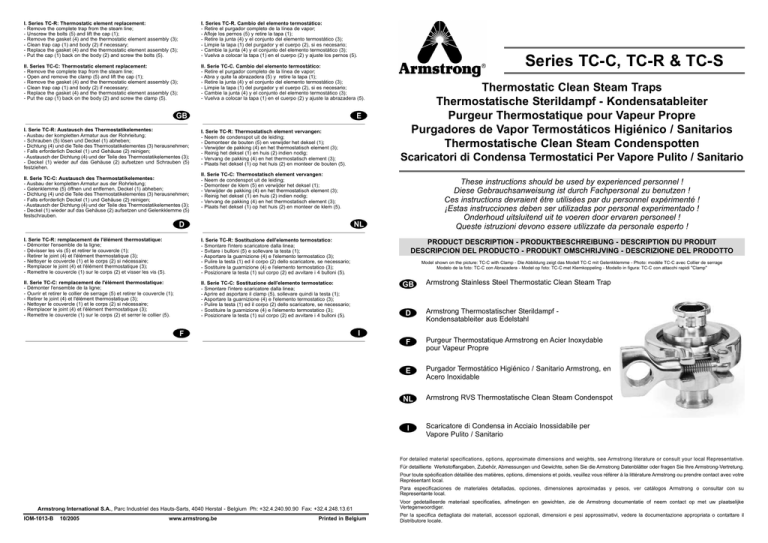
I. Series TC-R: Thermostatic element replacement: I. Series TC-R. Cambio del elemento termostático: - Unscrew the bolts (5) and lift the cap (1); - Afloje los pernos (5) y retire la tapa (1); - Retire el purgador completo de la línea de vapor; - Remove the complete trap from the steam line; - Remove the gasket (4) and the thermostatic element assembly (3); - Clean trap cap (1) and body (2) if necessary; - Retire la junta (4) y el conjunto del elemento termostático (3); - Limpie la tapa (1) del purgador y el cuerpo (2), si es necesario; - Replace the gasket (4) and the thermostatic element assembly (3); - Cambie la junta (4) y el conjunto del elemento termostático (3); II. Series TC-C: Thermostatic element replacement: II. Serie TC-C. Cambio del elemento termostático: - Open and remove the clamp (5) and lift the cap (1); - Abra y quite la abrazadera (5) y - Put the cap (1) back on the body (2) and screw the bolts (5). Series TC-C, TC-R & TC-S - Vuelva a colocar la tapa (1) en el cuerpo (2) y ajuste los pernos (5). - Retire el purgador completo de la línea de vapor; - Remove the complete trap from the steam line; - Remove the gasket (4) and the thermostatic element assembly (3); - Clean trap cap (1) and body (2) if necessary; - Replace the gasket (4) and the thermostatic element assembly (3); - Put the cap (1) back on the body (2) and screw the clamp (5). retire la tapa (1); - Retire la junta (4) y el conjunto del elemento termostático (3); Thermostatic Clean Steam Traps - Limpie la tapa (1) del purgador y el cuerpo (2), si es necesario; - Cambie la junta (4) y el conjunto del elemento termostático (3); Thermostatische Sterildampf - Kondensatableiter - Vuelva a colocar la tapa (1) en el cuerpo (2) y ajuste la abrazadera (5). Purgeur Thermostatique pour Vapeur Propre I. Serie TC-R: Austausch des Thermostatikelementes: Purgadores de Vapor Termostáticos Higiénico / Sanitarios I. Serie TC-R: Thermostatisch element vervangen: - Ausbau der kompletten Armatur aus der Rohrleitung; - Neem de condenspot uit de leiding; - Schrauben (5) lösen und Deckel (1) abheben; - Dichtung (4) und die Teile des Thermostatikelementes (3) herausnehmen; - Falls erforderlich Deckel (1) und Gehäuse (2) reinigen; - Austausch der Dichtung (4) und der Teile des Thermostatikelementes (3); - Deckel (1) wieder auf das Gehäuse (2) aufsetzen und Schrauben (5) festziehen. Thermostatische Clean Steam Condenspotten - Demonteer de bouten (5) en verwijder het deksel (1); - Verwijder de pakking (4) en het thermostatisch element (3); - Reinig het deksel (1) en huis (2) indien nodig; - Vervang de pakking (4) en het thermostatisch element (3); - Plaats het deksel (1) op het huis (2) en monteer de bouten (5). Scaricatori di Condensa Termostatici Per Vapore Pulito / Sanitario II. Serie TC-C: Thermostatisch element vervangen: II. Serie TC-C: Austausch des Thermostatikelementes: These instructions should be used by experienced personnel ! - Neem de condenspot uit de leiding; - Ausbau der kompletten Armatur aus der Rohrleitung; - Demonteer de klem (5) en verwijder het deksel (1); - Gelenklemme (5) öffnen und entfernen, Deckel (1) abheben; - Dichtung (4) und die Teile des Thermostatikelementes (3) herausnehmen; - Falls erforderlich Deckel (1) und Gehäuse (2) reinigen; - Austausch der Dichtung (4) und der Teile des Thermostatikelementes (3); - Deckel (1) wieder auf das Gehäuse (2) aufsetzen und Gelenkklemme (5) Diese Gebrauchsanweisung ist durch Fachpersonal zu benutzen ! - Verwijder de pakking (4) en het thermostatisch element (3); - Reinig het deksel (1) en huis (2) indien nodig; Ces instructions devraient être utilisées par du personnel expérimenté ! - Vervang de pakking (4) en het thermostatisch element (3); ¡Estas instrucciones deben ser utilizadas por personal experimentado ! - Plaats het deksel (1) op het huis (2) en monteer de klem (5). Onderhoud uitsluitend uit te voeren door ervaren personeel ! festschrauben. Queste istruzioni devono essere utilizzate da personale esperto ! I. Serie TC-R: remplacement de l'élément thermostatique: I. Serie TC-R: Sostituzione dell'elemento termostatico: - Dévisser les vis (5) et retirer le couvercle (1); - Svitare i bulloni (5) e sollevare la testa (1); - Démonter l'ensemble de la ligne; - Retirer le joint (4) et l'élément thermostatique (3); DESCRIPCION DEL PRODUCTO - PRODUKT OMSCHRIJVING - DESCRIZIONE DEL PRODOTTO - Asportare la guarnizione (4) e l'elemento termostatico (3); - Nettoyer le couvercle (1) et le corps (2) si nécessaire; - Pulire la testa (1) ed il corpo (2) dello scaricatore, se necessario; - Remettre le couvercle (1) sur le corps (2) et visser les vis (5). - Posizionare la testa (1) sul corpo (2) ed avvitare i 4 bulloni (5). - Remplacer le joint (4) et l'élément thermostatique (3); Model shown on the picture: TC-C with Clamp - Die Abbildung zeigt das Modell TC-C mit Gelenkklemme - Photo: modèle TC-C avec Collier de serrage - Sostituire la guarnizione (4) e l'elemento termostatico (3); II. Serie TC-C: remplacement de l'élément thermostatique: II. Serie TC-C: Sostituzione dell'elemento termostatico: - Ouvrir et retirer le collier de serrage (5) et retirer le couvercle (1); - Aprire ed asportare il clamp (5), sollevare quindi la testa (1); - Démonter l'ensemble de la ligne; - Retirer le joint (4) et l'élément thermostatique (3); Modelo de la foto: TC-C con Abrazadera - Model op foto: TC-C met Klemkoppeling - Modello in figura: TC-C con attacchi rapidi "Clamp" Armstrong Stainless Steel Thermostatic Clean Steam Trap - Smontare l'intero scaricatore dalla linea; - Asportare la guarnizione (4) e l'elemento termostatico (3); - Nettoyer le couvercle (1) et le corps (2) si nécessaire; - Pulire la testa (1) ed il corpo (2) dello scaricatore, se necessario; - Remettre le couvercle (1) sur le corps (2) et serrer le collier (5). - Posizionare la testa (1) sul corpo (2) ed avvitare i 4 bulloni (5). - Remplacer le joint (4) et l'élément thermostatique (3); PRODUCT DESCRIPTION - PRODUKTBESCHREIBUNG - DESCRIPTION DU PRODUIT - Smontare l'intero scaricatore dalla linea; Armstrong Thermostatischer Sterildampf - - Sostituire la guarnizione (4) e l'elemento termostatico (3); Kondensatableiter aus Edelstahl Purgeur Thermostatique Armstrong en Acier Inoxydable pour Vapeur Propre Purgador Termostático Higiénico / Sanitario Armstrong, en Acero Inoxidable Armstrong RVS Thermostatische Clean Steam Condenspot Scaricatore di Condensa in Acciaio Inossidabile per Vapore Pulito / Sanitario For detailed material specifications, options, approximate dimensions and weights, see Armstrong literature or consult your local Representative. Für detaillierte Werkstoffangaben, Zubehör, Abmessungen und Gewichte, sehen Sie die Armstrong Datenblätter oder fragen Sie Ihre Armstrong-Vertretung. Pour toute spécification détaillée des matières, options, dimensions et poids, veuillez vous référer à la littérature Armstrong ou prendre contact avec votre Représentant local. Para especificaciones Representante local. Armstrong International S.A., Parc Industriel des Hauts-Sarts, 4040 Herstal - Belgium IOM-1013-B 10/2005 www.armstrong.be Ph: +32.4.240.90.90 Fax: +32.4.248.13.61 Printed in Belgium Voor gedetailleerde Vertegenwoordiger. de materiales materiaal detalladas, specificaties, opciones, afmetingen en dimensiones gewichten, zie aproximadas de y Armstrong pesos, ver documentatie catálogos of neem Armstrong contact op o consultar met uw con su plaatselijke Per la specifica dettagliata dei materiali, accessori opzionali, dimensioni e pesi approssimativi, vedere la documentazione appropriata o contattare il Distributore locale. INSTALLATION - INSTALLATIONSANWEISUNG - INSTALLATION MAINTENANCE - WARTUNGSINFORMATIONEN - MAINTENANCE INSTALACION - INSTALLATIE - INSTALLAZIONE MANTENIMIENTO - ONDERHOUD - MANUTENZIONE Model shown on the drawing: TC-S Sealed - Die Zeichnung zeigt das Modell TC-S mit vollverschweißtem Gehäuse - Schéma: modèle TC-S Soudé Modelo mostrado en el dibujo: TC-S Sellado - Model op tekening: TC-S Gelast - Modello in figura: TC-S Sigillato For troubleshooting, testing methods, frequency of maintenance and detailed spare parts list, see Armstrong literature or consult your local Representative. Possible connections: threaded, tube and sanitary end - Mögliche Anschlußarten: Für detaillierte Informationen über Fehlersuche, Testmethoden, Wartungsintervallen und Ersatzteillisten fragen Sie Ihre Armstrong-Vertretung. Muffengewinde, Schweißende und Sanitär Pour le dépannage, les méthodes de test, la fréquence d'entretien et la liste détaillée des pièces de rechange, veuillez vous référer à la littérature Mogelijke aansluitingen: draad, las of sanitair - Connessioni disponibili: filettate, tasca a saldare o flangiate Para detección de posibles averías, métodos de test, frecuencia de mantenimiento y lista detallada de repuestos, ver catálogos Armstrong o Raccordements possibles: taraudé, tube et embouts sanitaires - Conexiones posibles: roscada, tubo y sanitaria Armstrong ou prendre contact avec votre Représentant local. consultar con su Representante local. Voor het oplossen van problemen, test methodes, onderhoud en gedetailleerde onderdelenlijsten, zie de Armstrong documentatie of neem contact op met uw plaatselijke Vertegenwoordiger. Per la soluzione di eventuali problemi, metodi di prova funzionalità, documentazione Armstrong o consultare il Distributore locale. frequenza di manutenzione e dettaglio della lista ricambi, vedere Equipement under pressure - Operating temperature > 100°C Make sure trap is cold before handling ! Armatur steht unter Druck - Arbeitstemperatur > 100°C Stellen sie sicher, dass die Armatur kalt und drucklos ist, bevor an dieser gearbeitet wird ! Equipement sous pression - Température en fonctionnement > 100°C Laisser le purgeur refroidir avant toute manipulation ! Equipo bajo presión - Temperatura de trabajo > 100°C Not included ¡Asegúrese de que el purgador esté frío antes de manipularlo ! Connection Nicht enthalten Verbindung No incluido Conexion Condenspot moet afgekoeld zijn alvorens eraan te werken ! Connessioni Apparecchiatura in pressione - Temperatura operativa > 100°C Non compris Toestel onder druk - Werktemperatuur > 100°C Connexion Niet meegeleverd Aansluiting Non inclusi Assicurarsi che lo scaricatore sia freddo prima d’intervenire ! START-UP PROCEDURE - INBETRIEBNAHME - PROCEDURE DE DEMARRAGE PROCEDIMIENTO DE PUESTA EN MARCHA - OPSTARTPROCEDURE - PROCEDURA D'AVVIAMENTO For detailed hookups and adapted start-up and shut-down procedures, see Armstrong literature or consult your local Representative. Für detaillierte Informationen über Installation, Inbetriebnahme und Außerbetriebnahme sehen Sie die Armstrong Datenblätter oder fragen Sie Ihre Armstrong-Vertretung. Pour plus de détails à propos des procédures de démarrage et d'arrêt, ainsi que pour l'installation, veuillez vous référer à la littérature Armstrong Model shown on the drawing: TC-R Repairable Die Zeichnung zeigt das Modell TC-R verschraubt Schéma: TC-R Réparable Modelo mostrado en el dibujo: TC-R Reparable Model op tekening: TC-R Repareerbaar Modello in figura: TC-R Riparabile ou prendre contact avec votre Représentant local. Para posibilidades de conexionado y procedimientos de parada y puesta en marcha, ver catálogos Armstrong o consultar con su Representante local. Voor gedetailleerde montage en installatie instructies zie het betreffende Armstrong documentatieblad of neem contact op met uw plaatselijke Vertegenwoordiger. Per procedure dettagliate di collegamento, d'avviamento e di fermata, vedere la documentazione Armstrong o consultare il Distributore locale. SHUT-DOWN PROCEDURE - AUSSERBETRIEBNAHME - PROCEDURE D'ARRET PROCEDIMIENTO DE PARADA - UIT BEDRIJFNAME - PROCEDURA DI FERMATA Model shown on the drawing: TC-C with Clamp Die Zeichnung zeigt das Modell TC-C mit Gelenkklemme Schéma: TC-C avec Colier de Serrage Modelo mostrado en el dibujo: TC-C con Abrazadera Model op tekening: TC-C met Klemkoppeling Modello in figura: TC-C con Clamp la
