5039 - Ilumisa
Anuncio
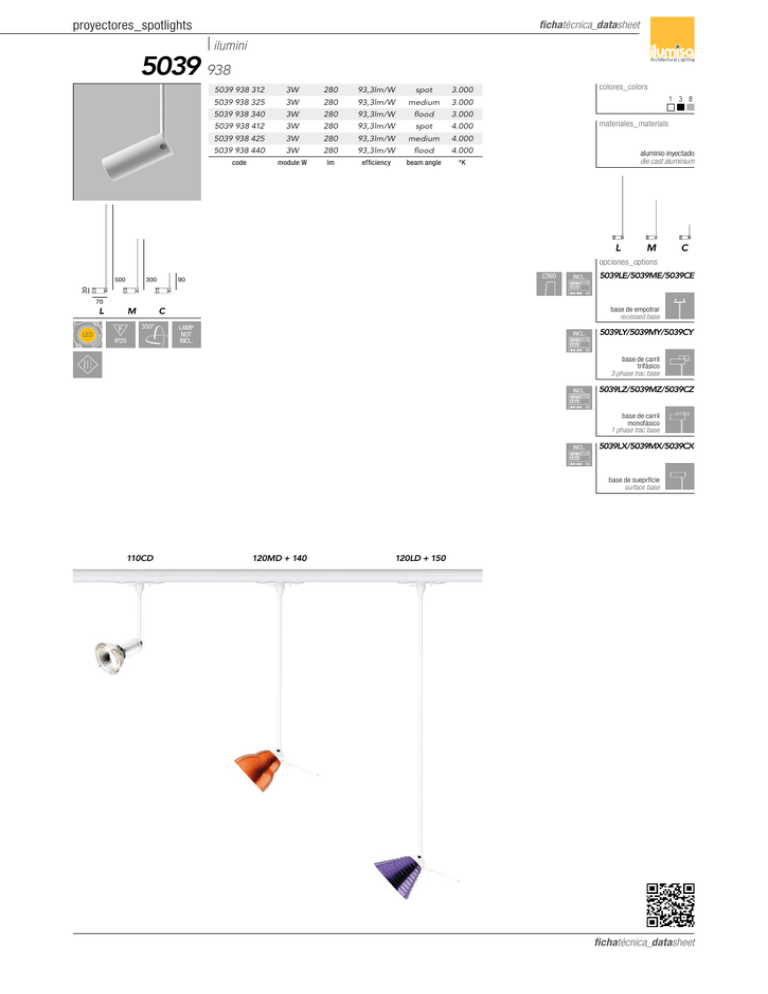
proyectores_spotlights fichatécnica_datasheet ilumini 5039 938 5039 938 312 3W 280 93,3lm/W spot 3.000 5039 938 325 5039 938 340 3W 280 93,3lm/W medium 3.000 3W 280 93,3lm/W flood 3.000 5039 938 412 3W 280 93,3lm/W spot 4.000 5039 938 425 3W 280 93,3lm/W medium 4.000 3W 280 93,3lm/W flood 4.000 module W lm efficiency beam angle ºK 5039 938 440 code colores_colors 1 3 8 materiales_materials aluminio inyectado die cast aluminium opciones_options 300 Ø60 90 INCL. 5039LE/5039ME/5039CE 30 500 70 base de empotrar recessed base 350º LED IP20 LAMP NOT INCL. INCL. 5039LY/5039MY/5039CY base de carril trifásico 3 phase trac base INCL. 5039LZ/5039MZ/5039CZ base de carril monofásico 1 phase trac base INCL. 5039LX/5039MX/5039CX base de sueprficie surface base 110CD 120MD + 140 120LD + 150 fichatécnica_datasheet proyectores_spotlights 5039 fichatécnica_datasheet ilumini INSTRUCCIONES_INSTRUCTION válido para todos los proyectores con base a empotrar valid for recessed base spots Ø60mm Ø60mm Hacer un corte de techo de 60mm. Conectar el latiguillo del falso techo al driver e introducir éste en el mismo. Make a 60mm ceiling cut. Connect the mains and insert the driver in the false ceiling. Despegar la tapa embellecedora tirando suavemente hasta vencer la resistencia de los imanes. Lower the canopy pulling gently till winning the force of the magnets. Ladear la luminaria para introducir en el corte del techo la pieza de fijación. Tilt the fixture in order to introduce the fixing brackets inside the false ceiling hole. Una vez introducida, apretar los tornillos hasta que la liminaria suba y se ajuste contra el falso techo. Once inside, tighten the screws till the luminaire is well secured to the false ceiling. Colocar de nuevo la tapa embellecedora contra la base adosada al techo, valíendose de los imanes Rise back the canopy to the ceiling base, the magnets will keep it in position. Orientar la luminaria. Point the fixture. fichatécnica_datasheet proyectores_spotlights 5039 fichatécnica_datasheet ilumini INSTRUCCIONES_INSTRUCTION válido para todos los proyectores con adaptador a carril trifásico valid for 3 phase track adaptor spots Antes de montar el adaptador en el carril, asegúrese de que la corriente está cortada. Fijar el proyector en el carril trifásico conectando correctamente el adaptador. Before installing the adapter into the track, make sure the power is switched off. Connect the spotlight into the triphasic track by plugging its adaptor correctly. Comprobar la posición correcta para evitar daños. Check the right position to avoid damage. Bloquear la leva en la posición correcta. Lock the lever to its correct position. Ajustar el dial en el circuito o fase correcta. Adjust the wheel to the correct phase / circuit. Orientar la luminaria. Adjust the fixture. fichatécnica_datasheet proyectores_spotlights 5039 fichatécnica_datasheet INSTRUCCIONES_INSTRUCTION ilumini válido para todos los proyectores con adaptador a carril monofásico valid for 1 phase track adaptor spots Antes de montar el adaptador en el carril, asegúrese de que la corriente está cortada. Gire la leva del adaptador en sentido contrario a las agujas del reloj. Introduzca el adaptador en el carril en la posición correcta. Sin dejar de presionar el adaptador al carril, gire la leva en el sentido de las agujas del reloj hasta el click final. Orientar la luminaria Before installing the adapter into the track, make sure the power is switched off. Turn adapter lever anticlockwise. Insert the adapter into the track in the right position. While pressing the adapter to the track, turn the lever clockwise until the end click. Adjust the fixture fichatécnica_datasheet proyectores_spotlights fichatécnica_datasheet ilumini 5039 938 fichatécnica_datasheet
