Infrared light barrier max. 50m Infrarot
Anuncio
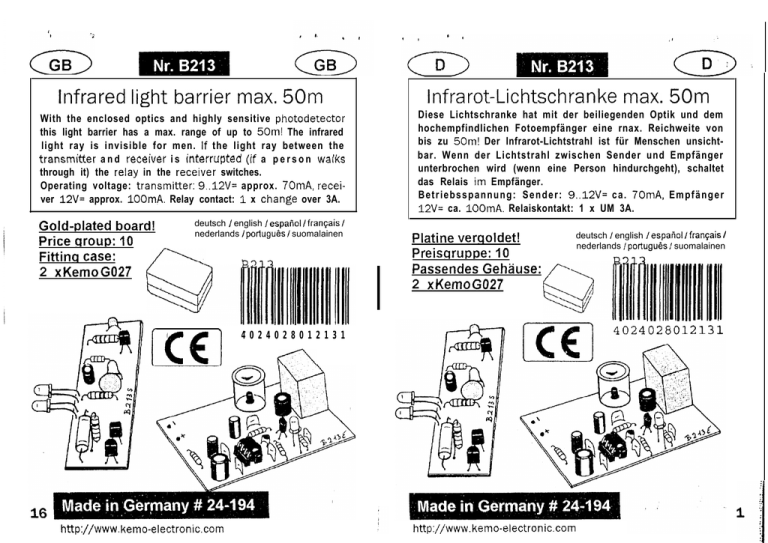
Infrared light barrier max. 50m Infrarot-Lichtschranke max. 50m With the enclosed optics and highly sensitive photodetector this light barrier has a max. range of up to 50m! The infrared light ray is invisible for men. If the light ray between the transmitter a n d receiver i s interrupted (if a p e r s o n wa/ks through it) the reiay in the receiver switches. Operating voltage: transmitter: 9..12V= approx. 70mA, receiver 12V= approx. 100mA. Relay contact: 1 x Change over 3A. Diese Lichtschranke hat mit der beiliegenden Optik und dem hochempfindlichen Fotoempfänger eine rnax. Reichweite von bis zu 50m! Der Infrarot-Lichtstrahl ist für Menschen unsichtbar. Wenn der Lichtstrahl zwischen Sender und Empfänger unterbrochen wird (wenn eine Person hindurchgeht), schaltet das Relais im Empfänger. B e t r i e b s s p a n n u n g : S e n d e r : 9..12V= ca. 70mA, E m p f ä n g e r 12V= ca. 100mA. Relaiskontakt: 1 x UM 3A. Gold-plated board! Price cxoup: 10 Fittinq case: 2 x Kemo G027 / deutsch / english / espaiiol / franqais / nederlands / portuguk / suomalainen DT-l 3 \ IW http://www. kemo-electronic.com Platine verqoldet! Preisqruppe: IO Passendes Gehäuse: 2 x Kemo G027 4024028012131 1 fl http://www.kemo-electroniccom R31 2 deutsch / english / espafiol / fratqais / nederlands / portuguks f suomalainen Infrar>unavaIoveräjä maks. 50m I Infrarood lichtsluis max. 50 m Deze lichtsluis heeft met bijgesloten optiek en hooggevoelige lichtontvanger een maximaai bereih van 50 meter! De infrar o o d lichtstraal i s v o o r m e n s e n o n z i c h t b a a r . A l s de straal tussen zender en ontvanger onderbroken wordt (als er een persoon doorheen gaat), schakelt het relais in de ontvanger. Voedingsspanning: zender: 9 - 12 V = bij 70 mA; ontvanger: 12 V = bij 100 mA Relaiskontakt: 1 x OM 3 A. Tämän valoveräjän kantomatka on sarjaan kuuluvan optiikan j a e r i t t ä i n h e r k ä n v a h v i s t i m e n a n s i o s t a j o p a 50m! Infrapunasäde on ihmissilmälle näkymätön. Kun valosäde Iähettimen ja vastaanottimen väliltä katkeaa (henkilön liikkuessa sen Iäpi) kytkee vastaanottimessa sijaitseva rele. K ä y t t ö j ä n n i t e : lähettimen: 9...12V=, n . 70mA, v a s t a a n o t i n 12V=, n. IOOmA. Relekosketin: 1 x vk, 3A. - Piirilevy kullattu! Hintaluokka: 10 : _ Sopiva kotelo: 2 x Kemo G027 -deutsch / english / espafiol l franqais I nederlands l portugubs / suomalainen 4024028012131 http://www.kemo-electroniccom http://www. kemo-electroniccom Barri&e infrarouge max. 50 m Avec I’optique ci-jointe et ie photodetecteur tres sensible ce barrage photoelectrique a un rayon d’action maximal jusqu’a 50 m! Le rayon infrarouge est invisible pour I’homme. Quand Ie rayon lumineux entre I’emetteur et Ie recepteur est interrompu (si une personne traverse), Ie relais dans Ie recepteur commute. Tension de Service: emetteur: 9...12V=, env. 70mA, recepteur , 12V=, env. 100mA. Contact du reiais: 1 x inversion 3A. deutsch / english / espatio / francais 1 Platine dorke! nederlands / poriugues / suomalainen A Gioupe de prix: IO Baitier recommandh: [ 2 x Kemo G027 4C24028012131 5arrera de luz infrarroja max. 50m Con Ia optica adjuntada y el fotodetector muy sensible esta barrera de Iuz tiene un alcance m6ximo hasta aprox. 50m. El rayo de iuz infrarroja es invisible para hombres. Cuando se interumpe el rayo de luz entre el emisor y receptor (cuando una persona atravesa), el relais en el emisor conmuta. Tension de servicio: emisor: 9...12V=, aprox. 70mA, receptor 12V=, aprox. 100mA. Contacto de rele: 1 x conmutar 3A. iPli3Ca dorada! deutsch / english / espaiiol ! franqais ! nederlands / portugub / suomalainen w 3x-l Grupo de precios: IOCaja pertinente: 2 x Kemo G027 - - - - 5 http://www. kemo-eIectronic.com http://www.kemo-eIect.ronic.com ! , , > > I ’ Empfänger lnfravermelha barreira Mminosa maximo 50m Esta barreira luminosa tem com a junta optica e o senkivel foto receptor um raio de alcance maximo at6 50 m! A infravermelha barreira luminosa e para pessoas invisivel. Quando o raio luminoso entre o emissor e o receptor for interrompido (quando uma pessoa o atravessar) liga o rele no receptor. T e n s ä o d e servico: e m i s s o r : 9...12V= cerca 70mA, r e c e p t o r 12V= cerca 100mA. Rele contacto: 1 x comutador 3A. Placa dourada! Grupo de precos: 10 Caixa adesuada: 2 x Kemo G027 deutsch / english / espafiol / franqais / derlands / porluyu~s / suomalainen Sender transmitter 4024028012131 http://www. kemo-electronic.com http://www. kemo-electronic.com , 9 - D / STÜCKLISTE / SENDER: LEDl,LED2 : 2 Infrarotdioden TSHA 5201 Tl,T2 : 2 T r a n s i s t o r e n S S 2 1 9 o d e r B C 5 4 7 T3 : 1 T r a n s i s t o r S F 8 2 8 E o d e r B C 337/40 R5 : 1 W i d e r s t a n d 1 5 Ohm 1W ( 1 5 R ) R6,R8 : 2 W i d e r s t ä n d e 1 0 k ( b r a u n - s c h w a r z - s c h w a r z - r o t . . . ) R7 : 1 W i d e r s t a n d 2 2 k ( r o t - r o t - s c h w a r z - b r a u n . . . ) R9 : 1 W i d e r s t a n d l k l ( b r a u n - s c h w a r z - b r a u n - b r a u n . . . ) c-7 : 1 Elko 1001~F 16V C8 : 1 K o n d e n s a t o r 100nF ( 1 0 4 ) C9,ClO : 2 K o n d e n s a t o r e n 4,?‘nF (4n7) 1 Platine, ca. 17 x 55 mm STÜCKLISTE / EMPFÄNGERl,R4 : 2 W i d e r s t ä n d e 6 8 0 O h m ( 6 8 0 R ) R2 : 1 Widerstand 150 k (braun-grün-schwarz-orange...) R3 : 1 Widerstand lk05 (braun-schwarz-grün-braun...) R7 * T l c7 -. _ LED1 Sender Transmitte R5 T3 R9 c-7 . C6 lens Linse \ t RE IF t, LED Rl Em Receiver c4 i c3 8 \ c2 IC CS e Cl,C5 C2,C4,ClO: 2: 3 Elkos Kondensatoren 1OvF50V 82pF (82 K) Q c3 C6 : : 1 1 Elko Kondensator 1OOpF 25V 100nF (104) C7 : 1 K o n d e n s a t o r 3 9 p F ( 3 9 p ) C 8 : 1 K o n d e n s a t o r 4,7nF (4n7) C9 : 1 Elko 4,7uF 25V IC :llCU 2531 : 1 IC-Sockel 8-polig IF : 1 Infrarotdiode LED : 1 Leuchtdiode 5 mm orange RE : 1 Relais 1 x UM 12V T : 1 Transistor BC 308 1 Linse 1 Platine, ca. 56 x 45 mm Beiliegendes Extm!J~?t rnlt Sicherheitshinweisen beachtenl I GB ,’ PARTS LIST / TRANSMITTER: LEDl,LED2 : 2 infrared diodes TSHA 5201 : 2 transistors SS 219 or BC 547 Tl,72 : 1 transistor SF 828 E or BC 337/40 T3 R5 : 1 resistor 15 ohm 1W (15R) : 2 resistors 10 k (brown-black-black-red...) R6,R8 : 1 resistor 22 k (red-red-black-brown...) R7 : 1 resistor lkl (brown-black-brown-brown...) R9 c7 : 1 electrolytlc capacitor 1OOpF 16V C8 : 1 capacitor 100nF (104) C9,ClO : 2 capactors 4,7nF (4n7) 1 board, approx. 17 x 55 mm PARTS LIST / RECEIVER: Rl,R4 :2 resistors 680 ohm (680R) R2 :l resistor 150 k (brown-green-black-orange...) R3 :l resistor lk05 (brown-black-green-brown. ..) Cl,C5 :2 electrolytic capacitors 10pF 50V C2,C4,ClO : 3 capacitors 82pF (82K) c3 :l ele&trolytic capacitor 100pF 25V :l capacitor 1OOnF (104) C6 C7 :l capacitor 39pF (39p) C8 :l capacitor 4,7nF (4n7) c9 :l electrolytic capacitor 4,7uF 25V :l IC U 2531 IC : 1 IC socket 8-pole :1 infrared diode IF :l light emitting diode 5 mm orange LED :1 relay 1 x Change over 12V RE T :l transistor BC 308 1 lens 1 board, approx. 56 3 45 mm ’ .’ 1 , abgeflachte Seite flattened side / // t abgeflachte Seite flattened side + 10 11 1 4 1 l , I D / D i e b e i d e n P l a t i n e n w e r d e n gern% Z e i c h n u n g e n S e i t e 8 bestuckt. Der Fototransistor des Empfängers wird bis zum Anschlag tn die Platine gesteckt (bitte d i e r i c h t i g e P o l a r i t ä t b e a c h t e n , d i e e i n e S e i t e d e s F o t o t r a n s i s t o r s ist abgeflacht). D i e L i n s e n o p t i k w i r d gemäf3 Z e i c h n u n g s o a u f d i e P l a t i n e g e k l e b t , da6 d e r Fototransistor in der Mitte des Durchmessers der Linse liegt (im Brennpunkt). Der Empfänger benötigt eine Betriebsspannung von 12Vz (ca. 100mA) und der Sender ca. 9V= (max. 70mA). Bitte verwenden Sie ausreichend starke Gatterren o d e r N e t z t e i l e ! ( D i e k l e i n e n 9V B l o c k b a t t e r i e n sind z.B zu sch\uach und nicht geeignet!). Am besten verwenden Sie 2 stabrlisierte Steckernetzteile mit je 9V= und 12V= Ausgangsspannung. Um den Fototransistor vor seitlichen Lichteinfall zu schützen, muß ein Kunststoffoder Papprohr, gemäR Zeichnung Seite 15, über die Optik geschoben werden Das Rohr muß innen schwarz eingefärbt sein. Außerdem muR das Papprohr in alle Richtungen den Lichteinfall verhindern, außer von vorne. Der Sender muß dann so ausgerichtet werden, daf3 er genau von vorn? durch das schwarze Rohr auf die Optik strahlt. J e w e i t e r d e r S e n d e r v o m E m p f ä n g e r e n t f e r n t w i r d , umso g e n a u e r m u ß d e r 7 S e n d e r a u f d e n E m p f ä n g e r a u s g e r i c h t e t w e r d e n . W e n n d e r Sender auf den Empfänger trifft, leuchtet die.Leuchtdiode am Empfänger und das Relais schaltet ein. E / Dotar las dos placas de circuitos impresos segun los dibujos pagina 8. Introducir el i fototransistor del receptor en Ia placa de circuitos impresos hasta el tope (presrar atencion a Ia polaridad correcta, un lado del fofotransistor es aplanado). Pegar Ia optica de Ia lente sobre Ia placa de circuitos impresos segun el dibujo de manera que et fototransistor se encuentre al centro del diametro de Ia lente (en el foco). El receptor necesita una tension de servicro de l2V= (aprox. 100mA) y el emisor aprox. 9V= (max. 70mA). Por favor. utrlize Vd. baterias con potencia suficiente o fuentes de alimentacion (Las pequehas baterias monobloc 9V son demasiado debiles y no son adecuadas). Lo mejor es de utilizar dos fuentes de alimentocion de clavija estabilizadas con 9V= y 12V= tension de salida respectivamente. Para proteger el fototransistor contra rncrdencia de Iuz lateral. se debe empujar un’tubo de plastico o de carton sobre Ia eptica segun el dibujo Pagina 15. Et tubo debe ser colorado negro al interior. Adern& el tubo de carton debe prevenir Ia incidencia de luz en todas las direcciones, excepto de delante. Entonces se necesita ajustar el emisor de manera que radie a traves del tubo negro de delante sobre Ia optica. Lo mas el emisor se aleja del receptor, Io rnas exacto el emisor se debe alinear al receptor. Cuando el emisor choca contra el receptor, el diodo luminescente al , receptor emite luz y el rele conecta. 12 ‘F / Equ~p& Ie\ deux piatines selon les dessins page 8. Inserez Ie phatotransistor’du recepteur dans Ia Platine jusqu’a Ia butee (veuillez faire attention 5 Ia polaritd corrocte. une face du phototransistor est aplatie). Collez I’optique de lentrlle sur Ia Platine selon ie dessin de maniere que Ie phototransistor soit au centre du diametre de Ia lentille (dans Ie foyer). ie recepteur a besoin d’une tension de Service de 12V= (env. 100mA) et I%metteur env. 9V= (max. 70mA) Veuilfez ernployer des batteries qui sont assez pUiSSantes ou des blocs d’alimentation! (Les petites batteries monoblocs 9V sont trop faibles et ne s o n t pas approprieesl). Le mieux est d’ctiliser 2 blocs d’alimentation de Prise avec 9V= et 12V= tension da sortie! Pour proteger Ie phototransrstor contr,a I’incidence laterale de Ia lumiere, il f a u t pousser un tuyau en plastique ou en carton sur I’optique selon Ie dessin page 15. II faut que Ie tuyau soit colore noir a I’interieur En plus Ie tuyau en carton doit empechcr I’incidence de Ia lumiere dans toutes les directions, sauf par devant. Ensuite il faut ajuster I’emetteur de faC;on qu’il rayonne exactement dans Ie tuyau nOif . . . par aevanr sur I’oprique. Le plus I’emetteur est eloign6 du recepteur. Ie plus exact Gmetteur doit 6tre aligne sc!r Ie recepteur. Quand I’emetteur donne contre Ie recepteur, Ia diode &WdUtninescente au recepteur s’allume et Ie relais commute. GB / 60th boards have to be tipped according to the drawings page 8. The phototransistor of the receiver is rnserted into the board up to the limit stop @lease pay attention tc the correct polanty. one side of the phototransistor is flattened). .9ccording to the drawing the lens optic is Stuck an the board in such a manner that the phototransistor is located in the centre of the diameter of the lens (in the focus). The recetver requires an operatingvoltage of 12V= (approx. 100mA) and the transmitter approx. 9V= (max. 70mA). Please use batteries or power unrts which arc powerful enough (the small 9V compound batteries are too weak and not suitable!) It would be the best If you use 2 stabilized connector power units with 9V= and 12V= Output voltage each. In order- to protect the phototransistor from lateral incidcnce of light, a piastic or cardboard tube must,be slid over the optics according to the drawing page 15. The inside of the tube must be stained black. Furthermore the cardboard tube mUSt prevent the incidence of Iight from all directions with the exception of the front. Then the transmitter must be adjusted in such a manner that it radiates through the black tube on the optics exactly from the front. The greater the distance from the transmitter to the receiver, the more exactly the transmitter must be aligned on the receiver. If the transmitter meets the receiver, the Irght emlttmg diode at the receiver lights and the relay switches on. 13 I N L ) D e bei&e p r i n t p l a t e n m o e t e n v o l g e n s d e t e k e n i n g e n lzijde S LjrordRn volgebouwd. De fototransistor van de ontvanger wordt tot aan de aanslag in de p r i n t p l a a t g e s t o k e n . L e t a.u.b. o p d e k o r r e k t e p o l a r i t e i t , een k a n t v a n de transistor is vlak. De lenzenoptiek worden volgens tekenrng zodanig op de printplaat gep!akt, dat de fototransistor in het midden van de doorsnede van de optiek kamt. dus in het brandpunt. De ontvanger wordt gevoed met 12 V = en 100 mA, en de zender met 9 V = en max. 70 mA. Gebruik a.u.b. voldoende Sterke batterijen of adaptors! (De kleine 9 V blokbatterijen zijn bijv. te zwak en dus niet, geschikt). Het beste gebruikt u 2 gestabiliseerde adaptors met respectievelijk 9 V = en 12 V = ultgangsspanntng Om de fototransistor af te schermen voor licht dat van de zijd?n invalt. moet er een kunststof of kartonnen buis volgens de tekening zijde 15 over de optiek geschoven w o r d e n . D e buis moet van binnen z w a r t g e v e r f d o f g e k l a u r d z i j n . B o v e n d i e n m o e t h i j de lichtinval van alle kanten verhinderen, behalve van voren. D e zender m o e t z o d a n i g opgesteid worden dat hij precies van voren door de burs in de optiek straalt. I H o e verder weg de zender van de ontvanger geplaatst wordt, hoe preciezer h i j op de ontvanger afgesteld moet worden. Als de zender precies op de ontvanger straalt, gaat de LED op de ontvanger aan. en schakelt de relais in. 1 i i ! I l - L ia I FIN / Piirilevyt kalustetaan piirustusten mukaisesti sivu 8. Vastaanottimen valotransistori tyonnetaan piirrlevyyn vasteeseen asti (tarkista. että napaisuus on oikea, valotransistorin toisessa srvussa on suora taso). Linsseista kcostuva optiikka liimataan piirustuksen mukaisesti piirilevyyn niin, etta valotransistort srjoittuu lin ssrn halkaisijan keskipisteeseen (polttopisteeseen) Vastaanotrn tarvitsee 12V.n käyttöjannitteen (n. 100mA) ja Iähetin n. 9V= (maks. 70mA). Gytä tarpeeksi tehokkaita parlstoja tai verkkolaitteital (Esim. pienet 9V ‘neppariparistot’ ovat liian heikkoja eivatkä soveltu!) Käytä mieluiten kaksi stabiloitua verkkolaitetta. joiden ulostulojannitteet ovat 9V= ja 12V=. Valotransistorr suojataan srvulta tulevalta valolta tyontämälla muovi- tai pahviputki optiikkaan piirustuksen mukaisesti sivu 15. Putken sisäpinnan tulee olla mustaksi värjätty. ‘L’IS”dk$I lu’t~e p’Lwer1 ESA tl mw px?Iqn WhSCtr \nu~svl suu~\~N~~ ya.s< suusad~\ 5ssi%Sl2. Lahetin tulee Sitten suunnata niin. että se valaisee mustaan putkeen suoraan edestä. Mi:ä kauempana Iähetin on vastaanottimesta sitä tarkemmin sita on suunnattava. Kun \avzxl~~~ U~EWi2 BP, tiu ‘s -3A3 ~WG~WI\~WI I s)Wjj ~?hG9iYirS~iil\\~ WWiwY ja vat UHCSA. ( 1 Lichtschranke Linsensystem Lens System i P / As duas platinas So equipadas tonforme no desenho Pagina 8. 0 foto transistor do receptor e montado na platrna at6 ao esbarro (tomar atencäo na polaridade. un? lado do transistor e chato). 1 A lente optica 6 assim tonforme no desenho colada na platina, para que o foto transistor I fique situado no meio do diametro (no ponto focal). .O receptor necessita uma tensao de servico com l2V= (cerca 100mA) e o emissor cerca 9V= (max.7OmA). Usar batarias ou pecas de rede suficiente fortes. (As pequenas bloco batarias 9V s30 por exp. muito fracas e nao adequadas!). i melhor usar 2 estabilizadas pecas de rede, cada com 9V= e 12V= tensao de saida. Para proteger G foto transistor contra lateral Iuz incrdente, tem tonforme no desenhc Pagina 15 ser um tubo plastico ou de cartao empurrado sobre a optica. 0’ tubo ?em no i n t e r i o r ser tmgido de preto. 0 tubo de cartao deve evitar a luz incidente de todas as direcöes menos pela frente. 0 ernissor tem entäo de ser ajustado, para que este pela frente atraves do tubo preto possa brilhar exatamente na optica. Quant0 mais Qistante estiver o emissor do receptor, entao mais exato tem o emrssor ser ajustado ao receptor. Quando o emisscr acertar com o receptor entäo brrlha CJ diodo luminoso no receotor. e 0 rele entra em servico. 14 \ schwarze Papphülse black cardboard tube CBE längerer Draht langer wire abgeflachte Seite flattened side - .4 ., - , . . .’ ., _. . . _-. . . . _ . . - .I . . _. . *: . . - . : . .
