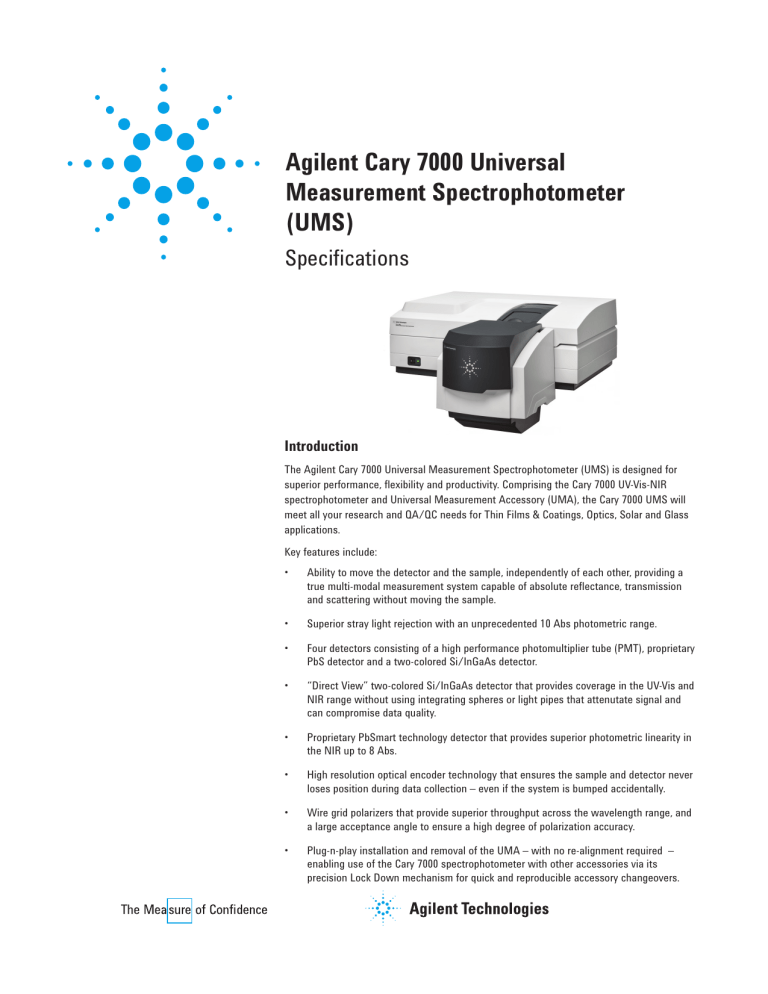
Agilent Cary 7000 Universal Measurement Spectrophotometer (UMS) Specifications Introduction The Agilent Cary 7000 Universal Measurement Spectrophotometer (UMS) is designed for superior performance, flexibility and productivity. Comprising the Cary 7000 UV-Vis-NIR spectrophotometer and Universal Measurement Accessory (UMA), the Cary 7000 UMS will meet all your research and QA/QC needs for Thin Films & Coatings, Optics, Solar and Glass applications. Key features include: • Ability to move the detector and the sample, independently of each other, providing a true multi-modal measurement system capable of absolute reflectance, transmission and scattering without moving the sample. • Superior stray light rejection with an unprecedented 10 Abs photometric range. • Four detectors consisting of a high performance photomultiplier tube (PMT), proprietary PbS detector and a two-colored Si/InGaAs detector. • “Direct View” two-colored Si/InGaAs detector that provides coverage in the UV-Vis and NIR range without using integrating spheres or light pipes that attenutate signal and can compromise data quality. • Proprietary PbSmart technology detector that provides superior photometric linearity in the NIR up to 8 Abs. • High resolution optical encoder technology that ensures the sample and detector never loses position during data collection – even if the system is bumped accidentally. • Wire grid polarizers that provide superior throughput across the wavelength range, and a large acceptance angle to ensure a high degree of polarization accuracy. • Plug-n-play installation and removal of the UMA – with no re-alignment required – enabling use of the Cary 7000 spectrophotometer with other accessories via its precision Lock Down mechanism for quick and reproducible accessory changeovers. Performance Specifications The Agilent Cary 7000 UMS is manufactured according to a quality management system certified to ISO 9001. Operators can routinely repeat performance tests using Agilent’s dedicated instrument performance test software suite — Validate. Some tests, where indicated, require equipment or certified material, which can be obtained through Agilent or international standard organizations. Monochromator Double out-of-plane Littrow monochromator Grating 70 x 45 mm UV-Vis Ruled line diffraction grating, 1200 lines/mm blazed at 250 nm NIR Ruled line diffraction grating, 300 lines/mm blazed at 1192 nm Beam splitting system Rotating beam splitter, which measures a sample, dark and reference signal per cycle with a speed of 30 Hz Detectors UV-Vis R928 PMT NIR Cooled PbSmart PbS Limiting resolution (nm) UV-Vis <0.048 nm NIR <0.2 nm Stray light (%T) At 220 nm (10 g/L NaI ASTM method) <0.00007% At 370 nm (50 mg/L NaNO2) <0.00007% At 1420 nm (H2O, 1 cm pathlength) <0.0002% At 2365 nm (CHCl3, 1 cm pathlength) <0.00045% Wavelength range (nm) (N2 purge required below 185 nm) 175–3300 nm Wavelength accuracy (nm) Deuterium lamp lines UV-Vis: 190–900 nm ± 0.08 nm NIR: 760–3000 nm ± 0.4 nm Wavelength reproducibility (nm) Peak separation of repetitive scanning of a UV-Vis line source <0.025 nm Peak separation of repetitive scanning of a IR line source <0.1 nm Standard deviation of 10 measurements, UV-Vis <0.005 nm Standard deviation of 10 measurements, NIR <0.02 nm Photometric accuracy (Abs) Using double aperture method at 0.3 Abs UV-Vis <0.00025 Abs 2 Agilent Cary 7000 UMS Performance specifications Photometric linearity (Abs) All tests performed by addition of filters technique UV-Vis (465 nm, 10 s SAT, 2 nm SBW), NIR (1200 nm, 10 s SAT, energy 3) UV-Vis, at 1 Abs <0.0007 Abs UV-Vis, at 2 Abs <0.0014 Abs UV-Vis, at 3 Abs <0.005 Abs NIR, at 1 Abs <0.0015 Abs NIR, at 2 Abs <0.007 Abs Photometric range (Abs) 10 Abs Photometric reproducibility (Abs) Using NIST 930D filters, at 546.1 nm, 2 s SAT, 2 nm SBW 0.5 Abs, Standard deviation for 10 measurements <0.00008 1.0 Abs, Standard deviation for 10 measurements <0.00014 Photometric stability (Abs/hour) After 2 hr warm up, 500 nm, 1 s SAT, 2 nm SBW <0.00018 Photometric noise (Abs/RMS) UV-Vis (190 nm, 1 s SAT, 2 nm SBW) At 0 Abs <0.00009 At 1 Abs <0.0002 UV-Vis (500 nm, 1 s SAT, 2 nm SBW) At 0 Abs <0.00003 At 1 Abs <0.00005 At 2 Abs <0.0001 At 3 Abs with 1.5 Abs RBA <0.0003 At 4 Abs with 1.5 Abs RBA <0.0008 At 5 Abs with 1.5 Abs RBA <0.002 At 6 Abs with 3.0 Abs RBA <0.0045 NIR: Fixed SBW (1500 nm, 1 s SAT, 2 nm SBW At 0 Abs <0.00003 At 1 Abs <0.0001 At 2 Abs <0.0005 At 3 Abs <0.007 NIR: Variable SBW (1500 nm, 1 s SAT, Energy 1) At 0 Abs <0.00004 At 2 Abs <0.0005 At 3 Abs with 1.5 Abs RBA <0.0003 3 Performance specifications Baseline flatness (Abs) UV-Vis (0.1 s SAT, 4 nm SBW), NIR (0.2 s SAT, Energy 1), baseline corrected ± 0.0012 (200 to 3000 nm) UV-Vis (0.2 s SAT, 2 nm SBW), NIR (0.24 s SAT, Energy 1), no smoothing applied ± 0.0007 (200 to 3000 nm) Sample compartment beam separation (mm) 190.5 mm Compartment size (width x depth x height) Extended sample compartment fitted 160 x 433 x 221 mm Access Top, front and base Instrument dimensions (width x depth x height) 1020 x 710 x 378 mm Purging Sample compartment Yes Optics Yes Instrument weight 91 kg Operational Spectral bandwidth (nm)* UV-Vis 0.01–5.00 nm, 0.01 nm steps NIR 0.04–20 nm * At optimum environmental conditions. See page 5 for details. Signal averaging (seconds) 0.033–999 s Maximum scan rate (nm/min) UV-Vis 2000 nm/min NIR 8000 nm/min Slew rate (changing between wavelengths, nm/min) UV-Vis 16000 nm/min NIR 64000 nm/min Data interval (UV-Vis) (nm) 0.005–1.111 nm cm-1* 1.627–17.335 cm-1* Å 0.05–11.1 Å Data interval (NIR) (nm) 0.02–4.444 nm cm-1* 0.3145–4.0753 cm-1* Å 0.2–44.44 Å * Interval range is dependent upon scan range Repetitive scanning Maximum number of cycles 999 Maximum cycle time (min) 9999 4 Agilent Cary 7000 UMS Cary UMA Specifications Measurement Modes • • • • • Absolute specular reflection at variable angle from 5 to 85 degrees in 0.02 degree intervals Direct transmission and variable angle transmission from 0 to 180 degrees in 0.02 degree intervals Diffuse scattering, reflection or transmission through independent sample rotation (360 degrees) and detector positioning (10 – 350 degrees) at 0.02 degree intervals Absorptance, A where A= 1 – R – T at variable angle without moving the sample or beam onto the sample for improved productivity and greater accuracy Reflection/Transmission at single wavelength (read) or wavelength range (scan) Wavelength Range 190 – 2800 nm Auto Polarizer Wavelength Range 250 – 2500 nm Detectors Two-colored Si/InGaAs Aperture Masks Incident beam: 1, 2 and 3 degrees Detector: 1, 1.8, 2, 3, 4, 4.4, 5 and 6 degrees Recommended environmental conditions Instrument storage 5–45 °C at 20–80% relative humidity, non-condensing, altitude < 2133 m Instrument operation* Below 853 m altitude: 10–35 °C, 15–80% relative humidity, non-condensing Between 853 and 2133 m altitude: 10–25 °C, 15–80% relative humidity, non-condensing Instrument electrical requirements Mains supply of 100–240 volts AC with 300 VA power consumption. Frequency 50-60 Hz * For optimum analytical performance, it is recommended that the ambient temperature of the laboratory be between 20 and 25 °C (68 and 77 °F) and be held constant to within ±2 °C (±3.6 °F) throughout the entire working day. When performing the limiting resolution test on the Cary 4000/5000/6000i/7000 systems it is a requirement that these environment conditions are met. Accessories The Agilent Cary 7000 UMS is compatible with a wide range of sample compartment accessories when the UMA is removed. Some major accessories include: Cary 7000 UMS Accessories • • • • • • • Diffuse Reflectance Accessory (DRA ) – Internal (110mm sphere) and External (150mm sphere) Fixed angle Specular Reflectance Accessories (SRA) Variable Angle Specular Reflectance Accessory (VASRA) Polarizers – Glan Taylor, Glan Thompson and Wire Grid Variable angle transmission holder Automated thin film holder Peltier temperature software controlled single and multi-cell cuvette holders Support policies Type Policy Warranty 12 months, though this may vary according to location Hardware support period Seven (7) years from date of last unit manufacture. After this time, parts and supplies will be provided if available Software support Telediagnostic capability is available for some instrument models. Availability of Telediagnostic support may vary according to location. Software upgrades to add additional functionality will attract a fee Further details More information For further information please consult your Agilent office or supplier, or our Web site at www.agilent.com 5 www.agilent.com/chem Agilent shall not be liable for errors contained herein or for incidental or consequential damages in connection with the furnishing, performance or use of this material. Information, descriptions, and specifications in this publication are subject to change without notice. © Agilent Technologies, Inc. 2013 Published June 1, 2013 Publication number: 5991-2540EN
