RADIADOR DE ACEITE MANUAL DE INSTRUCCIONES
Anuncio
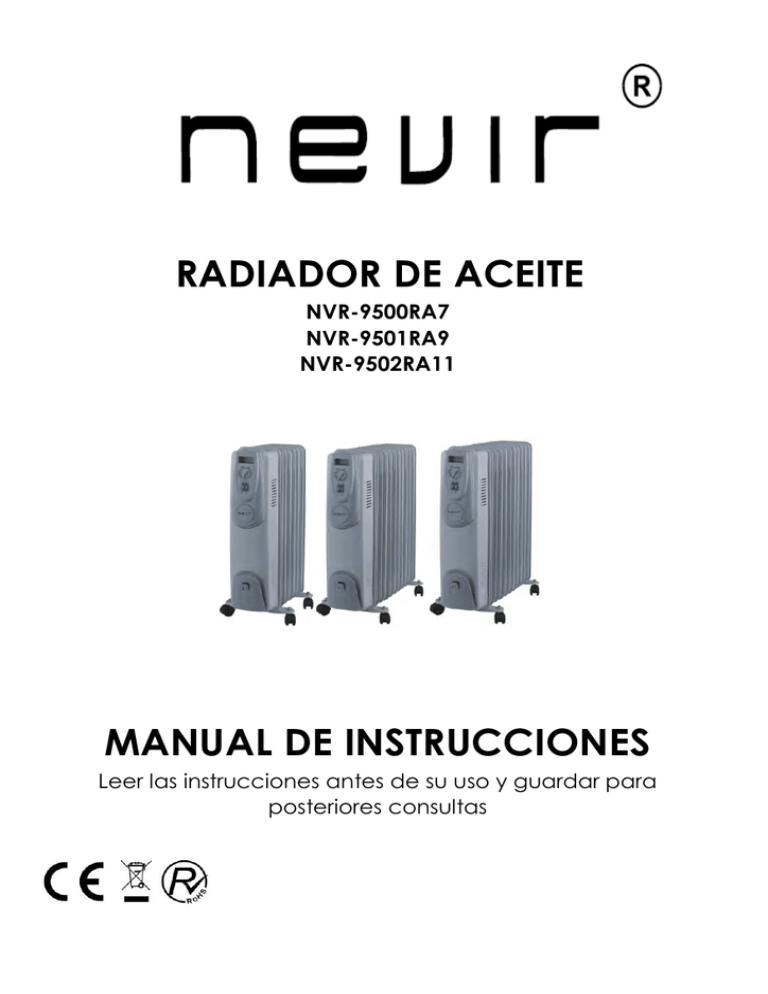
RADIADOR DE ACEITE NVR-9500RA7 NVR-9501RA9 NVR-9502RA11 MANUAL DE INSTRUCCIONES Leer las instrucciones antes de su uso y guardar para posteriores consultas ES Modelos incluidos en esta hoja de instrucciones: RAC7-1500 - 1500W. Radiador de aceite 7 elementos RAC9-2000 - 2000W. Radiador de aceite de 9 elementos RAC11-2500 - 2500W. Radiador de aceite de 11 elementos 220 / 230V - 50Hz NO PONER EL RADIADOR DEL REVÉS CUANDO ESTÉ EN FUNCIONAMIENTO INTRODUCCIÓN Gracias por comprar nuestro radiador de aceite. Cada unidad ha sido fabricada para garantizar la seguridad y fiabilidad. Antes del primer uso, por favor, lea las instrucciones cuidadosamente y guárdelas para referencia futura. MONTAJE DEL RADIADOR Saque el calentador y todos los accesorios de la caja. Las ruedas deben estar fijadas en el calentador de acuerdo con los detalles a continuación. NOTA: - Es importante que los conjuntos de ruedas se ajusten a la correcta (es decir, inferior) posición del calefactor. 1. Coloque el calentador al revés. 2. Coloque la base de la rueda entre las aletas. 3. Fije al radiador las tuercas y pernos en U suministrados. 4. Apretar las tuercas de mariposa. 5. Coloque las ruedas de las placas con las tuercas suministradas. 6. Coloque el calentador en la posición correcta DESCRIPCIÓN DE LAS PARTES 1. Interruptor. 2. Rueda de termostato. 3. Asa. 4. Elementos. 5. Ruedas. 6. Cavidad para almacenar el cable. FUNCIONAMIENTO DEL RADIADOR DE ACEITE Coloque el radiador en el suelo por lo menos 90 cm de distancia de la pared y otros objetos tales como muebles, cortinas o plantas. (Asegúrese de que la fuente de alimentación utilizada corresponde a la de la placa de características) Con el interruptor de control del termostato y los interruptores de ajuste de potencia en la posición “0”, conecte el calentador de la fuente de alimentación principal. 1. Temperatura ambiente se puede ajustar con el termostato simplemente. Gire el mando del termostato hacia la derecha, para aumentar el calor, y hacia la izquierda para disminuir la temperatura, hasta llegar a la temperatura deseada. 2. Encender la estufa a una de las siguientes opciones de energía. Modelo: RAC7-1500 = 1500 W = 3 posiciones (600, 900, 1500 W) RAC9-2000 = 2000 W = 3 posiciones (800, 1200, 2000 W) RAC11-2500 = 2500 W = 3 posiciones (1000, 1500, 2500W) 3. Las luces del interruptor se iluminan cuando se conecta el radiador. 4. Al girar el control del termostato hacia la derecha aumentará el "set" de la temperatura. 5. Al girar el termostato a la izquierda, disminuirá el "set" de la temperatura. 6. No cubra el calentador en cualquier momento durante el funcionamiento. Hay un riesgo de incendio si el calentador está cubierto. 7. Una vez que haya terminado de usar su calentador, lleve a su vez los interruptores de encendido y el interruptor de control del termostato a la posiciones "0" y desconecte de la red eléctrica. NOTA: - Cuando los calefactores se encienden por primera vez o después de no haber sido utilizado durante un período largo, los calentadores puede emitir olor y humo. Esto desararecerá cuando el calentador haya estado funcionando en un corto tiempo. LIMPIEZA DEL RADIADOR DE ACEITE 1. Siempre desconecte el calentador de la red eléctrica antes de limpiarlo. 2. Limpie el exterior del calentador con un paño húmedo y pula con un paño seco. 3. No use ceras o limpiadores ya que pueden reaccionar con el calentador y causar decoloración. ALMACENAMIENTO DEL RADIADOR DE ACEITE 1. Guarde la caja para el almacenamiento fuera de temporada. 2. Limpie el calentador siguiendo las instrucciones de limpieza anterior. 3. Retire la base de la rueda. 4. Coloque el calentador, y los conjuntos de ruedas en su caja original y guárdelo en un lugar fresco y seco. 5. Si decide guardar el calentador completamente ensamblado, cúbralo para protegerlo del polvo. ¡IMPORTANTE! NORMAS DE SEGURIDAD 1. Lea detenidamente las instrucciones antes de su uso y guardarlas para futuras referencias. 2. Siempre desconecte el calentador de la alimentación principal cuando no esté en uso y cuando vaya a limpiarlo. 3. No deje el calentador "ON" sin supervisión. 4. El calentador debe estar siempre en posición vertical. 5. Compruebe que el voltaje de alimentación es el mismo que el que se muestra en la etiqueta y que existe toma de tierra. 6. Es normal que el calentador para haga ruido cuando se utilice por primera vez. 7. Con el fin de evitar el sobrecalentamiento, no cubra el calentador. 8. Mantenga el calefactor a una distancia de al menos 90 cm de cualquier material combustible, tales como muebles, cortinas de telas de ropa de cama, papeles, 9. Mantenga el calefactor limpio. No permita que objetos entren en la ventilación, ya que esto puede provocar una descarga eléctrica, fuego o daños. 10. Estrecha supervisión es necesaria cuando el aparato es utilizado cerca de o por los niños. 11. Nunca permita que el cable toque superficies húmedas o calientes, se tuerza o esté dentro del alcance de los niños. 12. No lo coloque sobre o cerca de un gas caliente o quemador eléctrico. 13. Nunca utilice el aparato con un cable o enchufe dañado o después que el aparato no funciona correctamente o haya sido dañado de alguna forma. 14. No intente abrir o desmontar cualquier parte de los controles. La responsabilidad del daño no puede ser aceptada si estas instrucciones han sido ignoradas. 15. No utilice el aparato para otra cosa que el uso previsto. 16. Este aparato está destinado sólo para uso doméstico, no utilice al aire libre. 17. Todas las reparaciones que se deben hacer al radiador deben ser referidas a un agente de servicio autorizado. 18. El aparato no está diseñado para ser utilizado por personas (incluidos niños) con capacidades físicas, sensoriales o mentales, o la falta de experiencia y conocimiento, a menos que se les supervise o les instruya en el uso del aparato por una persona responsable de su seguridad. Los niños deben ser supervisados para asegurarse de que no jueguen con el aparato. 19. Si el cable eléctrico está dañado, debe ser reemplazado por el fabricante, su agente de servicio o personas cualificadas, con el fin de evitar peligro. 20. El calefactor no debe estar situado inmediatamente debajo de una toma de corriente. 21. No utilice este calentador en el entorno de un baño, una ducha o una piscina. 22. El calentador se llena con una cantidad precisa de aceite especial. Reparaciones que requieran la apertura del contenedor de aceite son sólo para ser realizados por el fabricante o su agente de servicio que se debe contactar si hay una fuga de aceite. Cuando desguace el calentador, siga las normas relativas a la eliminación de los hidrocarburos. MANTENIMIENTO 1. Saque siempre el enchufe de la toma de corriente y deje que el radiador se enfríe antes de limpiarla. 2. Limpie el radiador con un trapo suave y húmedo (no mojado). ADVERTENCIA: No sumerja el calentador en agua. No utilice ningún producto químico de limpieza tales como detergentes y abrasivos. No permita que el interior se moje, ya que esto podría crear un peligro. 3. Para almacenar lejos del calentador, devanar la bobina cable redondo y almacenar el calentador en un lugar limpio y seco. 4. En caso de mal funcionamiento o de duda, no intente reparar el radiador usted mismo, puede resultar riesgo de incendio o descarga eléctrica. Proceso correcto de desecho de este producto EN WARNING: READ THIS OWNER’S MANUAL CAREFULLY BEFORE USE When using an electrical appliance, basic safety precautions should always be observed, including the following: WARNING: To reduce the risk of fire, electrical shock, or injury to person: 1. This appliance is not intended for use by persons (including children) with reduced physical, sensory or mental capabilities, or lack of experience and knowledge, unless they have been given supervision or instruction concerning use of the appliance by a person responsible for their safety. 2. Children should be supervised to ensure that they do not play with the appliance. 3. The product is for household use only. 4. Connect the appliance to single phase AC supply of the voltage specified on the rating plate. 5. In order to avoid overheating, do not cover the heater. 6. Never leave the heater unattended while it is in use. Always turn the product to the OFF position and unplug it from the electrical outlet when not in use. 7. Extreme caution is necessary when any heater is used by or near children, invalids or elderly person and whenever the heater is left operating and unattended. 8. The heater must not be located immediately below an electrical socket-outlet. 9. Do not run cord under carpeting and do not cover cord with throw rugs, runners or the like. Arrange cord away from traffic area and where it will not be tripped over. 10. Do not operate the heater with a damaged cord or plug, or after the heater malfunctions, has been dropped, or damaged in any manner. 11. If the supply cord is damaged, it must be replaced by the manufacturer or its service agent or a similarly qualified person to avoid a hazard. 12. Avoid the use of an extension cord as this may overheat and cause a risk of fire. 13. Use the heater in a well-ventilated area. Do not insert or allow objects to enter any ventilation or exhaust opening. To prevent a possible fire, do not block air intakes or exhaust openings in any manner. Do not use on soft surfaces, like a bed, where openings may become blocked. Use the heater on flat, dry surfaces only. 14. Do not place this heater near flammable materials, surfaces or substances, as there may be a risk of fire. Keep the above flammable materials, surfaces or substances at least 1m from the front of the product and keep them away from the sides and rear. 15. Do not use the heater in any areas where petrol, paint or other flammable liquids are stored e.g. Garages or workshops as a hot, arcing or sparking parts inside the heater. 16. Don’t use this heater in the immediate surroundings of a bath, a shower or a swimming pool. Never locate the heater where it may fall into bathtub or other water container. 17. This heater is hot when in use. To avoid burns and personal injury, do not let bare skin touch hot surfaces. If provided, use handles when moving the product. 18. Be sure that no other appliances are in use on the same electrical circuit as your product as an overload can occur. 19. This heater is filled with a precise quantity of special oil. 20. Repair requiring opening of the oil container are only to be made by the manufacturer or his service agent who should be contacted if there is an oil leakage. 21. Regulations concerning the disposal of oil when scrapping the appliance have to be followed. 22. The heater should not be used in a room, of which the floor area is less than 5 M2. 23. The cord shouldn’t be placed nearby the hot surface of the appliance. SPECIFICATIONS 1. Power switch 2. Thermostat knob 3. Handle 4. Radiant fins 5. Castor 3 6. Cord storage Technical data: Model I II III YL-B07-7 600W 900W 1500W YL-B07-9 1000W 1000W 2000W YL-B07-11 1000W 1500W 2500W ASSEMBLY INSTRUCTIONS The heater is packaged with the feet unattached. You must attach them before operating the heater. WARNING: Do not operate without feet attached. Do operate the heater only in upright position (feet on the bottom, controls on the top), any other position could create a hazardous situation. 1. Place the radiator body upside-down on a scratch-free location, make sure it is stable and will not fall. 2. Screw off the wing nuts from the U-shaped bolt provided, attach the U-shaped bolt to the U-facing flange between first and second fins (near the front cover). 3. To attach the castor mounting plate to the radiator body, you should insert the threaded ends of the U bolt in the holes on the castor mounting plate. 4. Screw the wing nuts back to the U bolt and fasten the wing nut properly. Note: do not over tighten, which may cause the damage of radiator flange. 5、Screw off spherical nut from the castor, align the shaft to the hole of the castor mounting plate, insert in, and screw on the spherical nut. 6、Repeat 2, 3, 4 and 5 on the rear of radiator for mounting of the rear castors. Note: the rear castors must be mounted between the end two fins. INSTRUCTIONS FOR USE 1. Before using the heater, make sure that it is on a flat and stable surface, damage may occur if it is placed on an incline or decline. 2. Set all the controls to OFF position and insert the plug into a socketoutlet with well grounded. Be sure that plug fits firmly. 3. Rotate the thermostat knob clockwise to MAX position and switch the heater on as follow: the switch I for low heat, the switch II for medium heat and both switches on for high heat. 4. When your room reaches the desired temperature, now slowly rotate the thermostat knob counter clockwise until the pilot light goes out. The thermostat can now be left at this setting. As soon as the room temperature has dropped below the set temperature, the unit will switch it self on automatically until the set temperature has been reached again. In this way the room temperature remains constant with the most economical use of electricity. 5. If you want to change the room temperature setting, rotate the thermostat knob clockwise to raise the temperature, or counter clockwise to lower it. 6. This heater includes an overheat protection system that shuts off the heater when parts of the heater are getting excessively hot. 7. To completely shut the heater off, turn all the controls to OFF, and remove plug from the socket-outlet. MAINTENANCE 1. Always remove the plug from the socket-outlet and allow the radiator to cool down before clean it. 2. Wipe radiator with a soft damp (not wet) cloth. WARNING: Do not immerse the heater in water. Do not use any cleaning chemicals such as detergents and abrasives. Do not allow the interior to get wet as this could create a hazard. 3. To store away the heater, wind the cable round bobbin and store the heater in a clean dry place. 4. In case of malfunction or doubt, do not try to repair the radiator yourself, it may result in a fire hazard or electric shock. Correct Disposal of this product DECLARACIÓN DE CONFORMIDAD NEVIR, S.A. Declara bajo su responsabilidad que el aparato indicado cumple los requisitos de las siguientes directivas: LOW VOLTAGE DIRECTIVA EEC DIRECTIVA EMC Descripciones del aparato: RADIADOR DE ACEITE Modelo NEVIR: NVR-9500RA7 NVR-9501RA9 NVR-9502RA11 Importador: NEVIR, S.A. Dirección del importador: NEVIR, S.A. C/ Canteros, 14 Parque Empresarial Puerta de Madrid 28830 San Fernando de Henares, Madrid
