Kit de terminación AKO-5239 e instrucciones de montaje AKO
Anuncio
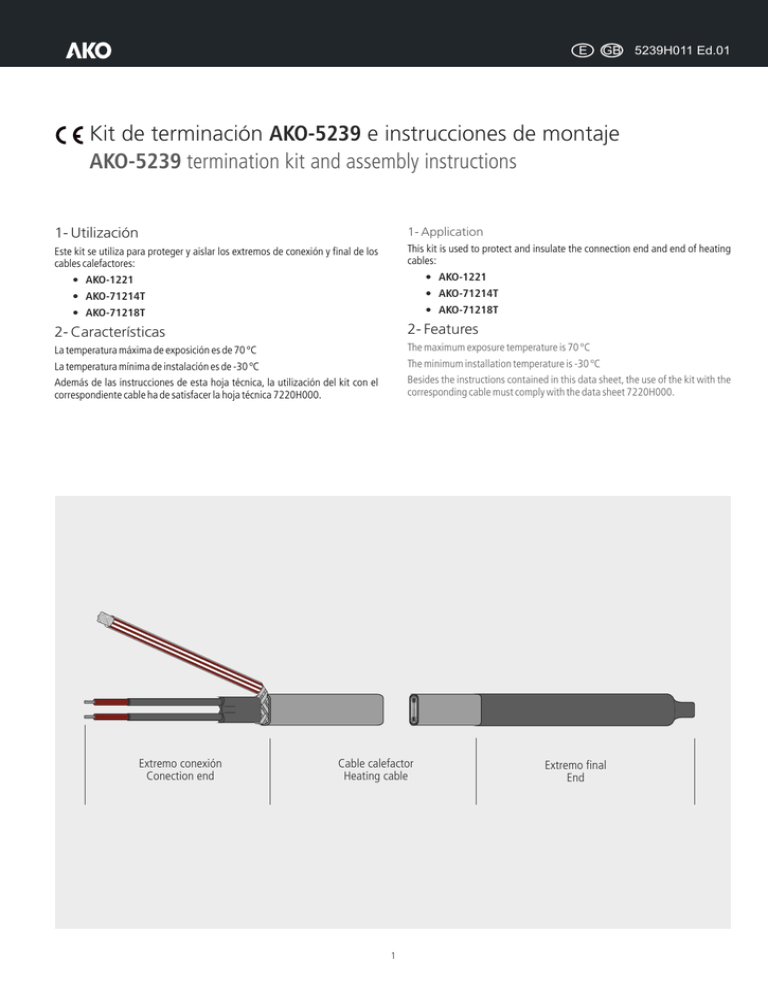
E GB 5239H011 Ed.01 Kit de terminación AKO-5239 e instrucciones de montaje AKO-5239 termination kit and assembly instructions 1- Utilización 1- Application Este kit se utiliza para proteger y aislar los extremos de conexión y final de los cables calefactores: This kit is used to protect and insulate the connection end and end of heating cables: AKO-1221 l AKO-1221 l AKO-71214T l AKO-71214T l AKO-71218T l AKO-71218T l 2- Features 2- Características La temperatura máxima de exposición es de 70 ºC The maximum exposure temperature is 70 ºC La temperatura mínima de instalación es de -30 ºC The minimum installation temperature is -30 ºC Además de las instrucciones de esta hoja técnica, la utilización del kit con el correspondiente cable ha de satisfacer la hoja técnica 7220H000. Besides the instructions contained in this data sheet, the use of the kit with the corresponding cable must comply with the data sheet 7220H000. Extremo conexión Conection end Cable calefactor Heating cable 1 Extremo final End E GB 5239H011 Ed.01 3- Composición / Components Extremo conexión / Connection end Nº 1 Nº 3 Nº 2 Nº 1 Dos tubos termorretráctiles de 115 mm / Two heat-shrink sleeves of 115 mm Nº 2 Tubo termorretráctil de 125 mm / 125 mm heat-shrink sleeve Nº 3 Tubo termorretráctil de 25 mm / 25 mm heat-shrink sleeve Extremo final / End Nº 4 Nº 5 Nº 4 Tubo termorretráctil de 100 mm / 100 mm heat-shrink sleeve Nº 5 Tubo termorretráctil de 130 mm / 130 mm heat-shrink sleeve Hoja técnica 5239H011 para kit de conexión y final con instrucciones de montaje. Data sheet 5239H011 for connection and end kit with assembly instructions Descripción del cable calefactor / Heating cable description 1 Cubierta / Outer sheath 2 Trenza metálica / Metal braid 3 Aislamiento / Insulation 4 Núcleo / Core 5 Conductores / Conductors 1 2 3 4 5 Herramientas necesarias / Tools required Cortaalambres / Wire cutters Alicates / Flat nose pliers Cuchilla / Trimming knife Destornillador / Screwdriver Pistola de aire caliente / Hot air gun 0 1 2 3 4 5 6 7 8 9 2 10 11 12 13 14 15 16 17 E GB 5239H011 Ed.01 15 0m m 4- Instrucciones de montaje para extremo conexión / Assembly instructions for connection end Cortar y abrir la cubierta en 150 mm. No cortar la trenza. Quitar la cubierta. Retroceder la trenza para que aumente su diámetro y quede suelta. Hacer una abertura en la trenza y extraer el cable. Cut 150 mm from the outer sheath. Do not cut the braid. Remove the outer sheath. Push back braid to increase its diameter and loosen. Make an opening in the braid and remove the heater. Cortar 135 mm de aislamiento. No cortar los conductores. Eliminar el aislamiento cortado. Cortar el núcleo con la cuchilla según se muestra. 3 4 Separar los conductores del núcleo. Eliminar todo el material del núcleo. Pull the conductors away from the core. Remove all core material. 13 5m m Cut 135 mm of insulation. Do not cut conductors. Remove electrical insulation. Cut the core as show using the trimming knife Enrollar la trenza mediante 3 ó 4 giros en la zona indicada. 5 Roll up the braid means of 3 or 4 turns in showed area. Zona de giro Turn area 13 mm Colocar los tubos termorretráctiles Nº 1 sobre los conductores y retractilar. Colocar el tubo termorretráctil Nº 2 sobre la trenza y retractilar. Position the heat-shrink sleeves No. 1 over exposed conductors and shrink. Position the heat-shrink sleeve No. 2 over braid, and shrink. 7 A 6 B Colocar el tubo termorretráctil Nº 3 sólo sobre el aislamiento y los conductores, según se muestra. Retractilar y presionar los puntos A y B durante 5 segundos. Por los extremos debe aparecer adhesivo derretido. Si no aparece volver a calentar. Dejar 13 mm sin aislamiento en conductores y trenza. Position heat-shrink sleeve No. 3 over heater and conductors only (as show). Shrink and squeeze positions A and B for 5 seconds. Molten adhesive apperars at edges. If none appears reheat. Leave 13 mm without insulation on conductors and braid. 3 E GB 5239H011 Ed.01 5- Instrucciones de montaje para extremo final / Assembly instructions for end 13 0m m Cortar y abrir la cubierta en 130 mm. No cortar la trenza. Quitar la cubierta. Retroceder la trenza hacia atrás. 2 Push back braid. Cut 130 mm from the outer sheath. Do not cut the braid. Remove the outer sheath. Cortar 50 mm de cable. Colocar el tubo termorretráctil Nº 4 según se muestra y retractilar. 4 Cut 50 mm of heater. Position the heat-shrink sleeve No. 4 as show and shrink. 50 mm Recuperar la trenza hasta que quede cubierto el tubo Nº 4, y enrollar el extremo de la misma. Cortar la trenza. Doblar el extremo de la trenza. Presionar el extremo del tubo Nº 4 hasta que quede pegado y sellado. Squeeze the No. 4 sleeve end to stick and seal 5m m Pull back braid to cover the sleeve No. 4, twist the braid end. Cut the braid. Bend the braid end. Presionar el extremo del tubo Nº 5 hasta que quede pegado y sellado. Position the heat-shrink sleeve No. 5 as show and shrink. Squeeze the No. 5 sleeve end to stick and seal 355239011 REV.00 2015 10 mm Colocar el tubo Nº 5 según se muestra y retractilar. AKO ELECTROMECÁNICA , S.A.L. Avda. Roquetes, 30-38 08812 • Sant Pere de Ribes. Barcelona • Spain. Tel.: +34 902 333 145 Fax: +34 938 934 054 www.ako.com Nos reservamos el derecho de suministrar materiales que pudieran diferir levemente de los descritos en nuestras Hojas Técnicas. Información actualizada en nuestra web. We reserve the right to supply materials that might vary slightly to those described in our Technical Sheets. Updated information is available on our website.
