Quick Up - VOCO GmbH
Anuncio
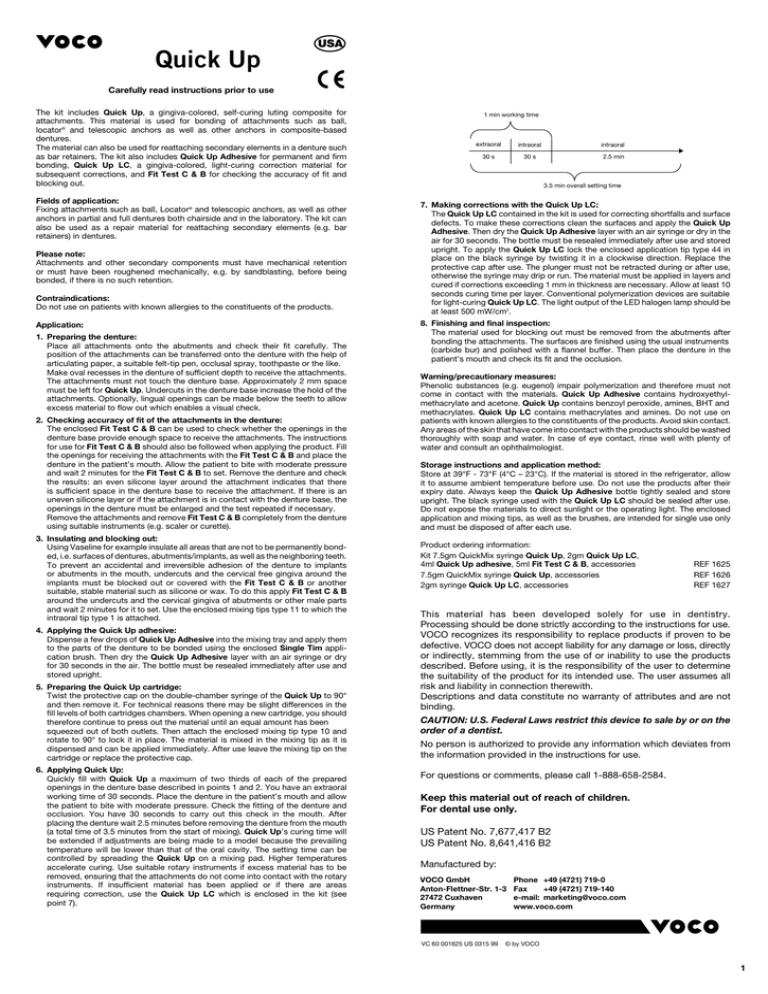
Quick Up USA Carefully read instructions prior to use The kit includes Quick Up, a gingiva-colored, self-curing luting composite for attachments. This material is used for bonding of attachments such as ball, locator® and telescopic anchors as well as other anchors in composite-based dentures. The material can also be used for reattaching secondary elements in a denture such as bar retainers. The kit also includes Quick Up Adhesive for permanent and firm bonding, Quick Up LC, a gingiva-colored, light-curing correction material for subsequent corrections, and Fit Test C & B for checking the accuracy of fit and blocking out. Fields of application: Fixing attachments such as ball, Locator® and telescopic anchors, as well as other anchors in partial and full dentures both chairside and in the laboratory. The kit can also be used as a repair material for reattaching secondary elements (e.g. bar retainers) in dentures. Please note: Attachments and other secondary components must have mechanical retention or must have been roughened mechanically, e.g. by sandblasting, before being bonded, if there is no such retention. Contraindications: Do not use on patients with known allergies to the constituents of the products. Application: 1. Preparing the denture: Place all attachments onto the abutments and check their fit carefully. The position of the attachments can be transferred onto the denture with the help of articulating paper, a suitable felt-tip pen, occlusal spray, toothpaste or the like. Make oval recesses in the denture of sufficient depth to receive the attachments. The attachments must not touch the denture base. Approximately 2 mm space must be left for Quick Up. Undercuts in the denture base increase the hold of the attachments. Optionally, lingual openings can be made below the teeth to allow excess material to flow out which enables a visual check. 2. Checking accuracy of fit of the attachments in the denture: The enclosed Fit Test C & B can be used to check whether the openings in the denture base provide enough space to receive the attachments. The instructions for use for Fit Test C & B should also be followed when applying the product. Fill the openings for receiving the attachments with the Fit Test C & B and place the denture in the patient’s mouth. Allow the patient to bite with moderate pressure and wait 2 minutes for the Fit Test C & B to set. Remove the denture and check the results: an even silicone layer around the attachment indicates that there is sufficient space in the denture base to receive the attachment. If there is an uneven silicone layer or if the attachment is in contact with the denture base, the openings in the denture must be enlarged and the test repeated if necessary. Remove the attachments and remove Fit Test C & B completely from the denture using suitable instruments (e.g. scaler or curette). 3. Insulating and blocking out: Using Vaseline for example insulate all areas that are not to be permanently bonded, i.e. surfaces of dentures, abutments/implants, as well as the neighboring teeth. To prevent an accidental and irreversible adhesion of the denture to implants or abutments in the mouth, undercuts and the cervical free gingiva around the implants must be blocked out or covered with the Fit Test C & B or another suitable, stable material such as silicone or wax. To do this apply Fit Test C & B around the undercuts and the cervical gingiva of abutments or other male parts and wait 2 minutes for it to set. Use the enclosed mixing tips type 11 to which the intraoral tip type 1 is attached. 4. Applying the Quick Up adhesive: Dispense a few drops of Quick Up Adhesive into the mixing tray and apply them to the parts of the denture to be bonded using the enclosed Single Tim application brush. Then dry the Quick Up Adhesive layer with an air syringe or dry for 30 seconds in the air. The bottle must be resealed immediately after use and stored upright. 5. Preparing the Quick Up cartridge: Twist the protective cap on the double-chamber syringe of the Quick Up to 90° and then remove it. For technical reasons there may be slight differences in the fill levels of both cartridges chambers. When opening a new cartridge, you should therefore continue to press out the material until an equal amount has been squeezed out of both outlets. Then attach the enclosed mixing tip type 10 and rotate to 90° to lock it in place. The material is mixed in the mixing tip as it is dispensed and can be applied immediately. After use leave the mixing tip on the cartridge or replace the protective cap. 6. Applying Quick Up: Quickly fill with Quick Up a maximum of two thirds of each of the prepared openings in the denture base described in points 1 and 2. You have an extraoral working time of 30 seconds. Place the denture in the patient’s mouth and allow the patient to bite with moderate pressure. Check the fitting of the denture and occlusion. You have 30 seconds to carry out this check in the mouth. After placing the denture wait 2.5 minutes before removing the denture from the mouth (a total time of 3.5 minutes from the start of mixing). Quick Up’s curing time will be extended if adjustments are being made to a model because the prevailing temperature will be lower than that of the oral cavity. The setting time can be controlled by spreading the Quick Up on a mixing pad. Higher temperatures accelerate curing. Use suitable rotary instruments if excess material has to be removed, ensuring that the attachments do not come into contact with the rotary instruments. If insufficient material has been applied or if there are areas requiring correction, use the Quick Up LC which is enclosed in the kit (see point 7). 1 min working time extraoral intraoral intraoral 30 s 30 s 2.5 min 3.5 min overall setting time 7. Making corrections with the Quick Up LC: The Quick Up LC contained in the kit is used for correcting shortfalls and surface defects. To make these corrections clean the surfaces and apply the Quick Up Adhesive. Then dry the Quick Up Adhesive layer with an air syringe or dry in the air for 30 seconds. The bottle must be resealed immediately after use and stored upright. To apply the Quick Up LC lock the enclosed application tip type 44 in place on the black syringe by twisting it in a clockwise direction. Replace the protective cap after use. The plunger must not be retracted during or after use, otherwise the syringe may drip or run. The material must be applied in layers and cured if corrections exceeding 1 mm in thickness are necessary. Allow at least 10 seconds curing time per layer. Conventional polymerization devices are suitable for light-curing Quick Up LC. The light output of the LED halogen lamp should be at least 500 mW/cm2. 8. Finishing and final inspection: The material used for blocking out must be removed from the abutments after bonding the attachments. The surfaces are finished using the usual instruments (carbide bur) and polished with a flannel buffer. Then place the denture in the patient’s mouth and check its fit and the occlusion. Warning/precautionary measures: Phenolic substances (e.g. eugenol) impair polymerization and therefore must not come in contact with the materials. Quick Up Adhesive contains hydroxyethylmethacrylate and acetone. Quick Up contains benzoyl peroxide, amines, BHT and methacrylates. Quick Up LC contains methacrylates and amines. Do not use on patients with known allergies to the constituents of the products. Avoid skin contact. Any areas of the skin that have come into contact with the products should be washed thoroughly with soap and water. In case of eye contact, rinse well with plenty of water and consult an ophthalmologist. Storage instructions and application method: Store at 39°F - 73°F (4°C – 23°C). If the material is stored in the refrigerator, allow it to assume ambient temperature before use. Do not use the products after their expiry date. Always keep the Quick Up Adhesive bottle tightly sealed and store upright. The black syringe used with the Quick Up LC should be sealed after use. Do not expose the materials to direct sunlight or the operating light. The enclosed application and mixing tips, as well as the brushes, are intended for single use only and must be disposed of after each use. Product ordering information: Kit 7.5gm QuickMix syringe Quick Up, 2gm Quick Up LC, 4ml Quick Up adhesive, 5ml Fit Test C & B, accessories 7.5gm QuickMix syringe Quick Up, accessories 2gm syringe Quick Up LC, accessories REF 1625 REF 1626 REF 1627 This material has been developed solely for use in dentistry. Processing should be done strictly according to the instructions for use. VOCO recognizes its responsibility to replace products if proven to be defective. VOCO does not accept liability for any damage or loss, directly or indirectly, stemming from the use of or inability to use the products described. Before using, it is the responsibility of the user to determine the suitability of the product for its intended use. The user assumes all risk and liability in connection therewith. Descriptions and data constitute no warranty of attributes and are not binding. CAUTION: U.S. Federal Laws restrict this device to sale by or on the order of a dentist. No person is authorized to provide any information which deviates from the information provided in the instructions for use. For questions or comments, please call 1-888-658-2584. Keep this material out of reach of children. For dental use only. US Patent No. 7,677,417 B2 US Patent No. 8,641,416 B2 Manufactured by: VOCO GmbH Anton-Flettner-Str. 1-3 27472 Cuxhaven Germany VC 60 001625 US 0315 99 Phone +49 (4721) 719-0 Fax +49 (4721) 719-140 e-mail: marketing@voco.com www.voco.com © by VOCO 1 Quick Up USA/E Leer esmeradamente las instrucciones antes del uso El kit incluye Quick Up, un composite de fijación del color de la gingiva y autopolimerizable para anclajes. Este material es usado para pegar anclajes como p. ej., retenedores de bola, Locator® y retenedores telescópicos, así como otros elementos de soporte en prótesis a base sintética. Además, el material se puede emplear para sujetar elementos secundarios de una prótesis como, p. ej. sujeciones de barras. El set incluye el Quick Up Adhesive que garantiza una unión óptima y duradera. El material de corrección Quick Up LC suministrado, del color de la encía y fotopolimerizable, se puede utilizar para correcciones posteriores. Para controlar la precisión de ajuste y el bloqueado se puede utilizar el Fit Test C & B incluido en el set. Ámbitos de aplicación: Fijación de anclajes como p. ej. retenedores de bola, Locator® y retenedores telescópicos, así como otros elementos de soporte en prótesis parciales y totales en sillón dental o laboratorio. Además, el set se puede utilizar como material de reparación para sujetar elementos secundarios de las prótesis (p. ej. barras). Atención: Los anclajes y otras piezas secundarias deben poseer retenciones mecánicas o, en su defecto, rasparse mecánicamente, p. ej. con chorro de arena, antes de la fijación, si no hay así unos retenedores. Contraindicaciones: No utilice el material en pacientes con alergia a los componentes. Evítese el contacto con la piel. Aplicación: 1. Preparación de la prótesis: Coloque cuidadosamente todos los anclajes en los pilares y asegúrese de que están bien colocados. Mediante trabajo articular, un rotulador adecuado, spray de oclusión, crema dental o similar, se puede transferir la posición de los anclajes a la prótesis. Prepare cavidades ovaladas en la prótesis que sean lo suficientemente grandes como para alojar los anclajes. Los anclajes no deben tocar la base de la prótesis. Se debe dejar un espacio de aprox. 2 mm para Quick Up. Las socavaduras en la base de la prótesis aumentan la sujeción. De forma opcional se pueden elaborar aberturas linguales debajo de los dientes para poder retirar el material sobrante y tener un control visual. 2. Control de la precisión de ajuste de los anclajes en la prótesis: Para controlar si las aberturas de la base de la prótesis ofrecen suficiente espacio para alojar los anclajes, se puede utilizar el Fit Test C & B suministrado. En cuanto al procesamiento, se deben seguir las instrucciones de uso de Fit Test C & B. Llene las aberturas para alojar los anclajes con Fit Test C & B y coloque la prótesis al paciente. Haga que el paciente muerda con relativa presión y espere 2 minutos hasta que el Fit Test C & B haya fraguado. Retire la prótesis y compruebe el resultado: Si la capa de silicona en el anclaje es uniforme significa que existirá suficiente espacio libre en la base de la prótesis para alojarlo. Si las capas de silicona son irregulares o el anclaje entra en contacto con la base de la prótesis, se deben ampliar las aberturas de la prótesis y, en caso necesario, repetir la prueba. Retire los anclajes y el Fit Test C & B de la prótesis con instrumentos adecuados (p. ej. un raspador o una cureta). 3. Aislamiento y bloqueado: Aísle, p. ej. con vaselina, todas las zonas que no se deban unir de forma permanente: las superficies de la prótesis, los pilares/implantes y los dientes adyacentes. Con el fin de evitar que la prótesis quede adherida al implante o los postes de forma no intencionada y el resultado sea irreversible, las zonas socavadas y la encía libre cervical próximas al implante se deben aislar o cubrir con Fit Test C & B u otro material resistente adecuado, como silicona o cera. Para ello se debe aplicar Fit Test C & B alrededor de las zonas socavadas y la encía cervical de los pilares u otros soportes (punzones) y esperar 2 minutos a que fragüe. Utilice las puntas de mezcla suministradas tipo 11 con las puntas intrabucales tipo 1. 4. Aplicación del adhesivo Quick Up: Vierta unas gotas del Quick Up Adhesive en la paleta mezcladora y aplíquelo a las zonas de la prótesis que desea pegar con ayuda del pincel aplicador Single Tim. A continuación, seque la capa de Quick Up Adhesive con una jeringa de aire o espere 30 segundos. El frasco se debe cerrar inmediatamente después del uso y se debe almacenar en posición vertical. 5. Preparación del cartucho de Quick Up: Gire 90° el capuchón de la jeringa de doble cámara del Quick Up y retírela. En función de las condiciones técnicas, el nivel de llenado puede ser diferente entre una y otra cámara del cartucho. Por tanto, al abrir un cartucho nuevo, presione el material hasta que drene de forma regular por ambos orificios de salida. A continuación, coloque la punta de mezcla de tipo 10 suministrada y fíjela girándola 90°. El material se mezclará en la cánula y se podrá aplicar directamente. Después del uso de la punta de mezcla, deje ésta insertada en el cartucho o colóquele la tapa. 6. Aplicación de Quick Up: Llene rápidamente con Quick Up todas las aberturas que se indican en los puntos 1 y 2 de la base de la prótesis hasta un máximo de 2/3. Dispone de un tiempo de manipulación extrabucal de 30 segundos. Coloque la prótesis en la boca del paciente y haga que éste muerda con relativa presión. Compruebe que la prótesis esté bien colocada y verifique la oclusión. Dispone de 30 segundos para hacer esta comprobación en la boca. Después de la colocación, espere 2,5 minutos antes de retirar la prótesis de la boca (3,5 minutos en total desde la preparación de la mezcla). Si Quick Up se adapta a un modelo, se debe prolongar el tiempo de fraguado, ya que la temperatura será más baja que la de la cavidad bucal. El tiempo de fraguado se puede controlar aplicando Quick Up en un mezclador. Cuanto más alta sea la temperatura, más rápido será el fraguado. En caso de que deba retirar material restante, utilice instrumentos rotatorios adecuados sin tocar los anclajes. En caso de que deba añadir material o deban corregirse algunas zonas, utilice el Quick Up LC suministrado en el set (véase el punto 7). Tiempo de elaboración de 1 min extrabucal intrabucal intrabucal 30 s 30 s 2,5 min 3,5 min de tiempo total hasta el fraguado 7. Correcciones con el Quick Up LC: El set incluye Quick Up LC para los casos en que se deba añadir material y corregir defectos superficiales. Limpie las superficies y aplique el adhesivo Quick Up. A continuación, seque la capa de adhesivo Quick Up con una jeringa de aire o espere 30 segundos. El frasco se debe cerrar inmediatamente después del uso y se debe almacenar en posición vertical. Para aplicar Quick Up LC, coloque en la jeringa negra la cánula de aplicación suministrada tipo 44 girándola en el sentido de las agujas del reloj. Cuando haya terminado, vuelva a colocar la tapa. Con el fin de garantizar el funcionamiento de la jeringa sin retorno, se debe tener en cuenta que el émbolo no se debe retirar durante ni después del uso. Si es necesario realizar correcciones de más de 1 mm de grosor, se debe aplicar el material y dejarlo fraguar por capas. Los tiempos de fraguado son de 10 segundos por capa como mínimo. Para la fotopolimerización de Quick Up LC se utilizan los polimerizadores convencionales. La potencia lumínica de la lámpara LED/ halógena debería ser de 500 mW/cm2 como mínimo. 8. Acabado y control final: Una vez pegados los anclajes, se debe retirar de los pilares el material utilizado para el bloqueado. Con los instrumentos habituales (fresa de carburo metálico) se realiza el acabado de las superficies y éstas se pulen con un paño de franela. A continuación, coloque la prótesis en la boca del paciente y compruebe su posición y la oclusión. Indicaciones, medidas de prevención: Las sustancias fenólicas (p. ej. eugenol) afectan la polimerización, por lo que no deben entrar en contacto con los materiales. El Quick Up Adhesive contiene metacrilato de hidroxietilo y acetona. Quick Up contiene peróxido de benzoílo, aminas, BHT y metacrilato. Quick Up LC contiene metacrilato y aminas. En caso de contacto, lávese abundantemente con agua y jabón. En caso de contacto con los ojos, lávense inmediata y abundantemente con agua y acúdase a un médico. Indicaciones de conservación y aplicación: Conservar a una temperatura entre 39°F - 73°F (4 °C y 23 °C). Si se conserva el material en el refrigerador, tiene que alcanzar la temperatura ambiente antes de su uso. No utilice las preparaciones después de la fecha de caducidad. Mantenga bien cerrado el frasco del Quick Up Adhesive y consérvelo en posición vertical. Cierre la jeringa negra con el Quick Up LC una vez utilizada. No exponga los materiales a la luz directa del sol ni a la luz de quirófano. Las cánulas de aplicación y puntas de mezcla, así como los pinceles, son de un único uso, por lo que se deben desechar una vez utilizadas. Presentaciones: set 7,5grs jeringa QuickMix Quick Up, 2grs Quick Up LC, 4ml Quick Up adhesivo, 5ml Fit Test C & B, accesorios 7,5grs jeringa QuickMix Quick Up, accesorios 2grs jeringa Quick Up LC, accesorios REF 1625 REF 1626 REF 1627 Este material se desarrolló exclusivamente para el uso del odontólogo. El proceso debe ser como está indicado en la información de uso. VOCO reconoce su responsibilidad de reemplazar los productos si se muestran que están defectos. VOCO no acepta la responsabilidad de cualquier perjuicio o pérdida que descienden del uso o de la incapacidad de usar los productos descritos. Antes de usarlo, es la responsabilidad del utilizador de determinar lo adecuado del producto para su uso intentado. El utilizador supone todo el riesgo y la responsabilidad en conexión con eso. Descripciones y datos no constituyen ninguna garantía y no son aglumerantes. Atención: La legislación américana rejistre este dispositivo para venderlo o al pedido del dentista. Ninguna persona está autorizada de proveer ninguna información que desvía de las informaciones provéidas en esta información de uso. Para preguntas o comentarios, por favor, llámen al 1-888-658-2584. Mántengase fuera del alcance de los niños. Solamente para el uso odontólogo. US Patent No. 7,677,417 B2 US Patent No. 8,641,416 B2 Fabricado por: VOCO GmbH Anton-Flettner-Str. 1-3 27472 Cuxhaven Germany Phone +49 (4721) 719-0 Fax +49 (4721) 719-140 e-mail: marketing@voco.com www.voco.com 2
