HIT® – Hook Inserting Tack System
Anuncio
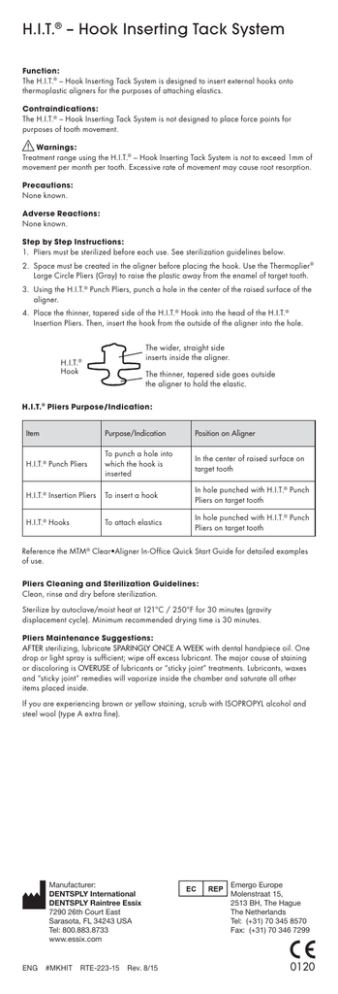
H.I.T.® – Hook Inserting Tack System Function: The H.I.T.® – Hook Inserting Tack System is designed to insert external hooks onto thermoplastic aligners for the purposes of attaching elastics. Contraindications: The H.I.T.® – Hook Inserting Tack System is not designed to place force points for purposes of tooth movement. Warnings: Treatment range using the H.I.T.® – Hook Inserting Tack System is not to exceed 1mm of movement per month per tooth. Excessive rate of movement may cause root resorption. Precautions: None known. Adverse Reactions: None known. Step by Step Instructions: 1. Pliers must be sterilized before each use. See sterilization guidelines below. 2. Space must be created in the aligner before placing the hook. Use the Thermoplier ® Large Circle Pliers (Gray) to raise the plastic away from the enamel of target tooth. 3. Using the H.I.T.® Punch Pliers, punch a hole in the center of the raised surface of the aligner. 4. Place the thinner, tapered side of the H.I.T.® Hook into the head of the H.I.T.® Insertion Pliers. Then, insert the hook from the outside of the aligner into the hole. The wider, straight side inserts inside the aligner. H.I.T.® Hook The thinner, tapered side goes outside the aligner to hold the elastic. H.I.T.® Pliers Purpose/Indication: Item Purpose/Indication Position on Aligner H.I.T.® Punch Pliers To punch a hole into which the hook is inserted In the center of raised surface on target tooth H.I.T.® Insertion Pliers To insert a hook In hole punched with H.I.T.® Punch Pliers on target tooth H.I.T.® Hooks To attach elastics In hole punched with H.I.T.® Punch Pliers on target tooth Reference the MTM ® Clear•Aligner In-Office Quick Start Guide for detailed examples of use. Pliers Cleaning and Sterilization Guidelines: Clean, rinse and dry before sterilization. Sterilize by autoclave/moist heat at 121°C / 250°F for 30 minutes (gravity displacement cycle). Minimum recommended drying time is 30 minutes. Pliers Maintenance Suggestions: AFTER sterilizing, lubricate SPARINGLY ONCE A WEEK with dental handpiece oil. One drop or light spray is sufficient; wipe off excess lubricant. The major cause of staining or discoloring is OVERUSE of lubricants or “sticky joint” treatments. Lubricants, waxes and “sticky joint” remedies will vaporize inside the chamber and saturate all other items placed inside. If you are experiencing brown or yellow staining, scrub with ISOPROPYL alcohol and steel wool (type A extra fine). Manufacturer: DENTSPLY International DENTSPLY Raintree Essix 7290 26th Court East Sarasota, FL 34243 USA Tel: 800.883.8733 www.essix.com ENG #MKHIT RTE-223-15 Rev. 8/15 Emergo Europe Molenstraat 15, 2513 BH, The Hague The Netherlands Tel: (+31) 70 345 8570 Fax: (+31) 70 346 7299 0120 Sistema de tachuelas para inserción de ganchos H.I.T.® Función: El sistema de tachuelas para inserción de ganchos H.I.T.® está diseñado para insertar ganchos externos en alineadores de termoplástico para la sujeción de elásticos. Contraindicaciones: El sistema de tachuelas para inserción de ganchos H.I.T.® no está diseñado para colocar puntos de fuerza para el movimiento de los dientes. Advertencias: La gama de tratamiento al usar el sistema de tachuelas para inserción de ganchos H.I.T.® no debe exceder 1 mm de movimiento al mes por diente. El movimiento excesivo puede causar la reabsorción de la raíz. Precauciones: Ninguna conocida. Reacciones adversas: Ninguna conocida. Instrucciones paso a paso: 1. Las pinzas deben esterilizarse antes de cada uso. Consulte los lineamientos de esterilización, presentados más adelante. 2. Debe crearse espacio en el alineador antes de colocar el gancho. Use las pinzas Thermoplier ® para círculos grandes (grises) para separar el plástico del esmalte del diente objetivo. 3. Use las pinzas perforadoras H.I.T.® para abrir un agujero en el centro de la superficie levantada del alineador. 4. Coloque el lado ahusado, más delgado, del gancho H.I.T.® en la cabeza de las pinzas de inserción H.I.T.®. Luego, inserte el gancho por la parte externa del alineador, hacia al agujero. El lado recto, más ancho, se inserta en el alineador. Gancho H.I.T.® El lado ahusado, más delgado, va afuera del alineador para sujetar el elástico. Propósito e indicación de las pinzas H.I.T.® : Artículo Propósito e indicación Posición en el alineador Pinzas Perforar un agujero donde En el centro de la superficie perforadoras H.I.T.® se inserta el gancho levantada del diente objetivo Pinzas de inserción H.I.T.® Insertar un gancho En el agujero perforado con las pinzas perforadoras H.I.T.® en el diente objetivo Ganchos H.I.T.® Sujetar elásticos En el agujero perforado con las pinzas perforadoras H.I.T.® en el diente objetivo Consulte la guía de inicio rápido para el consultorio del alineador transparente MTM ® para conocer ejemplos detallados de la forma de uso. Lineamientos de limpieza y esterilización de las pinzas: Limpie, enjuague y seque antes de esterilizar. Esterilice con autoclave y calor húmedo a 121°C / 250°F durante 30 minutos (ciclo de desplazamiento por gravedad). El tiempo mínimo de secado recomendado es de 30 minutos. Sugerencias de mantenimiento de las pinzas: DESPUÉS de esterilizar, lubrique CON MODERACIÓN UNA VEZ POR SEMANA con aceite para piezas de mano dentales. Es suficiente una gota o una aspersión ligera; limpie el exceso de lubricante. La principal causa de manchas y decoloración es el USO EXCESIVO de lubricantes o tratamientos de “unión pegajosa”. Los lubricantes, las ceras y los remedios de “unión pegajosa” se vaporizarán dentro de la cámara y saturarán todas las piezas en el interior. Si se presentan manchas pardas o amarillas, talle con alcohol ISOPROPÍLICO y lana de acero (tipo A extrafina). Fabricante: DENTSPLY International DENTSPLY Raintree Essix 7290 26th Court East Sarasota, FL 34243 USA Tel: 800.883.8733 www.essix.com ESP #MKHIT RTE-223-15 Rev. 8/15 Emergo Europe Molenstraat 15, 2513 BH, La Haya Países Bajos Tel: (+31) 70 345 8570 Fax: (+31) 70 346 7299 0120 H.I.T.® – Système de fixation à insertion de crochet Fonction : Le système de fixation à insertion de crochet H.I.T.® (Hook Inserting Tack System) est conçu pour insérer des crochets externes dans les aligneurs thermoplastiques dans le but de fixer des élastiques. Contre-indications : Le système de fixation à insertion de crochet H.I.T.® n’est pas conçu pour placer des points de résistance dans le but d’un mouvement dentaire. Avertissements : Le traitement avec le système de fixation à insertion de crochet H.I.T.® ne doit pas dépasser 1mm de mouvement par mois et par dent. Un mouvement excessif pourrait provoquer une résorption radiculaire. Précautions : Aucune connue. Réactions indésirables : Aucune connue. Instructions étape par étape : 1. La pince doit être stérilisée avant chaque utilisation. Consultez les consignes de stérilisation ci-dessous. 2. Un espace doit être créé dans l’aligneur avant de placer le crochet. Utilisez la pince circulaire de grande taille (grise) Thermoplier ® pour lever le plastique de l’émail de la dent cible. 3. À l’aide de la pince de perforation H.I.T.®, percez un trou dans le centre de la surface élevée de l’aligneur. 4. Placez le côté plus fin et effilé du crochet H.I.T.® dans la tête de la pince d’insertion H.I.T.®. Insérez ensuite le crochet, depuis l’extérieur de l’aligneur, dans le trou. Insérez le côté plus large et droit dans l’aligneur. Crochet H.I.T.® Le côté plus fin et effilé va en dehors de l’aligneur pour maintenir l’élastique. Indication de la pince H.I.T.® : Article Indication Position sur l’aligneur Pince de perforation H.I.T.® Permet de percer un trou dans lequel le crochet est inséré Au centre de la surface élevée, sur la dent cible Pince d’insertion H.I.T.® Permet d’insérer un crochet Dans le trou percé avec la pince de perforation H.I.T.®, sur la dent cible Crochet H.I.T.® Permet de fixer les élastiques Dans le trou percé avec la pince de perforation H.I.T.®, sur la dent cible Consultez le guide de démarrage rapide de l’aligneur transparent MTM ® pour des exemples d’utilisation détaillés. Consignes de nettoyage et de stérilisation de la pince : Nettoyez, rincez et séchez avant la stérilisation. Stérilisez par autoclave/chaleur humide à 121°C / 250°F pendant 30 minutes (cycle de déplacement par gravité). Le temps de séchage minimum recommandé est de 30 minutes. Suggestions d’entretien de la pince : APRÈS la stérilisation, lubrifiez AVEC PARCIMONIE, UNE FOIS PAR SEMAINE, avec de l’huile d’instrument dentaire. Une goutte ou une légère pulvérisation suffit ; essuyez le lubrifiant en trop. La cause majeure des taches ou de la décoloration est L’UTILISATION EXCESSIVE de lubrifiants. Les lubrifiants et les cires vont se vaporiser et saturer tous les autres éléments placés dans la chambre. En cas de taches marrons ou jaunes, frottez avec de l’acool ISOPROPYLIQUE et de la laine d’acier (type A, extra fine). Fabricant : DENTSPLY International DENTSPLY Raintree Essix 7290 26th Court East Sarasota, FL 34243 USA Tel: 800.883.8733 www.essix.com FRA #MKHIT RTE-223-15 Rev. 8/15 Emergo Europe Molenstraat 15, 2513 BH, La Haye Pays-Bas Tel: (+31) 70 345 8570 Fax: (+31) 70 346 7299 0120 H.I.T.® – Sistema per inserire ganci per ancoraggio elastici Funzione: Il sistema H.I.T.® – Hook Inserting Tack System (Sistema per inserire ganci per ancoraggio elastici) è indicato per l’inserimento di ganci esterni su allineatori termoplastici allo scopo di ancorare gli elastici. Controindicazioni: Il sistema H.I.T.® non è destinato al posizionamento di punti di forza finalizzati allo spostamento di un dente. Avvertenze: Utilizzando H.I.T.® – Sistema per inserire ganci per ancoraggio elastici, l’intervallo di trattamento non deve superare 1 mm al mese di spostamento per dente. Una velocità di spostamento superiore può causare riassorbimento radicolare. Precauzioni: Nessuna nota. Reazioni avverse: Nessuna nota. Istruzioni dettagliate: 1. La pinza deve essere sterilizzata prima di ogni uso. Vedere le linee guida per la sterilizzazione seguenti. 2. Prima di posizionare il gancio occorre creare un varco nell’allineatore. Utilizzare la Pinza Thermoplier ® per formare appoggi circolari grandi per ancoraggio elastici (grigio) per rialzare la plastica lontano dallo smalto del dente bersaglio. 3. Utilizzando la pinza punzonatrice H.I.T.®, punzonare un foro al centro della superficie sollevata dell’allineatore. 4. Posizionare il lato più sottile e rastremato del gancio H.I.T.® nella morsa della pinza per inserimento H.I.T.®. Inserire quindi il gancio dall’esterno dell’allineatore entro il foro. Il lato più largo e diritto si inserisce nell’allineatore. Gancio H.I.T.® Il lato più sottile e rastremato sporge dall’allineatore per sostenere l’elastico. Finalità/uso previsto delle pinze H.I.T.® : Articolo Finalità/uso previsto Posizione sull’allineatore Pinza punzonatrice H.I.T.® Punzonatura di un foro in cui inserire il gancio Al centro della superficie rialzata sul dente bersaglio Pinza per inserimento H.I.T.® Inserimento di un gancio Nel foro punzonato con la pinza punzonatrice H.I.T.® sul dente bersaglio Ganci H.I.T.® Ancoraggio di elastici Nel foro punzonato con la pinza punzonatrice H.I.T.® sul dente bersaglio Per esempi d’uso dettagliati, fare riferimento alla Guida rapida all’allineatore trasparente MTM ®. Linee guida per la pulizia e la sterilizzazione delle pinze: Lavare, sciacquare e asciugare prima della sterilizzazione. Sterilizzare in autoclave/calore umido a 121°C / 250°F per 30 minuti (ciclo di spostamento per gravità). Il tempo di asciugatura minimo raccomandato è di 30 minuti. Consigli per la manutenzione delle pinze: DOPO la sterilizzazione, lubrificare CON PARSIMONIA UNA VOLTA ALLA SETTIMANA con olio per manipoli odontoiatrici. Una goccia di uno spray leggero è sufficiente; asciugare il lubrificante in eccesso. La causa principale di macchie o decolorazione è l’utilizzo di lubrificante IN ECCESSO o trattamenti di “articolazioni impiastrate”. Lubrificanti, cere e i rimedi per le articolazioni impiastrate si vaporizzeranno entro la camera saturando tutti gli altri elementi posti all’interno. Se si sono prodotte macchie marroni o gialle, strofinare con alcool ISOPROPILICO e lana d’acciaio (tipo A extra-fine). Produttore: DENTSPLY International DENTSPLY Raintree Essix 7290 26th Court East Sarasota, FL 34243 USA Tel: 800.883.8733 www.essix.com ITA #MKHIT RTE-223-15 Rev. 8/15 Emergo Europe Molenstraat 15, 2513 BH, L’Aja Paesi Bassi Tel: (+31) 70 345 8570 Fax: (+31) 70 346 7299 0120 H.I.T.® – HakeneinführungsBefestigungssystem Funktion: Das H.I.T.® – Hakeneinführungs-Befestigungssystem wurde entwickelt, um externe Haken in die thermoplastischen Schienen zu Zwecken der Befestigung von Elastics einzuführen. Kontraindikationen: Das H.I.T.® – Hakeneinführungs-Befestigungssystem ist nicht zur Platzierung von Kraftübertragungspunkten zur Zahnbewegung bestimmt. Warnhinweise: Die Behandlung unter Verwendung des H.I.T.® – Hakeneinführungs-Befestigungssystems sieht keine größere Zahnbewegung pro Monat als 1 mm vor. Eine übermäßige Zahnbewegung kann zu einer Wurzelresorption führen. Vorsichtsmaßnahmen: Keine bekannt. Unerwünschte Reaktionen: Keine bekannt. Schritt-Für-Schritt-Anweisungen: 1. Die Zange muss vor jeder Verwendung sterilisiert werden. Siehe die unten stehenden Sterilisationsrichtlinien. 2. Es muss Platz in der Schiene geschaffen werden, bevor der Haken platziert wird. Heben Sie den Kunststoff mithilfe der großen Thermoplier ® Rundzange (grau) vom Zahnschmelz des Zielzahns ab. 3. Stanzen Sie mithilfe der H.I.T.® Stanzzange ein Loch in die Mitte der angehobenen Oberfläche der Schiene. 4. Platzieren Sie die dünnere, abgeschrägte Seite des H.I.T.® Hakens am Kopf der H.I.T.® Einführzange. Führen Sie dann den Haken von außerhalb der Schiene in das Loch ein. Die breitere, gerade Seite wird in die Schiene eingeführt. H.I.T.® Haken Die dünnere, abgeschrägte Seite bleibt außerhalb der Schiene zum Halten der Elastics. Zweck/Indikation der H.I.T.® Zange: Artikel Zweck/Indikation Position auf der Schiene H.I.T.® Stanzzange Zum Stanzen eines Loches, in das der Haken eingeführt wird In der Mitte der angehobenen Oberfläche des Zielzahns H.I.T.® Einführzange Zum Einführen eines Hakens In dem mit der H.I.T.® Stanzzange gestanzten Loch am Zielzahn H.I.T.® Haken Zur Befestigung von Elastics In dem mit der H.I.T.® Stanzzange gestanzten Loch am Zielzahn Lesen Sie die MTM ® Klare•Schiene Kurzanleitung für detaillierte Anwendungsbeispiele. Richtlinien zur Reinigung und Sterilisation der Zange: Vor Sterilisation reinigen, spülen und trocknen. Im Autoklav/mit feuchter Hitze bei 121°C / 250°F für 30 Minuten sterilisieren (Schwerkraftverdrängungszyklus). Die empfohlene Mindesttrocknungsdauer beträgt 30 Minuten. Wartungsempfehlungen für die Zange: NACH der Sterilisation EINMAL WÖCHENTLICH SPARSAM mit einem Öl für dentale Handstücke schmieren. Ein Tropfen oder ein leichter Sprühstoß genügen; überschüssiges Schmiermittel abwischen. Der Hauptgrund für Flecken oder Verfärbungen ist ÜBERMÄSSIGER GEBRAUCH von Schmiermitteln oder die Behandlung mit klebrigen Mitteln. Schmiermittel, Wachse und klebrige Mittel verdampfen innerhalb der Kammer und schlagen sich auf allen anderen darin befindlichen Gegenständen nieder. Wenn Sie braune oder gelbe Flecken beobachten, reinigen Sie diese mit ISOPROPYLALKOHOL und Stahlwolle (Typ A extrafein). Hersteller: DENTSPLY International DENTSPLY Raintree Essix 7290 26th Court East Sarasota, FL 34243 USA Tel: 800.883.8733 www.essix.com DEU #MKHIT RTE-223-15 Rev. 8/15 Emergo Europe Molenstraat 15, 2513 BH, Den Haag Niederlande Tel: (+31) 70 345 8570 Fax: (+31) 70 346 7299 0120
