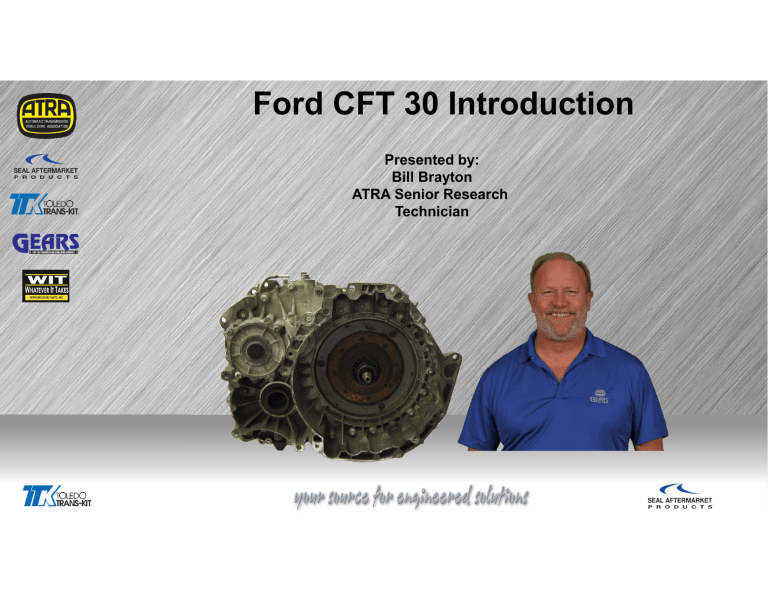
Ford CFT 30 Introduction Presented by: Bill Brayton ATRA Senior Research Technician Connections Handout Webinars@ATRA.com Questions Survey Welcome To Today’s Presentation Sponsored By: Thank you to our CoSponsors Any Questions Or Comments Please Contact Lance Wiggins At ATRA lwiggins@atra.com Webinar Schedule ATRA Webinar Schedule Description Jan 27/28 CFT 30 Rebuild Feb 10/11 Lineartronic CVT Introduction Feb 24/25 ZF8HP Introduction March 10/11 DPS6 Introduction March 24/25 Honda 6 Rebuild April 7/8 8L90 Introduction April 21/22 CFT30 Rebuild May 5/6 948TE Introduction May 19/20 Lineartronic CVT Rebuild June 2/3 ZF8HP Rebuild June 23/24 6R140 Introduction July 7/8 DPS6 Internal Operation July 21/22 U660 Introduction and Rebuild Aug 4/5 8L90 Internal Aug 18/19 01J Problems & Fixes Sept 1/2 948TE Internal Sept 15/16 5R110W Problems & Fixes Sept 29/30 Lineartronic CVT Problems & Fixes Oct 13/14 6R140 Problems & Fixes CFT 30 Applications 2005 – 2007 Five Hundred 2005 – 2007 Freestyle 2006 – 2011 Mariner Hybrid CFT 30 Applications 2009 – 2011 Milan Hybrid 2005 – 2007 Montego • • • • • • Uses Motorcraft CVT designed fluid No discreet gear shifts and no interruptions in power flow during accelerations Infinite number of gear ratios so the optimum engine operating point can be found Uses a drive chain not a belt A single planetary is used to change the rotation of the pulley assembly for forward and reverse driving ranges The TCM is internally mounted to the valve body (Mechatronic) Transaxle Electronic Control System The following is a list of components that are incorporated within the mechatronic assembly: • Transmission Control Module (TCM) • Transmission Fluid Temperature (TFT) Sensor • Speed Sensors • Turbine Shaft Sensor (TSS) and Primary Variator Speed Sensor • Valve body • Pressure Control Solenoids • Pressure Sensors The output shaft speed (OSS) is part of the transaxle electronic control system but it is not part of the mechatronic assembly. The OSS sensor is bolted to the case and reads the differential gear. Depowering the Hybrid WARNING: When servicing the high-voltage system, establish a buffer zone per the specified procedure. Failure to follow this instruction may result in serious personal injury or death. WARNING: Depower the high-voltage traction battery (HVTB) before carrying out any removal or installation procedures affecting the highvoltage battery system. Failure to follow this instruction may result in serious personal injury or death. WARNING: Wear high-voltage insulated safety gloves and a face shield when working around high-voltage batteries or cables. The high-voltage insulated safety gloves should be of appropriate safety and protection rating. Inspect the gloves before use and always wear them with the leather outer glove. Any hole in the rubber insulating glove is a potential entry point for high-voltage. Failure to follow these instructions may result in serious personal injury or death. CAUTION: Place the service disconnect plug into the servicing shipping position while the high-voltage traction battery (HVTB) is being removed and/or while the high-voltage system is having repairs carried out. If the service disconnect plug is left out and placed in the bench or toolbox, dirt or other contaminants may enter the HVTB, which can cause damage. Depowering the Hybrid (continued) WARNING: Turn OFF the ignition switch for a minimum of 5 minutes before removing high-voltage cables. High-voltage cables and wiring are orange in color. The high-voltage traction battery voltage (HVTB) is 330 V DC. Failure to follow these instructions may result in serious personal injury or death. 1. Set up a buffer zone around the vehicle. 2. Remove the service disconnect plug 1. Rotate the service disconnect plug from the lock position to the unlock position. 2. Remove the service disconnect plug and place in the servicing shipping position. 3. To connect, reverse the disconnect procedure. CFT 30 Trouble Code Chart Five Digit DTC Component Description C1222 Controller area network (CAN) Wheel speed mismatch P0218 Transmission fluid temperature (TFT) ATF over temp P0219 Engine engine rpm of vehicle speed limit reached P0562 TCM TCM power input signal low P0563 TCM TCM power input signal high P0604 TCM TCM RAM error P0605 TCM TCM ROM error P0613 TCM EEPROM error P0615 Starter relay circuit (start interlock) Starter relay pin 10 short to power or ground P0634 TCM TCM internal temp too high P0641 TCM TCM module sensor voltage failed P0657 Actuator supply voltage circuit A Actuator supply voltage circuit A open P0658 Actuator supply voltage circuit A Actuator supply voltage circuit A low P0659 Actuator supply voltage circuit A Actuator supply voltage circuit A high P0701 Trans control system Trans control system P0702 Transmission control electrical system Transmission control electrical system error P0705 Trans range sensor TR sensor circuit A P0710 TFT TFT sensor A P0711 TFT TFT sensor A P0714 TFT TFT sensor A P0715 Turbine speed sensor TSS sensor circuit A P0716 Turbine speed sensor TSS sensor circuit A high P0720 Output speed sensor OSS sensor circuit P0721 Output speed sensor OSS sensor circuit P0730 Gear ratio Incorrect gear ratio CFT 30 Trouble Code Chart Five Digit DTC Component P0740 Torque converter clutch (TCC) TCC solenoid circuit open P0741 TCC TCC solenoid circuitperformance or stuck off P0742 TCC TCC solenoid circuit stuck on P0743 TCC TCC solenoid circuit electrical P0810 Clutch position control Clutch position control error P0811 Forward or reverse clutch Excessive clutch slippage P0840 Main pressure sensor Trans main fluid pressure sensor A circuit pressure sensor A circuit P0845 Secondary pulley pressure sensor Secondary pulley fluid pressure sensor B circuit P0868 Trans fluid pressure Trans fluid pressure low P0871 Trans secondary fluid pressure sensor Trans secondary fluid pressure sensor circuit C P0900 Clutch actuator Clutch actuator solenoid open circuit P0902 Clutch actuator Clutch actuator circuit low P0903 Clutch actuator Clutch actuator circuit high P0942 Hydraulic pressure unit Stuck limp home mode value P0960 Pressure control solenoid A (PCA) PCA control circuit open P0961 PCA PCA out of range P0962 PCA PCA control circuit low P0963 PCA PCA control circuit high P0964 Pressure control solenoid B (PCB) PCB control circuit open P0966 PCB PCB control circuit low P0967 PCB PCB control circuit high P0968 Pressure control solenoid C (PCC) PCC control circuit open P0970 PCC PCC control circuit low P0971 PCC PCC control circuit high Description CFT 30 Trouble Code Chart Five Digit DTC Component Description P1710 TCM TCM solenoid/internal ground circuit P1935 Brake pedal position (BPP) switch/CAN ABS BPP switch/sensor signal P2544 PCM Torque management request input signal A P2637 CAN/PCM Torque management feedback signal A P2765 Primary pulley speed sensor A No or incorrect signal from primary pulley speed sensor P2766 Primary pulley speed sensor A No or incorrect signal from primary pulley speed sensor P186D TCM/DEM Set by all whee drive (AWD) failure concern. AWD clutch actuator stuck U0001 CAN/TCM High speed CAN communication bus U0073 TCM TCM communication error U0100 CAN Lost communication with ECM/PCM A U0101 TCM/PCM TCM communication error U0121 CAN/ABS Lost communication with ABS Module U0301 Software Incompatible Software incompatible with the PCM U0401 PCM/TCM Invalid data received from the PCM or engine components U0415 CAN/ABS Invalid data received from the ABS module U0301 Software Incompatible with the PCM The TCM is integrated into the mechatronic assembly. If installing a new transaxle or a mechatronic assembly, the TCM will need to be checked and reflashed to the latest level calibration available. Software is different than the vehicle configuration. No amount of driving to 'relearn' the electronic control system will resolve this issue! Engine driveability concerns. Will run rough and/or have low power. It’s highly recommended to always Flash Reprogram all of the Ford CVT equipped vehicles after a major repair and/or after replacing the Mechatronic assembly to achieve the best driveability and longevity experience. When diagnosing stored DTC's, always address the "P" DTC's before the "U" DTC's with the exception of DTC U0301. DTC Diagnostics P0871 Transmission Secondary Fluid Pressure Sensor and P0961 Pressure Control Solenoid Out of Range Both of these codes are pressure sensitive codes. The P0871 will set if the secondary pulley pressure is higher or lower than expected. This indicates a defect pressure sensor or a leakage in the hydraulic system. The P0961 will set if main pressure is higher or lower than expected. This indicates a defective pressure sensor or a leakage in the hydraulic system. First: Clear the codes and see if they return right away or the car needs to be driven. If the codes return right away and DO NOT read correctly on the scan tool the Mechatronic will need to be replaced. If the car must be driven and the DTC’s are temperature sensitive check to make sure that the trans has the correct fluid. Using synthetic fluids or fluids other than the factory fill, can and will cause these types pf trouble codes to set. Pressure Testing Ford’s CFT30 operating pressures will usually be in the range of 220250 psi, but can exceed 1000 psi at times. Ford’s CFT30 has no external pressure ports. The only way to check the operating pressure of this CVT, is to monitor the main pressure sensor (PCA MES) and secondary pressure sensor (PCC MES) PIDS with a scan tool. An internal fluid leak, incorrectly installed transmission fluid pan filter, cut/damaged mechatronic assembly feed tube O-rings or a transmission fluid pump leaking or not operating correctly can cause a difference in the pressure readings. Always check the fluid pan filter for correct installation, the mechatronic assembly bolt torque for correct torque setting, O-rings and feed tubes for damage and leaks, and the fluid pump for correct operation prior to installing a new or the original mechatronic assembly. If the feed tubes, O-rings or fluid pan filter are damaged or if the fluid pump is not operating correctly, install new components as required. Recheck the pressures using the pinpoint test. If the pressure readings are still incorrect, install a new mechatronic assembly. Pressure Testing (continued) The Transmission Control Module (TCM) is integrated into the mechatronic assembly. If you’re installing a new transaxle or a mechatronic assembly, the TCM will need to be checked and recalibrated (re-flashed) to the latest level calibration available. A1 Pressure Sensor diagnostics; 1. Key in the “OFF” position. 2. Check to make sure the transaxle harness connector is fully seated, pins are fully engaged in connector and in good condition before proceeding. 3. Connect the scan tool. 4. Turn the Key to the “ON” position. 5. Enter the following diagnostic mode on the scan tool: PIDs: Main Pressure Sensor (PCA_MES) and Pulley 2 Pressure Sensor (PCC_MES). Are the pressure sensor readings between 0-80 kPa (0-12 psi)? Yes: Pressure sensors are OK. Go to A2 No: Pressure sensors are faulty. INSTALL a new mechatronic assembly. Solenoid Identification The valve body has five solenoids: a main pressure control solenoid (PCA-A), torque converter clutch solenoid (TCC), primary pulley pressure solenoid (PCB), secondary pulley pressure solenoid (PCC), and forward and reverse clutch apply solenoid (PCD). All solenoids measure at 5.4 Ohms. 1. PCA Mainline Pressure Solenoid 2. 2. PCB Primary Variator Pressure 3. 3. PCC Secondary Variator Pressure 4. 4. PCD Forward and Reverse Clutch 5. 5. TCC Application Pressure TCC Solenoid Identification (continued) Always remove the solenoids to inspect the solenoid screens. Replace if torn or damaged Valve body identification The TCM is mounted to the valve body (Mechatronic) Valve body identification Black Small parts identification in the channel casting Green Red Valve body identification 3 1 2 5 4 6 Valve body identification 7 10 8 9 11 Manual Valve body identification Check valves push out from the other side of cover No TCC Operation During the rebuild process you may not notice the input shaft O-ring is missing. The vehicle may have come in with a no torque converter clutch operation or a DTC related to the torque converter operation. Make sure to reinstall the input shaft O-ring on the end of the shaft. Make sure to reinstall the input shaft O-ring on the end of the shaft. Ford # 5F9Z- 7H4977-EA Noises While Driving Use the following procedure to identify and repair specific CVT transmission noises. It’s important to understand normal operating characteristics of the CVT, what type, location, and speeds of noise. 1. 2. For whine/thump/knock noise in park or neutral, go to Step 1. For tick noise on deceleration from 20 MPH (32 Km/h) to a stop, go to Step 2. 3. For whine noise on deceleration, go to Step 3. Noises While Driving (continued) Step 1: Whine / thump / knock in park and neutral with engine running that goes away when vehicle is put into drive. Noise may come back when vehicle starts to move. This may be caused by machining of the input shaft or flat spots on the roller bearing. For diagnosis first use chassis ears to pinpoint the noise to transaxle area. If the noise is from the transaxle, monitor Turbine Shaft Speed (TSS_SRC) PID using scan tool. If the noise goes away as TSS_SRC goes to 0, when vehicle is put in gear, replace input shaft and bearing. Check for flat spots on the roller bearing Check the machining of the input shaft Noises While Driving (continued) Step 2: Tick noise on deceleration from 20 MPH (32 Km/h) to a stop. This may be caused by the differential ring gear. For front wheel drive (FWD), if the noise is isolated to the final drive area of the transmission, replace the differential assembly and transfer gear. If the vehicle is an all wheel drive (AWD), remove the power transfer unit (PTU) assembly, reinstall the halfshafts, disconnect the differential electronic module (DEM) and road test. If the noise goes away, the condition is isolated to the AWD system (not CVT related). If the noise is still present, replace the transaxle differential and transfer gear and shim the differential assembly and set proper preload. All replacement differential assemblies are serviced with bearings installed. AWD differentials are serviced with the inner seal installed. Outer bearing races are not packaged with replacement differential/bearing assemblies and will also require replacement. Noises While Driving (continued) Step 3: Gear whine during coast down or deceleration. This may be caused by the transfer gear assembly. If noise follows the criteria below, replace the transfer gear. • noise from 42-35 MPH (68-56 Km/h) (loudest around 37 MPH (59 Km/h)) • noise from 32 -25 MPH (51-40Km/h) (loudest around 27 MPH (43 Km/h)) • noise from 11-16 MPH (18-26 Km/h) (loudest around 15 MPH (24 Km/h)) Thank you to our CoSponsors Today’s Presentation Sponsored By: Thank You For Attending
