William C Vaughan - Topology Workbook Volume 2-Independently published (2019)
Anuncio
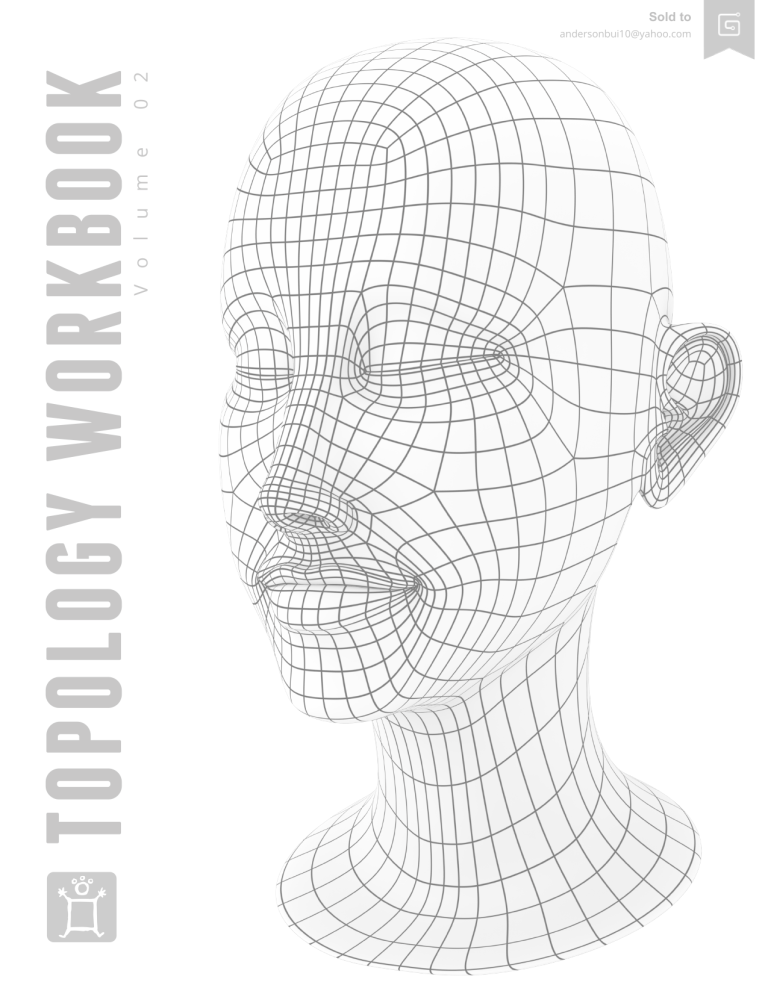
V o l u m e 0 2 TOPOLOGY WORKBOOK andersonbui10@yahoo.com Sold to “It is more than probable that the average man could, with no injury to his health, increase his efficiency fifty percent.”- Sir Walter Scott TOPOLOGY WORKBOOK V o l u m e 0 2 PUSHING POINTS TOPOLOGY WORKBOOK | volume 2 Pushing Points | Topology Workbook: Volume 2 William Vaughan pushingpoints.com Published by: Hickory Nut Publishing Clermont, FL Copyright © 2019 by William Vaughan All rights reserved. No part of this publication may be reproduced, stored in a retrieval system, or transmitted, in any form or by any means, electronic, mechanical, photocopying, recorded, or otherwise, without the prior written permission of the copyright owner. A friendly reminder from one artist to another. Copyright law protects the value of this creative work. When you make unauthorized copies of this creative work, you are taking something of value from the creator without permission. This creative work is the result of countless hours of learning and experience gained over many years. It’s compilation here also took many hours that could have been spent with family and friends. By legally acquiring this content, you encourage the creator to re-invest in their creative work. If you currently find yourself in a position where you simply can’t afford to legally obtain this creative work, there are alternative free resources available online that you can access legally. TOPOLOGY WORKBOOK | volume 2 About the Author William Vaughan is an award-winning artist, writer, and director. He has created thousands of original computergenerated characters, including Tofu the Vegan Zombie. William has trained thousands of cg artists throughout the world and authored more than one thousand tutorials and instructional videos. He has been published by major cg magazines, contributed to over twenty books, has written and directed several award-winning films, and has created digital art for many top studios, including Nickelodeon and Pixar Animation Studios. Later in his career, William added scripting to his arsenal of tools and has created hundreds of scripts and several kits for Modo. His custom tools are used by artists and studios across the globe. Some of the more notable kits and collections are the Hatchet Collection, Polystein Kit, MOP Booleans, MOP Tubes, the Topology Scripts Collection and the Coolidge Collection. Recently, William and his wife Andrea co-wrote a young adult science fiction novel titled 2nd Gen, which won first place category award winner for the 2018 Dante Rossetti International Book Awards. William Vaughan | pushingpoints.com About the Technical Reviewers Chris O’Riley has created visual content for advertising, corporate, editorial and interactive media to some of the world’s top brands. Combining cutting-edge 2D and 3D digital production techniques with photography, creative retouching and an unmatched attention to detail, he produces striking imagery and animation. Chris O’Riley | chris3d.com Ed Ferrari graduated with a BFA in Computer Animation from Miami International University of Art and Design. After college, he spent a decade in Los Angeles, working in the film and television industry. Following his stint in Hollywood, Ed landed a position with Foundry, fulfilling the role of software evangelist on the Modo team. Currently, he’s living in the greater Boston area working as a 3D Production Artist at New Balance Athletics Inc. In his spare time, he writes short stories and builds worlds around the odd characters he draws on the post-it notes that cover his work area. Ed Ferrari | artstation.com/edferrari TOPOLOGY WORKBOOK | volume 2 Table of Contents Introduction Who should read this book? What you can expect from this book? 02 03 Section 01 | Box Modeling: Character Head Getting Started Eye Mask Laugh Line Inner-Laugh Line and Nose Loop Nose Starting the Eyes Starting the Mouth Ear Finishing the Mouth Finishing the Eyes Neck Centerline Finalize 05 11 12 13 14 25 27 29 40 44 45 49 51 Section 02 | TOPOLOGY REFERENCE Core Face Topology Reference Additional Head Topology Reference 53 54 Final Thoughts Closing the Loop 60 TOPOLOGY WORKBOOK | volume 2 Introduction TOPOLOGY WORKBOOK | volume 2 INTRODUCTION When I released the first volume of the Pushing Points Topology Workbook, I can honestly say that I had no idea how it would be received. Although I had been sharing the same information in studios, classrooms and with individual artists for over twenty years, I had never compiled it into book form. I viewed releasing a book about the fundamentals of topology versus a book on how to create a specific character, environment, vehicle or prop as a gamble. I was extremely excited that the gamble paid off. Since its release, I’ve received an overwhelming amount of positive feedback about the first volume of the Topology Workbook. My thanks go out to everyone who reached out and shared their experience with the book and how it’s aided them in their creations. Many artists have asked for a follow up to the book, and the most requested topic was the techniques I use when creating the facial topology of a character head. The information in this book focuses on just that. As with anything that I have shared with artists over the years, it’s important to understand that the information you will find in this book isn’t the truth. It’s my truth. There are many ways to go about tackling any task, and the techniques for creating a character head that I share in this book is what works for me. My advice is to explore this resource with an open mind, leave with as many take-aways as you can and use what works best for you. Who should read this book? Anyone interested in gaining a better understanding of creating, editing and working with the topology of 3D character head meshes can obtain valuable information in this book. A character’s facial topology can affect many areas of production including modeling, UV’ing, rigging, animating and rendering. With that in mind, information covered in this book is not limited to digital modelers. Although it’s not a requirement for this book, I’d strongly recommend reading and completing the exercises found in the first volume of the Pushing Points Topology Workbook. It’s a software-agnostic guide that teaches you the foundation of Subdivision Surface topology. There are over sixty exercises packed with loads of tips, tricks and techniques designed to teach you how to manage the topology of your meshes. The book doesn’t show you how to build a car, character or creature. Instead, it teaches you the foundation of SubD topology, so you can construct ANY SubD asset with clean polygon flow. 02 TOPOLOGY WORKBOOK | volume 2 What can you expect from this book? This book is designed to demystify the creation of character heads with clean facial topology. Throughout the pages of this guide, I share production-proven modeling tips and techniques as well as ideologies that have served me over the course of my career. I’ve been sharing my process for modeling characters for over twenty years, and as you can imagine, my process has evolved over time. My goal when tackling any task is to find the most efficient way of working, and the information found in this book shares the techniques I currently use when modeling a character head. It’s important to note that this resource is not intended to replace your software’s manuals or help files. You should have a working knowledge of at least one 3D software. This book takes a software-agnostic approach, so you should have no problem following along whether you use Modo, Maya, Max, Blender, Cinema 4D, LightWave or any software with standard modeling tools and commands. For those interested, I’ve used Modo to demonstrate the tips and techniques in this book, but everything shown can be implemented in your choice of 3D software. Throughout this book, I’ll be using common industry terms to describe the components of a 3D mesh and modeling techniques. Many of the words and phrases used are the informal counterparts of the original terms. Vertices may be referred to as verts, and polygons may be referred to as polys, for example. It’s recommended that you become familiar with both the official word as well as its slang counterpart(s). For each step in the process I share not only what to do, but why to do it. While you could ignore the “why” and speed through each step blindly, you may walk away from this training lost, frustrated and no better off than before you read it. Learning isn’t a race. To truly increase your understanding and abilities, you need to slow down and take the time to understand the information being shared. In the end, you’ll get there faster. In this book, you’ll learn • • • • The fundamentals of good facial topology Multiple modeling techniques Professional practices And much more 03 TOPOLOGY WORKBOOK | volume 2 SECTION 01 Box Modeling: Character Head TOPOLOGY WORKBOOK | volume 2 SECTION 01 | Box Modeling: Character Head 01 Step | 01 Create a Cube Primitive. When modeling a character head, I almost always start with a cube primitive. This simple all-quad object consists of six quad polygons and is an ideal starting point for a head. The mesh already has dimension and is the fewest number of polygons I recommend starting with when building just about anything. I recommend scaling the cube to the rough dimensions you’d like to work with and then placing it at the origin. If you have reference images you plan on using, edit the dimensions of the cube to match the general shape of the head reference. 02 Step | 02 Convert the polygonal cube primitive to Catmull-Clark subdivision surfaces (SubD), and then Subdivide the mesh to generate a denser cage to work with. As we learned in volume one of the Topology Workbook, Subdivision Surfaces (SubD) is a refinement algorithm that creates a smooth curved surface from a coarse polygonal mesh. Although there are multiple SubD algorithms, the most commonly used subdivision surface algorithm is Catmull-Clark devised by Edwin Catmull and Jim Clark. For this exercise, we’ll be focusing on 3D mesh topology as it pertains to Catmull-Clark subdivision surfaces. Note: It’s very common for artists to over subdivide the mesh at this stage. I recommend keeping the mesh as light as possible for as long as possible. 05 TOPOLOGY WORKBOOK | volume 2 SECTION 01 | Box Modeling: Character Head Step | 03 03 Select the front two polygons (faces) located on the bottom of the mesh and extrude them down using the Extrude Tool. As you can see in the side view image in the lower-left, performing this step creates a blocked-out shape of a head which includes the chin and back of the skull. Note: Throughout this guide, we’ll be using a variety of tools. The names of these tools may be different, depending on which software you use. While the Extrude tool was used in this example, the same results could be created using alternate tools such as the Polygon Bevel or Smooth Shift tools. Feel free to use any tools you feel most comfortable with as long as the end result matches the reference images shown for each step. Simply put, the software and tools you choose to use are of little importance; only the results matter. *Side View 06 TOPOLOGY WORKBOOK | volume 2 SECTION 01 | Box Modeling: Character Head 04 Step | 04 Create a quad-loop of polygons that separate the left and right side of the head by edge beveling the center edge loop using the Edge Bevel Tool. New geometry shown in Blue. When applying an Edge Bevel, selected edges widen into quad strips of a uniform, specified width. New polygons are centered over the original edge and are oriented with the average normal of the two polygons on either side. Surrounding polygons remain in their same plane, simply shrinking on their affected edges. Note: I prefer to not work with a centerline when modeling a character. I find it much easier to manipulate the mesh throughout the build process without a centerline. In some 3D software, I also find working without a centerline avoids breaking symmetry while modeling. A centerline will be added later in the process, but for now I suggest working without one. If you prefer to work with a centerline, feel free to add one back in before moving forward. 07 TOPOLOGY WORKBOOK | volume 2 SECTION 01 | Box Modeling: Character Head Step | 05 05 Add an edge loop through the mouth area of the mesh using the Loop Slice Tool. There are many cutting and slicing tools available in most 3D software that can be used to perform this step. I chose to use the Loop Slice Tool, which is a powerful tool that lets you slice additional edge loops into your geometry. It’s like Edge Slice but more efficient when slicing polygon loops. You simply select two adjoining polygons or a single edge to define the loop, and the tool does the rest. *Side View 08 TOPOLOGY WORKBOOK | volume 2 SECTION 01 | Box Modeling: Character Head Step | 06 06 Add three additional edge loops to the upper portion of the mesh using the Loop Slice Tool. This will produce additional geometry that can be used when creating the eyes of the character. Note: In the last two steps, additional geometry has been added to the back of the head even though we just need it for the face. This isn’t an issue given that the overall mesh is still light on polycount, but be aware that it isn’t always ideal to add geometry in all areas of the mesh. When possible, choose to localize the detail. *Front View *Side View 09 TOPOLOGY WORKBOOK | volume 2 SECTION 01 | Box Modeling: Character Head Step | 07 07 Add an additional edge loop through the side of the face using the Loop Slice Tool. Note: These extra edges will aid in the creation of the eyes and mouth without making additional geometry on the back of the head. *Side View 10 TOPOLOGY WORKBOOK | volume 2 SECTION 01 | Box Modeling: Character Head 08 Step | 08 Create Eye Mask topology by selecting the ten polygons that make up the eye portion of the face and then bevel them using the Polygon Bevel Tool. New geometry shown in Blue. The Polygon Bevel tool performs a shift (sometimes referred to as Offset) and an inset (sometimes referred to as Scale) on the selected polygons. Shift pushes the polygons away from their starting positions, and Inset scales the polygons. New polygons are created to bridge the gaps that would be left by moving the original polygons from their starting positions. The “Group” option of the Polygon Bevel Tool, which is sometimes referred to as “Keep Faces Together,” treats the entire contiguous polygon selection as a single polygon. I keep this option enabled 99.9% of the time. I like to think of the Eye Mask as a border which protects the geometry that makes up the eyes. It has the same appearance as a superhero mask seen on characters such as the Umbrella Academy, the Incredibles, and Robin from the Batman comics. 11 TOPOLOGY WORKBOOK | volume 2 SECTION 01 | Box Modeling: Character Head 09 Step | 09 Create Laugh Line topology by selecting the nine polygons that make up the lower portion of the face and then inset them using the Polygon Bevel Tool. New geometry shown in Blue. The Laugh Line plays an important role in creating various expressions on a character’s face. I highly recommend creating Laugh Line topology on any and all characters you plan on animating. 12 TOPOLOGY WORKBOOK | volume 2 SECTION 01 | Box Modeling: Character Head 10 Step | 10 Create Inner-Laugh Line and Nose loop topology by selecting the nine polygons shown in the image on the left and then inset them using the Polygon Bevel Tool. With the polygons still selected, perform another bevel operation to create the first loop that will be used for the mouth. Note: This step requires a total of two polygon bevel operations. Ensure that your mesh looks similar to the image in the lower left before moving forward. 13 TOPOLOGY WORKBOOK | volume 2 SECTION 01 | Box Modeling: Character Head 11 Step | 11 Select the eleven polygons shown in the image to the left and inset them using the Polygon Bevel Tool. New geometry shown in Blue. The selection should appear as an upside down “T.” Beveling this geometry will generate additional edges that will be important when defining the character’s nose. As we learned in volume one of the Topology Workbook, performing a polygon bevel on any polygon island will result in an all-quad loop around the selection. It’s extremely important to remember this technique, as it comes in handy often. 14 TOPOLOGY WORKBOOK | volume 2 SECTION 01 | Box Modeling: Character Head Step | 12 12 Define the shape of the nose by manipulating the geometry within the selected edges shown in the images to the left. I use the Element Move Tool to manipulate the geometry, as it works in vert, edge and polygon component mode. I’d also recommend activating Symmetry at this point. The Symmetry function allows you to apply mirrored actions across a chosen axis. This allows for a simplified workflow on symmetrical objects, when corresponding sides of an object are exactly matched. No new geometry is created in this step. Note: Don’t feel like you must recreate the shapes shown in the reference images. I’d prefer you didn’t. You can use the steps provided in this book to create an endless amount of characters, all appearing very different. By default, the nose will appear very wide. By simply scaling the width of the nose, you can create a much smaller, narrow nose. I’ve used this topology to create everything from cute button noses for baby characters to large oversized noses for monsters. At anytime during this process, feel free to explore the overall proportions of the head and change up the shapes. As long as you keep the topology the same, you’ll end up in good shape. *Front View 15 TOPOLOGY WORKBOOK | volume 2 SECTION 01 | Box Modeling: Character Head Step | 13 13 Select the ten edges that border the tip and nostril portions of the nose and edge bevel them using the Edge Bevel Tool. This creates a new polygon loop as seen in the images on the left. New geometry shown in Blue. Note: An alternate method for this step can be found on the next page. *Front View 16 TOPOLOGY WORKBOOK | volume 2 SECTION 01 | Box Modeling: Character Head Step | 13 (Alternate) 13 Select the ten polygons that make up the tip and nostril portions of the nose and inset them using the Polygon Bevel Tool. This creates a new polygon loop as seen in the images on the left. New geometry shown in Blue. Note: This alternate technique is simply a reminder that there are many ways to tackle any operation. Give both methods a try and see which works best for you. *Front View 17 TOPOLOGY WORKBOOK | volume 2 SECTION 01 | Box Modeling: Character Head 14 Step | 14 Select the three polygons that make up the nostril area and inset them using the Polygon Bevel Tool. New geometry shown in Blue. This will add additional geometry that can be used to help shape the nose. 18 TOPOLOGY WORKBOOK | volume 2 SECTION 01 | Box Modeling: Character Head 15 Step | 15 Select the two polygons shown in the image to the left and shift them in using the Polygon Bevel Tool to create nostrils for the nose. New geometry shown in Blue. 19 TOPOLOGY WORKBOOK | volume 2 SECTION 01 | Box Modeling: Character Head Step | 16 16 Use the additional geometry added from the previous steps to refine the shape of the nose. Don’t forget that you can create any shape nose that you would like. I find it much easier to make broad changes to a mesh before too much geometry is present. Note: I find that I spend only 10% of my time creating new geometry and 90% of the time manipulating existing geometry. Make sure you are taking time to refine the mesh along the way before moving on to the next steps. *Front View *Side View 20 TOPOLOGY WORKBOOK | volume 2 SECTION 01 | Box Modeling: Character Head 17 Step | 17 Select the edge shown in the image on the left for both sides of the nose and reconfigure it using the Spin Edge Command. The Spin Edge Command rotates/spins an edge to reconfigure the way it separates the two adjoining polygons. Spin Edge changes the flow of your polygons while maintaining the surrounding mesh. Every major 3D software has at least one tool or command that produces the results of the Spin Edge command. They may not refer to it as the Spin Edge command; rather they use names such as Rotate Edge, Flip Edge or SpinQuads. To simplify things, I’ll be using the name Spin Edge when referring to these tools. For a better understanding of spinning edges, refer to Section 04 from Volume one of the Topology Workbook. 18 Step | 18 The result of spinning the edges in the previous step produced two edges that we need to remove from each side of the nose. Select these edges and delete them. Note: While there was technically nothing wrong with the topology that we started with at the beginning of Step 17, the resulting topology after Step 18 is more ideal and sets us up for future edits. 21 TOPOLOGY WORKBOOK | volume 2 SECTION 01 | Box Modeling: Character Head 19 Step | 19 Select the edges on the top of the head as seen in the image to the left and use the Spin Edge Command to reconfigure the topology. The new topology removes the five-edge poles on top of the head, but more importantly creates a clean loop that we can use in the next step. Note: For more information on poles, refer to section 05 in volume one of the Topology Workbook. 22 TOPOLOGY WORKBOOK | volume 2 SECTION 01 | Box Modeling: Character Head Step | 20 20 Select the loop of polygons shown in the image on the left and use the Loop Slice Tool to add an additional edge loop. This new geometry will be used to refine the shape of the nose and provide more geometry for the brow and eye area of the face. This is a perfect example of adding localized detail. *Side View 23 TOPOLOGY WORKBOOK | volume 2 SECTION 01 | Box Modeling: Character Head 21 Step | 21 With the new geometry added, now would be a good time to practice the 90% manipulation rule I mentioned earlier. Spend some time refining the areas of the mesh where we added geometry. Tweak the mesh until you’re satisfied with the result. The cleaner you make the mesh, the easier it will be to produce good results in the future. 24 TOPOLOGY WORKBOOK | volume 2 SECTION 01 | Box Modeling: Character Head 22 Step | 22 Select the twelve polygons that make up the eye sockets and inset them using the Polygon Bevel Tool. As you would expect, a new loop is generated, creating the first loop for the eyes. New geometry shown in Blue. 25 TOPOLOGY WORKBOOK | volume 2 SECTION 01 | Box Modeling: Character Head 23 Step | 23 Select the twelve polygons that make up the eye area, if they are no longer selected from the previous step, and then inset them using the Polygon Bevel Tool. With the polygons still selected, scale them vertically to create the appearance of squinting or closed eyes. 26 TOPOLOGY WORKBOOK | volume 2 SECTION 01 | Box Modeling: Character Head 24 Step | 24 Like the previous step, select the nine polygons that make up the mouth portion of the face and inset them using the Polygon Bevel Tool. With the polygons still selected, scale them vertically, then widen the mouth area to create a larger mouth. 27 TOPOLOGY WORKBOOK | volume 2 SECTION 01 | Box Modeling: Character Head Step | 25 25 We won’t be adding any more detail to the eyes or mouth at this time. While nothing prevents us from doing it, I find it easier to make broad edits to the face before too much detail is in place. Take some time to refine the overall shape of the head. If you’d like larger or smaller features such as the eyes, nose or mouth, now would be a great time to make those edits. *Front View 28 TOPOLOGY WORKBOOK | volume 2 SECTION 01 | Box Modeling: Character Head Step | 26 26 Select the three polygons on both sides of the head (total of six polygons) located where the ear will be created, as seen in the image to the left, and inset it using the Polygon Bevel Tool. This will be the start of our character’s ear topology. New geometry shown in Blue. *Side View 29 TOPOLOGY WORKBOOK | volume 2 SECTION 01 | Box Modeling: Character Head Step | 27 27 Select the six polygons that make up the ear portion of the head as seen in the image on the left, and extrude them using the Polygon Bevel Tool. *Side View 30 TOPOLOGY WORKBOOK | volume 2 SECTION 01 | Box Modeling: Character Head 28 Step | 28 With the new ear geometry created, refine the shape to your liking. Although we can always change it later, now would be a good time to decide the overall size and shape of the ears you’d like your character to have. 31 TOPOLOGY WORKBOOK | volume 2 SECTION 01 | Box Modeling: Character Head 29 Step | 29 Select the six polygons that make up the inner ears and inset them twice using the Polygon Bevel Tool. This will create additional geometry that we can use to help add localized detail to the ears. 32 TOPOLOGY WORKBOOK | volume 2 SECTION 01 | Box Modeling: Character Head 30 Step | 30 Select the edge shown in the image on the left for both sides of the head and spin it using the Spin Edge Command. The resulting topology will be ideal for the outer portion of the ears. Note: This step uses a similar method to the final exercise in Section 04 from Volume one of the Topology Workbook. The main difference is that exercise used fewer polygons to produce a similar topology. The additional geometry used in this book will provide us with more upfront geometry to work with, making it easier to add detail. 33 TOPOLOGY WORKBOOK | volume 2 SECTION 01 | Box Modeling: Character Head 31 Step | 31 Spend a moment to refine the newly created geometry. Next, select the nine inner ear polygons on each side of the head (total of 18 polygons) as seen in the image on the left, then inset and shift them twice using the Polygon Bevel Tool to produce a concave shape. 34 TOPOLOGY WORKBOOK | volume 2 SECTION 01 | Box Modeling: Character Head 32 Step | 32 Select the three polygons on each side of the head (total of six polygons) as seen in the image on the left. Next, shift the polygons using the Polygon Bevel Tool to create an ear canal. 35 TOPOLOGY WORKBOOK | volume 2 SECTION 01 | Box Modeling: Character Head 33 Step | 33 Select the polygon shown in the image on the left and shift it out using the Polygon Bevel Tool to create the tragus. Be sure you select a polygon on both sides of the head if you’re not using the symmetry function. Note: The tragus is a prominence on the inner side of the external ear, in front of and partly closing the passage to the organs of hearing. 36 TOPOLOGY WORKBOOK | volume 2 SECTION 01 | Box Modeling: Character Head 34 Step | 34 The previous step introduced a six-edge pole near the base of the tragus that we can easily fix using one of the techniques discussed in volume one of the Topology Workbook. It’s an ideal method for not only solving pole issues, but also for creating cleaner topology. Select the three polygons shown in the image on the left and collapse them using the Collapse Selected Command. This introduces the first non-quad polygons (eight triangles per ear). To address these triangles, simply select the four edges as seen in the lower left image and remove/delete them. Note: This method is also used in Section 06, Exercise 04 of Volume one of the Topology Workbook. 37 TOPOLOGY WORKBOOK | volume 2 SECTION 01 | Box Modeling: Character Head 35 36 Step | 35 Select and spin the edge shown in the image on the left using the Spin Edge Tool. This creates a smoother transition of the outer ear into the inner ear. Step | 36 Select and spin the edge shown in the image on the left using the Spin Edge Tool. Not only does this address the six-edge pole that was created from the previous step, but it also gives us an overall cleaner topology. 38 TOPOLOGY WORKBOOK | volume 2 SECTION 01 | Box Modeling: Character Head 37 Step | 37 Select the edges shown in the image on the left and move them out using the Move Tool to create a subtle ridge in the inner ear. Note: This is the final step for the ear in this exercise, but you’re free to use the methods discussed in Volume one of the Topology Workbook if you’d like to add additional detail. For example, Section 06, Exercise 07 shares a quick technique for adding more detail to the outer ear lobe. 39 TOPOLOGY WORKBOOK | volume 2 SECTION 01 | Box Modeling: Character Head 38 Step | 38 In the next few steps, we’ll be returning to the mouth to create a mouth cavity and lips. Take some time to smooth out the mouth topology to produce cleaner results. 40 TOPOLOGY WORKBOOK | volume 2 SECTION 01 | Box Modeling: Character Head 39 Step | 39 Select the nine polygons that make up the mouth portion of the face and inset them using the Polygon Bevel Tool. New geometry shown in Blue. 41 TOPOLOGY WORKBOOK | volume 2 SECTION 01 | Box Modeling: Character Head 40 Step | 40 Using the Polygon Bevel Tool, inset and shift three times to produce the mouth cavity as seen in the lower left image. New geometry shown in Blue. Note: Feel free to refine the shape of the mouth cavity before proceeding to the next step. *Side View 42 TOPOLOGY WORKBOOK | volume 2 SECTION 01 | Box Modeling: Character Head 41 Step | 41 Use the additional geometry you created in the previous two steps to define the shapes of the lips. You can then choose whether to close the mouth or not. Since we won’t be building a tongue, throat or teeth for this exercise, I chose to close the mouth in this example. Note: No new geometry is created in this step. We simply manipulate the existing geometry. 43 TOPOLOGY WORKBOOK | volume 2 SECTION 01 | Box Modeling: Character Head 42 Step | 42 Use the Polygon Bevel Tool and the same steps previously used when working on the mouth to create the eyelids and eye cavity. Once the new geometry is created, spend some time refining the shapes and close the eyelids before moving on to the next step. 44 TOPOLOGY WORKBOOK | volume 2 SECTION 01 | Box Modeling: Character Head 43 Step | 43 Select the twelve polygons on the bottom of the head as seen in the image on the left, then inset them using the Polygon Bevel Tool. New geometry shown in Blue. 45 TOPOLOGY WORKBOOK | volume 2 SECTION 01 | Box Modeling: Character Head 44 Step | 44 Select the same twelve polygons from the previous step and shift them out using the Polygon Bevel Tool to create neck geometry. 46 TOPOLOGY WORKBOOK | volume 2 SECTION 01 | Box Modeling: Character Head 45 Step | 45 Select the edge shown in the image on the left and spin it using the Spin Edge Tool. This is a quick way to address the six-edge pole on the jaw line and produce cleaner topology. 47 TOPOLOGY WORKBOOK | volume 2 SECTION 01 | Box Modeling: Character Head Step | 46 46 Extend the neck three more times using the Polygon Bevel Tool, then spend time refining the shape of the neck until you’re happy with the results. *Front View *Side View 48 TOPOLOGY WORKBOOK | volume 2 SECTION 01 | Box Modeling: Character Head 47 Step | 47 If you’ve been working without a centerline, add one at this point. I chose to add my centerline using the Loop Slice Tool. Since the mesh is made up of all quad polygons with clean loops, adding more loops is a trivial task. 49 TOPOLOGY WORKBOOK | volume 2 SECTION 01 | Box Modeling: Character Head 48 Step | 48 In the previous step, I mentioned how adding more loops on a mesh with clean topology is a trivial task. To show this in action, let’s create an additional loop that runs through the eye and cheek portions of the face. This additional loop can be useful for helping to define the eyes as well as gain more control for shaping areas such as the cheekbones. 50 TOPOLOGY WORKBOOK | volume 2 SECTION 01 | Box Modeling: Character Head 49 Step | 49 Congratulations! You’ve reached the end of this exercise! If you’ve followed each step properly, you should have a completed character head consisting of 668 SubD polygons. More importantly, you should have all the core facial topology that will allow for proper deformation when animated. At this stage, the mesh is made up of so few polygons that it’s extremely easy to manipulate with minimal effort. This is an ideal time to create UVs, blendshapes/morphs, weights and more. Once you are ready to move to the next stage of production, you may find that you’d like a denser mesh. By using the Subdivide Command we can convert the mesh to 2672 polygons. We now have a denser cage to work with, as seen in the image in the lower left. My suggestion is to keep the mesh as light as possible for as long as possible. It should also go without saying that you should always save a pre-subdivided version of your mesh that you can always return to. 51 TOPOLOGY WORKBOOK | volume 2 SECTION 01 | Box Modeling: Character Head Practice Makes Perfect! If this was your first time through this book, I encourage you to run through the process several times. Each time, attempt to create a completely different character. Create as many heads as you can and see if you can get to the point where the steps become second nature, allowing you to focus more on the development of the character and less on the technical aspects. The more heads you model, the faster the process will become. Each head on the left took roughly fifteen minutes to create using the exact steps described in this book. As an incentive, I’ll award a prize to the first ten people who post four unique character heads online using the steps covered in this book. 52 TOPOLOGY WORKBOOK | volume 2 SECTION 02 Topology Reference TOPOLOGY WORKBOOK | volume 2 SECTION 01 | Box Modeling: Character Head Core Face Topology With these Core Face Loops configured from the very beginning, we have a solid foundation to build on top of. Use this reference sheet as a guide while creating future character heads. It can help you stay on track. Base Mesh Eye Mask Loop Eye Loops Laugh Line Loop Mouth Loops Inner-Laugh line and Nose Loop 54 TOPOLOGY WORKBOOK | volume 2 55 TOPOLOGY WORKBOOK | volume 2 56 TOPOLOGY WORKBOOK | volume 2 57 TOPOLOGY WORKBOOK | volume 2 58 TOPOLOGY WORKBOOK | volume 2 Final Thoughts TOPOLOGY WORKBOOK | volume 2 Closing the Loop “Books are the real treasures of the world!” -Skeletor In closing, I’d like to thank you for reading this guide. The time and energy that you’ve invested is sure to pay off. And while this may be the conclusion of the book, it’s merely the beginning of your journey with character modeling. That said, you should have all the essential information needed to start creating an endless variety of character heads. Remember that you can always return to this guide as a refresher and a quick reference when tackling your next character model. Also remember to apply what you’ve learned from the book in your character modeling, but don’t be a slave to the process. Try new techniques, explore all of your options and use what works best for you. After some well-deserved time away from the computer, I’d like to encourage you to keep modeling, keep learning and most important… keep creating. As a lifelong educator, I enjoy hearing feedback on the training I provide. I encourage you to contact me through my site, pushingpoints.com, share your thoughts on the book and keep me posted on your work. I’d love to hear from you. Thanks for including me in your journey. Enjoy! 60 TOPOLOGY WORKBOOK | volume 2 More from Pushing Points If you enjoyed this book and would like to continue expanding your knowledge of 3D modeling and topology, you might be interested in volume one of the Topology Workbook. The Pushing Points | Topology Workbook The Pushing Points Topology Workbook is a 125page software-agnostic guide that teaches you the foundation of SubD topology. There are over sixty exercises packed with loads of tips, tricks and techniques designed to teach you how to manage the topology of your meshes. Throughout the book you will also find many images of wireframe rendered assets and their topology that you can study for reference. This book doesn’t show you how to build a car, character or creature. Instead, it teaches you the foundation of SubD topology, so you can construct ANY SubD asset with clean polygon flow. Andrea and William Vaughan With Earth rapidly becoming inhospitable to human life, G.S. Archean carries a one-way crew of courageous passengers to Uelara, an earth-like planet in the Cieri star system. Uelara is ideal, except for one minor detail—its distance from Earth. Traveling at sub-light speed, the generation ship won’t reach Uelara within the original crew’s lifetime. Thirty years into the journey, a new generation born on the Archean trains to fulfill the first generation’s mission. Eager to reach Uelara, the 2nd Gen crew prepares, as planned, to assume their parents’ responsibilities—that is, until. . . someone goes missing and a devastating secret is discovered, putting the future of the human race in jeopardy. Will the crew rally and carry out the mission—or is humanity doomed? It’s all up to the 2nd Gen. *Cover Illustrated with Modo by Fred Gambino
