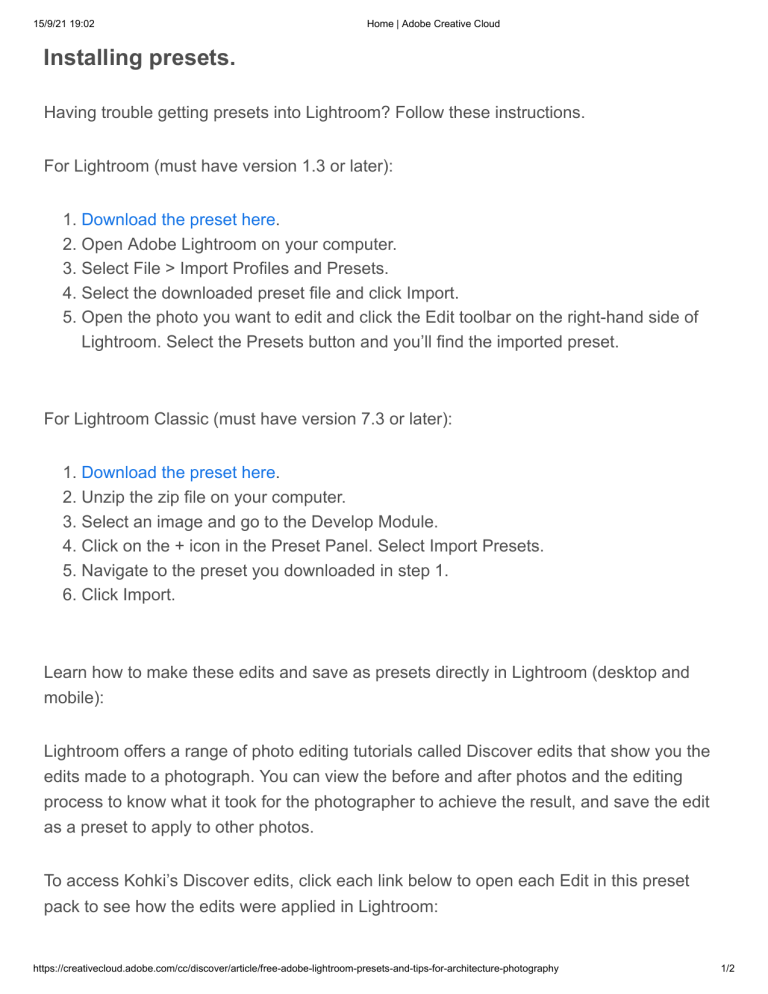
15/9/21 19:02 Home | Adobe Creative Cloud Installing presets. Having trouble getting presets into Lightroom? Follow these instructions. For Lightroom (must have version 1.3 or later): 1. Download the preset here. 2. Open Adobe Lightroom on your computer. 3. Select File > Import Profiles and Presets. 4. Select the downloaded preset file and click Import. 5. Open the photo you want to edit and click the Edit toolbar on the right-hand side of Lightroom. Select the Presets button and you’ll find the imported preset. For Lightroom Classic (must have version 7.3 or later): 1. Download the preset here. 2. Unzip the zip file on your computer. 3. Select an image and go to the Develop Module. 4. Click on the + icon in the Preset Panel. Select Import Presets. 5. Navigate to the preset you downloaded in step 1. 6. Click Import. Learn how to make these edits and save as presets directly in Lightroom (desktop and mobile): Lightroom offers a range of photo editing tutorials called Discover edits that show you the edits made to a photograph. You can view the before and after photos and the editing process to know what it took for the photographer to achieve the result, and save the edit as a preset to apply to other photos. To access Kohki’s Discover edits, click each link below to open each Edit in this preset pack to see how the edits were applied in Lightroom: https://creativecloud.adobe.com/cc/discover/article/free-adobe-lightroom-presets-and-tips-for-architecture-photography 1/2 15/9/21 19:02 Home | Adobe Creative Cloud Minimal Colors Green Enhance Simple Adjust Brighter Cyan Blue Tone Color Enhance High Shadow To view the Edit: Desktop users: In the bottom panel, tap Playback to view the edits step by step. Tap Edits to see all the applied edits. The Info button gives you information about the file type and metadata. Mobile users: The Edit will automatically display the output of edits made to the photo. Tap Edits at the bottom of the screen to see all of the applied edits step-by-step. Like on Desktop, the Info button gives you information about the file type and metadata. To save the edits applied as a preset: 1. Desktop users: Tap Save as Preset in the upper-right corner of the screen. 2. Mobile users: Tap “...” in the upper-right corner of the screen and then select Save as Preset. 3. Click Back in the upper-left corner to return to the Home view. 4. The preset is saved to User Presets folder in the Presets pop-up menu, by default. Follow Kohki Yamaguchi on Lightroom to view more of his Discover edits. https://creativecloud.adobe.com/cc/discover/article/free-adobe-lightroom-presets-and-tips-for-architecture-photography 2/2

