Crear interfaces graficas de usuario
Anuncio
Laboratorio No.2 Sistemas de Simulación GUIDE Objetivos:
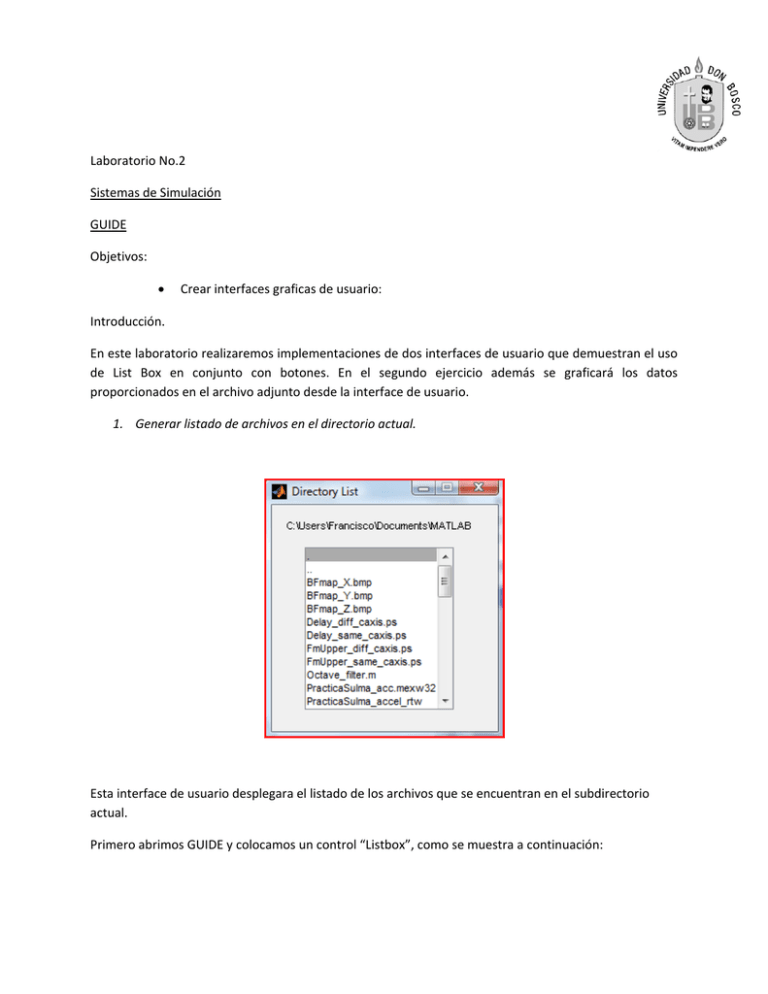
Crear interfaces graficas de usuario: Introducción. En este laboratorio realizaremos implementaciones de dos interfaces de usuario que demuestran el uso de List Box en conjunto con botones. En el segundo ejercicio además se graficará los datos proporcionados en el archivo adjunto desde la interface de usuario. 1. Generar listado de archivos en el directorio actual. Esta interface de usuario desplegara el listado de los archivos que se encuentran en el subdirectorio actual. Primero abrimos GUIDE y colocamos un control “Listbox”, como se muestra a continuación: La función lbox2_OpeningFcn debe de ser modificada como sigue function lbox2_OpeningFcn(hObject, eventdata, handles, varargin)
% This function has no output args, see OutputFcn.
% hObject
handle to figure
% eventdata reserved - to be defined in a future version of MATLAB
% handles
structure with handles and user data (see GUIDATA)
% varargin
command line arguments to lbox2 (see VARARGIN)
% Choose default command line output for lbox2
handles.output = hObject;
% Update handles structure
guidata(hObject, handles);
if nargin == 3,
initial_dir = pwd;
elseif nargin > 4
if strcmpi(varargin{1},'dir')
if exist(varargin{2},'dir')
initial_dir = varargin{2};
else
errordlg('Input argument must be a valid directory','Input
Argument Error!')
return
end
else
errordlg('Unrecognized input argument','Input Argument Error!');
return;
end
end
% Populate the listbox
load_listbox(initial_dir,handles)
Y el Call back de el control List_Box debe de ser modificado como sigue. function listbox1_Callback(hObject, eventdata, handles)
% hObject
handle to listbox1 (see GCBO)
% eventdata reserved - to be defined in a future version of MATLAB
% handles
structure with handles and user data (see GUIDATA)
% Hints: contents = get(hObject,'String') returns listbox1 contents as cell
array
%
contents{get(hObject,'Value')} returns selected item from listbox1
get(handles.figure1,'SelectionType');
if strcmp(get(handles.figure1,'SelectionType'),'open')
index_selected = get(handles.listbox1,'Value');
file_list = get(handles.listbox1,'String');
filename = file_list{index_selected};
if handles.is_dir(handles.sorted_index(index_selected))
cd (filename)
load_listbox(pwd,handles)
else
[path,name,ext,ver] = fileparts(filename);
switch ext
case '.fig'
guide (filename)
otherwise
try
open(filename)
catch ex
errordlg(...
ex.getReport('basic'),'File Type Error','modal')
end
end
end
end
% -----------------------------------------------------------% Read the current directory and sort the names
% ------------------------------------------------------------
Necesitamos crear la función load_listbox para crear el listado a ser desplegado en el GUI. function load_listbox(dir_path,handles)
cd (dir_path)
dir_struct = dir(dir_path);
[sorted_names,sorted_index] = sortrows({dir_struct.name}');
handles.file_names = sorted_names;
handles.is_dir = [dir_struct.isdir];
handles.sorted_index = sorted_index;
guidata(handles.figure1,handles)
set(handles.listbox1,'String',handles.file_names,...
'Value',1)
set(handles.text1,'String',pwd)
2. Graficando variables que están en el “workspace”. Crearemos una interface de usuario que graficará variables que están en el “workspace”. El resultado final se muestra en la siguiente figura. Primero empezamos en la ventana editora de GUDE, y creamos la interface colocando sus respectivos componentes, como se muestras a continuación: En esta interface utilizaremos los siguientes componentes:
1 Listbox 4 toggle button Cada componente requiere de algo de programación para funcionar, básicamente esta interface de usuario leera las variables en el espacio de trabajo y graficara el par que se ha escogido para graficar. Estas variables pueden ser graficadas de manera lineal, y usando los ejes X o Y en escala logarítmica. Primero en la función lb_OpeningFcn Agregamos al final el siguiente código % Populate the listbox
update_listbox(handles)
set(handles.listbox1,'Value',[])
Ahore veremos el código agregado a cada uno de los botones: Update_button update_listbox(handles)
plot_button [function plot_button_Callback(hObject, eventdata, handles, varargin)
% hObject
handle to plot_button (see GCBO)
% eventdata reserved - to be defined in a future version of MATLAB
% handles
structure with handles and user data (see GUIDATA)
[x,y] = get_var_names(handles);
figure(gcf)
try
evalin('base',['plot(',x,',',y,')'])
catch ex
errordlg(...
ex.getReport('basic'),'Error generating linear plot','modal')
end
semilogx_button function semilogx_button_Callback(hObject, eventdata, handles, varargin)
% hObject
handle to semilogx_button (see GCBO)
% eventdata reserved - to be defined in a future version of MATLAB
% handles
structure with handles and user data (see GUIDATA)
[x,y] = get_var_names(handles);
figure(gcf)
try
evalin('base',['semilogx(',x,',',y,')'])
catch ex
errordlg(...
ex.getReport('basic'),'Error generating semilogx plot','modal')
end
semilogy_button function semilogy_button_Callback(hObject, eventdata, handles, varargin)
% hObject
handle to semilogy_button (see GCBO)
% eventdata reserved - to be defined in a future version of MATLAB
% handles
structure with handles and user data (see GUIDATA)
[x,y] = get_var_names(handles);
figure(gcf)
try
evalin('base',['semilogy(',x,',',y,')'])
catch ex
errordlg(...
ex.getReport('basic'),'Error generating semilogy plot','modal')
end
Ademas tenemos que crear la función que leerá las variables desde el espacio de trabajo, la cual es invocada al inicio del programa asi como por el update_list button. function [var1,var2] = get_var_names(handles)
% Returns the names of the two variables to plot
list_entries = get(handles.listbox1,'String');
index_selected = get(handles.listbox1,'Value');
if length(index_selected) ~= 2
errordlg('You must select two variables','Incorrect Selection','modal')
else
var1 = list_entries{index_selected(1)};
var2 = list_entries{index_selected(2)};
end
Para ejecutar el programa se les proporcionará el archivo var_para_practica2.mat, que contiene varias variables para ser graficadas. Ejercicios adicionales, a ser presentado en el reporte de la práctica.
Para el primer ejercicio modifíquelo para que se pueda escoger el subdirectorio a ver.
Para el segundo ejercicio, modifíquelo para que se pueda cargar un archivo.
